There are many varieties of clam. Those in the pictures on this page are Littlenecks. Quahogs, Cherrystones, and Littlenecks, are all Quahogs of different sizes, in descending order.
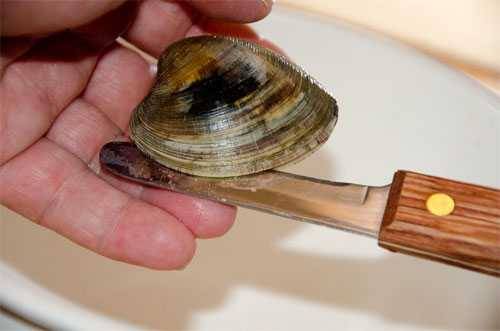
Other common varieties of small clams include Topneck, Longneck, Wellfleet, Razor Clams, Manila Clams, Butter Clams, and Cockles. And then there is the giant Geoduck of the Pacific Northwest.
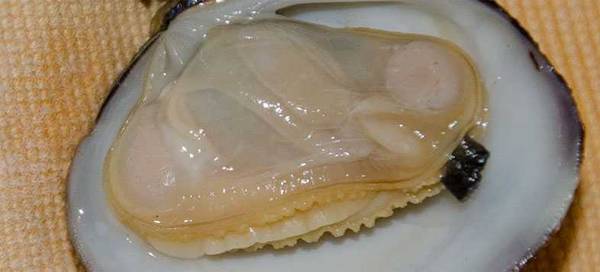
Some species have a thin black stocking over their “foot” (actually it is called the siphon) that must be peeled before you eat them, otherwise you can eat the entire interior of the clam, including the stomach which is sometimes green.
Clams come in many forms and how you plan to use them will determine what you buy.
Live. Clams are sold live in the shell, and this is the best way to make simple steamed clams or for eating raw. Raw clams need to be inspected and washed. To eat them raw or use them on a dish like Pepe’s Style White Clam Pizza, they need to be shucked (removed from the shell). Shucking is tricky and potentially hazardous. Clams are highly perishable and because they burrow in sand they are susceptible to contamination. Raw clams are delicious, but my microbiologist advisors never touch the stuff. They recommend you only eat cooked clams.
Fresh shucked. Some fishmongers sell freshly shucked clams. They are no longer alive, but if kept cold, they are fine for any use but eating raw. If your supplier does not normally sell fresh shucked clams, call ahead, sometimes he or she will shuck them for you for a fee.
Frozen in the shell. Some stores sell whole clams frozen in the shell. These will work well for steaming but they are not suitable for eating raw.
Frozen shucked, whole, chopped, and minced. You can buy whole raw clam meat pre-shucked and frozen in plastic tubs, and they are an excellent choice for things like pizza, pasta, or chowder. They are also sold frozen chopped coarsely or minced fine. Just remember the smaller they pieces the faster they cook, and overcooked clam meats are rubbery.
Canned. Canned clams are cooked in the canning process and have an inferior flavor and they can get a bit chewy, but they will work for many recipes. Not all canned clams are the same.
Storing and handling live clams
If you are buying raw, never frozen clams, ask your fish monger when they were harvested. By law, wholesale clams are labeled with the harvest date and location. Shoot for clams less than one week old. Even in Chicago I can get four to five day old clams which means fewer dead ones and longer life in the fridge.
Store fresh live clams in the refrigerator. Bacteria multiply rapidly at room temp. Put whole live clams in a bowl covered by a few layers of wet paper towel or with a bag of ice. Do not submerge them in water or they will drown.
Shucking the easy way
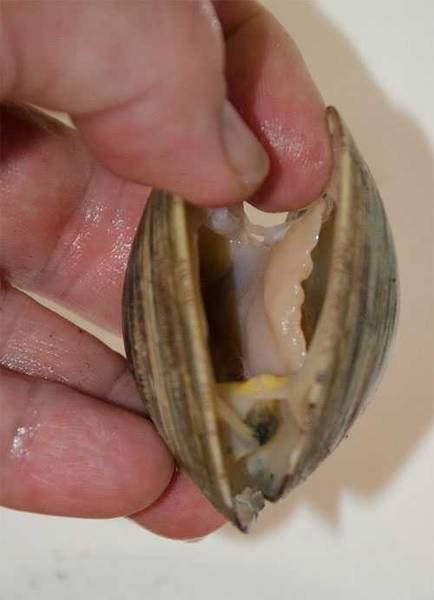
Scrub the exterior of the shells well with cold running water and a brush. There can be a lot of sand on them. Any that rattle or are too heavy or too light are probably dead and filled with sand. Chuck ’em, don’t shuck ’em.
Before shucking let them soak submerged in cold fresh water for about an hour and change the water once so they will spit out any sand and grit. Dump the water, rinse the clams again, and smell each one. Discard any funny smelling clams. Then make sure they are alive by squeezing on the shell. If the shell slides easily left to right, it is probably dead and you should discard it. If it is slightly open, when you squeeze it or tap it on the counter, it should slowly close itself. Cracked clams can be OK, but make sure they smell like the ocean. When in doubt, throw them out.
I have read that if you put clams in the freezer for about 15 minutes the cold will stun them and make opening them a bit easier. Never worked for me. What does work is just the opposite. Put them in some hot water, not boiling, just hot from the tap, for about 10 minutes. The folks at ChefSteps, whom I admire greatly, say 140°F is ideal so they use a sous-vide machine. The heat plumps them slightly without cooking them. The exact time varies depending on the thickness of the shell, so try a handful before you do the whole batch. This trick also works on oysters.
Shucking the hard way
Shucking the traditional way is time consuming and dangerous. These little suckers keep pretty clammed up and you need a sharp sturdy paring knife to get in. It is easy to seriously cut the hand holding the clam or the thumb of the hand holding the knife. If you plan to shuck them yourself, you should buy a clam shucking knife so you don’t ruin your paring knife, and while you’re at it, get some protective gloves.
There are two ways to approach the clam to open it. Some folks like opening clams from the hinge side, but I prefer to open them from the lip side. Hold the clam in the upturned palm of your hand with the pointed hinge facing the heel of your palm and the lips facing your fingers. Hold your hand over a large bowl to catch the drippings. That juice, called the liquor, is full of flavor, and you can freeze it. It makes a fine pasta sauce and poaching liquid.
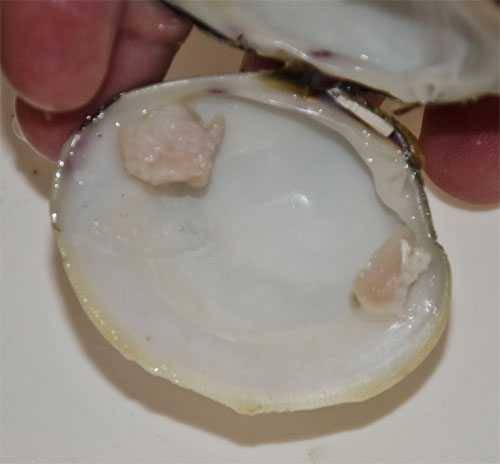
Insert the blade of your knife, not the point, between the thin lips. Wiggle it in a bit, slide it all around the exterior almost to the hinge on both sides. Do not push the knife in far or you will cut the meat in half. Now twist the knife so the opening is large enough to pry it open with your fingers. If the shell breaks, don’t sweat it. Pull open the top shell, twist it off, drain it into the bowl, and discard it. With the knife point cut the two upper adductor muscles that hold the clam to the shell on both sides. This is good meat. Don’t lose it. You can see the adductor muscles in the photos at right. Dump all the meat and liquor into a bowl and discard the bottom shell. After the meats are all shucked pour everything through a fine mesh strainer to separate the liquor.
For things like white clam pizza, when I want raw clams but I don’t want to fight them for an hour (one pizza needs 36 or more clams and it takes me a minute or two do shuck a single clam), I have been known to cheat. I put the whole live clams in a pot with about 1/4″ of water, cover the pot, turn the flame on high, and in about three minutes they pop open. I let them cool for a few minutes, and pop them open easily with my fingers. This process cooks them ever so slightly, but it works fine, and there is no blood letting.

High quality websites are expensive to run. If you help us, we’ll pay you back bigtime with an ad-free experience and a lot of freebies!
Millions come to AmazingRibs.com every month for high quality tested recipes, tips on technique, science, mythbusting, product reviews, and inspiration. But it is expensive to run a website with more than 2,000 pages and we don’t have a big corporate partner to subsidize us.
Our most important source of sustenance is people who join our Pitmaster Club. But please don’t think of it as a donation. Members get MANY great benefits. We block all third-party ads, we give members free ebooks, magazines, interviews, webinars, more recipes, a monthly sweepstakes with prizes worth up to $2,000, discounts on products, and best of all a community of like-minded cooks free of flame wars. Click below to see all the benefits, take a free 30 day trial, and help keep this site alive.
Post comments and questions below
1) Please try the search box at the top of every page before you ask for help.
2) Try to post your question to the appropriate page.
3) Tell us everything we need to know to help such as the type of cooker and thermometer. Dial thermometers are often off by as much as 50°F so if you are not using a good digital thermometer we probably can’t help you with time and temp questions. Please read this article about thermometers.
4) If you are a member of the Pitmaster Club, your comments login is probably different.
5) Posts with links in them may not appear immediately.
Moderators