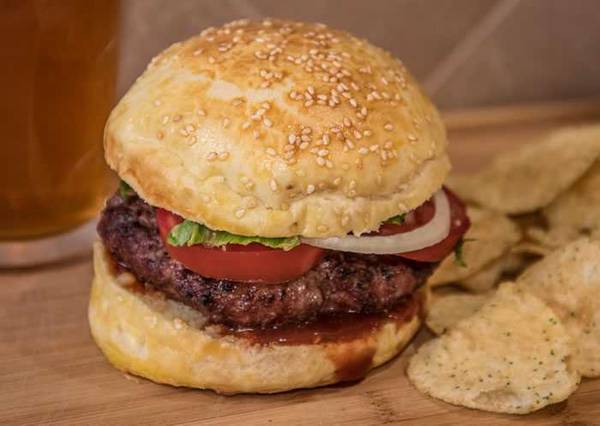
Even your favorite burger recipe can be made better with the addition of a buttery, pillowy homemade brioche bun!
Brian “Breadhead” Foreman is an active member of the Pitmaster Club. He frequently posts pictures of the most marvelous looking breads that he baked on his Big Green Egg, a ceramic kamado that is perfect for baking. I told him that I thought a specially formulated homemade brioche would make the perfect hamburger bun and he took the idea and ran with it. Brioche is a light rich, slightly sweet bread with a flaky texture that can be made sweet or savory. In France, where it originated, it is often baked in a cupcake like pan with fluted sides and served warm as a breakfast bread. With feedback from the chef Jacob Burton of the free online culinary school StellaCulinary.com, he created a brioche recipe that answers my job description perfectly.

You can bake this indoors or out. Indoors you have a little better temperature control than outdoors, but if you are the boss of your grill there is no reason why you can’t cook it outdoors. Kamados are especially good for this task.
Makes:
Takes:
Equipment
- A stand mixer such as the KitchenAid is recommended.
- A plastic dough scraper.
- Parchment paper or a silpat
- A digital scale.
- To make the ring molds, you'll need 6' (1.8 m) of 18" (45.7 cm) wide aluminum foil (normal foil is only 12" (30.5 cm)).
Ingredients
- 3 1/3 cups bread flour, sifted = 100%
- 1 1/4 cups whole milk = 60%
- 2 eggs = 20%
- 11 tablespoon unsalted butter = 30%
- 1 tablespoon sugar, heaping = 3%
- 1 teaspoon Morton Coarse Kosher Salt = 1.6%
- 1 packet instant dry yeast = 1.4%
- Spray oil
- 1 large egg for a glaze on top
- Sesame seeds, poppy seeds, dried onion flakes, coarse salt, or fresh herbs for a topping
These recipes were created in US Customary measurements and the conversion to metric is being done by calculations. They should be accurate, but it is possible there could be an error. If you find one, please let us know in the comments at the bottom of the page
Method
- Prep. Take the cold butter and cut it into slices about tablespoon each and let them warm to room temperature. Crack 2 of the 3 eggs and put them in the bowl of the mixer. Add the milk and mix them together on low speed with the whisk attachment. Then switch to the dough hook and add the flour one heaping tablespoon at a time. This will take about 4 to 5 minutes.
- Once all the liquids are absorbed by the flour turn the mixer up to speed 4 (medium) and let it mix the dough for 3 or 4 minutes. Turn the mixer off and take a break. Let the dough rest for 30 minutes. Bakers call this step the autolyse step, and it is crucial for hydration of the flour and formation of gluten which is an elastic protein.
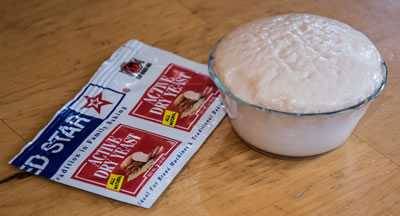
- While the dough is resting, put the yeast into a cup and add about 1 ounce of room temperature water. This lets the yeast activate, called blooming.
- Add the sugar, salt, and yeast to the mixer and mix for 1 minute on low. Now add the butter one pat at a time. Mix on slow speeds until the butter gets absorbed into the dough. This will take about 3 to 5 minutes.
- Once your butter is absorbed into the dough turn the mixer up to speed 4 (medium) and let it knead your dough for 15 minutes. Your dough will look more like a thick batter than a bulky bread dough when you are done mixing.
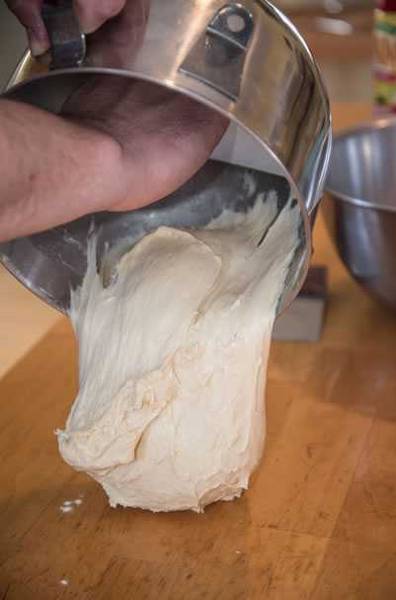
- Proof. Spray a light coat of oil on your work surface, pull the stretchy and sticky dough out of the bowl with a dough scraper, fold it in half, stretch, fold it in half again, and one more time. If it sticks to the surface, use your scraper to get it off. Put it in a large bowl for fermenting (called proofing), and cover with plastic wrap. Proof the dough at room temperature for 1 hour. Then put the bowl in the refrigerator overnight or for about 12 hours. The extended fermentation in the refrigerator makes a huge difference in flavor. A really great hamburger bun takes the same amount of time as a great pork butt or brisket, mostly waiting.
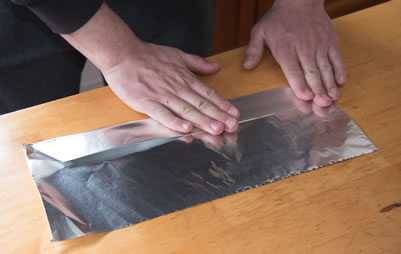
- Prep the ring molds. When you are ready to bake, prepare a sheet pan by lining it with parchment paper or a silpat. This material is non-stick. Put 4 1/2" (11.4 cm) tart rings on the sheet pan and spray the inside of them with spray oil. If you don't have tart rings, you can make ring molds with aluminum foil. You'll need extra wide foil, 18" (45.7 cm) wide. Just tear off 6 sheets about 1' (30.4 cm) long. Turn it so the 18" (45.7 cm) edge is facing you and fold it into a strip about 1" (2.5 cm) high. Now bend it into a ring that is 4.5" (11.4 cm) in diameter and staple it.
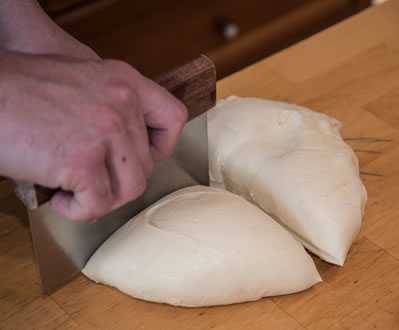
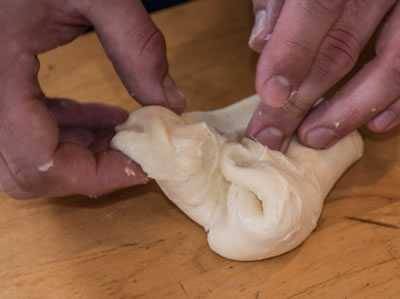
- Shape the dough. Take the dough out of the refrigerator. It will be cold and firm. Spray your work surface with oil. Weigh it and cut it into 6 equal portions. With the palm of your hand, press each portion of dough into a small square. Fold each corner into the center of the square. Pinch the seams together and you will have a sort of ball. Place each ball on your work surface seam side down. Roll it around with your open hand to make a nice ball, smooth and taught on all sides.
- Place each ball into a ring mold and spray with oil so it doesn’t stick to your hands. Press the dough balls down to make them fill the ring. If your dough won’t stretch that far, cover your sheet pan with plastic wrap and let the dough relax for 12 minutes. Remove the plastic wrap and press down on the dough again. It will fill the tart ring. Let your dough proof again for about an hour.
- Fire up. This is a good time to pre-heat your cooker to 400°F (204.4°C) or 375°F (190.6°C) for an indoor convection oven. If you are cooking it outdoors you must bake in the indirect zone.
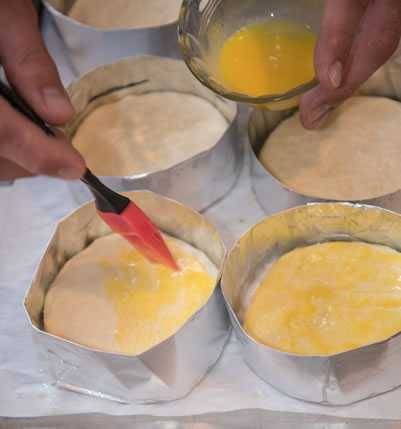
- Just before it's time to put the dough into the oven crack the extra egg, separate the yolk, add 1 teaspoon of water to the yolk, and stir it with a fork. Paint the tops with the egg yolk and if you wish top it with sesame seeds, poppy seeds, dried onion flakes, coarse salt, or fresh herbs.
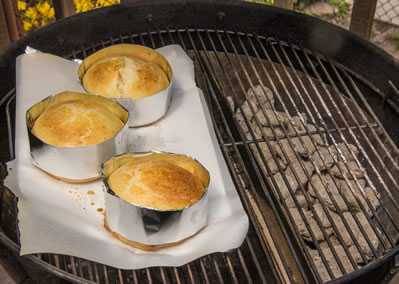
- Bake. Place the sheet pan in the oven and let it bake. In an indoor oven or a kamado it will take 22 to 25 minutes, 18 minutes in a convection oven. Halfway through, rotate the sheet pan 180 degrees to make sure they all cook and brown evenly. Pull the buns when the internal temperature is 195 to 200°F (90.6 to 93.3°C). In the picture here we baked them on a Weber Kettle with a Slow 'N Sear insert to help corral the coals and add moisture to the atmosphere.
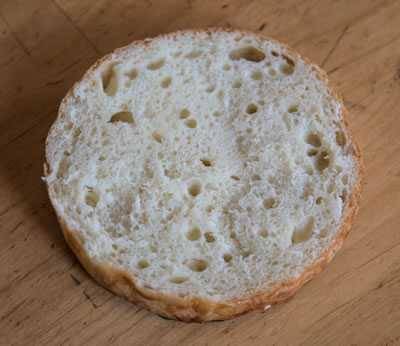
- Serve. Remove them from the sheet pan and place them on a cooling rack until they come to room temperature before slicing and serving as part of your favorite burger recipe.


High quality websites are expensive to run. If you help us, we’ll pay you back bigtime with an ad-free experience and a lot of freebies!
Millions come to AmazingRibs.com every month for high quality tested recipes, tips on technique, science, mythbusting, product reviews, and inspiration. But it is expensive to run a website with more than 2,000 pages and we don’t have a big corporate partner to subsidize us.
Our most important source of sustenance is people who join our Pitmaster Club. But please don’t think of it as a donation. Members get MANY great benefits. We block all third-party ads, we give members free ebooks, magazines, interviews, webinars, more recipes, a monthly sweepstakes with prizes worth up to $2,000, discounts on products, and best of all a community of like-minded cooks free of flame wars. Click below to see all the benefits, take a free 30 day trial, and help keep this site alive.
Post comments and questions below
1) Please try the search box at the top of every page before you ask for help.
2) Try to post your question to the appropriate page.
3) Tell us everything we need to know to help such as the type of cooker and thermometer. Dial thermometers are often off by as much as 50°F so if you are not using a good digital thermometer we probably can’t help you with time and temp questions. Please read this article about thermometers.
4) If you are a member of the Pitmaster Club, your comments login is probably different.
5) Posts with links in them may not appear immediately.
Moderators