Keep it oiled and use it often
The primary reason to “season” a cast-iron pan is to protect the iron from rusting. Seasoning also creates a smoother, less sticky surface. The interior of vintage and newer premium cast-iron pans may appear smooth, but seasoning can make it even smoother. When oil is heated past its smoke point, the oil breaks down, bonds with the metals, and creates a relatively stable surface called “seasoning.” Most cast-iron pans now come preseasoned from the manufacturer to reduce stickiness. The best way to maintain your pan’s seasoning is to cook with fats and oils often and clean the pan gently. If your pan loses its seasoning or isn’t nonstick enough for you, you can easily strip the surface if necessary (see below) and re-season the pan to restore its luster.
How to season cast iron
To season or re-season a cast-iron pan, use any oil with a neutral flavor and a high smoke point. That includes vegetable oil, vegetable shortening, canola oil, sunflower oil, corn oil, peanut oil, soybean oil, safflower oil, and grapeseed oil. Oils like grapeseed and flax are expensive, so go for a cheap cooking oil you don’t mind burning up. Heat the oil past its smoke point, and it will break down, forming a type of glass bound to the iron. Some claim the seasoning is a “polymer,” but as our science advisor, Professor Greg Blonder, explains, “a polymer is a chemical with repeating molecular elements strung out like pearls on a necklace. A glass is randomly bonded mesh like a Rice Krispies treat. Cast iron oil seasoning is technically a glass produced by breaking down polymers with heat. This oil seasoning’s glassy surface is less dense and less uniform than a polymer and has little pores which grab onto food particles. It is neither as uniform nor as effective as a Teflon coating, which is polymer.”
To season your pan, warm it to about 200ºF on a stovetop or grill. Rub the oil into the iron with a paper towel, leaving only a thin sheen of oil behind. You want a very thin layer. If you leave a thick layer of oil, the oil may not fully polymerize and can then become gummy and sticky instead of smooth. When seasoning a bare pan, rub the oil over all areas of the pan—inside, outside, the handle…the works. If you are simply re-seasoning to build up the pan’s existing seasoning, rubbing oil on the cooking surface alone is sufficient. Once you have a thin layer of oil—even on the lip and spout of the pan—set the pan upside down on an oven rack or grill grate and heat the oven or grill on full bore, 500ºF or higher. Leaving the pan upside down helps prevent oil from pooling in it. This process does produce some smoke and odors so doing it on a gas grill outdoors is a great way to go.
When the cooker comes up to temp, bake the pan for 1 hour. Then turn off the cooker and let the pan cool completely inside, at least 2 hours. Repeat the process as many times as possible for the thickest, most durable nonstick seasoning. Shoot for six times if you can. Three minimum. You can also season cast-iron over a campfire. Follow a similar process: warm up the pan a bit, wipe on a thin layer of oil, then leave the pan right side up and sear the snot out of it over the fire until it stops smoking. Let it cool until warm, then repeat. To keep your cast-iron pan well-seasoned, cook a lot of fat in it by frying bacon, rendering beef fat, searing well-marbled steaks and sautéing in whatever other fats you choose.

MYTH: You can’t cook acidic ingredients in cast iron
BUSTED. All metal cookware can react with food, particularly acidic foods, transferring metal ions into the food and resulting in a slightly metallic taste and some discoloration. Some metals like stainless steel are less reactive, while others like iron, carbon steel, and copper are more reactive. That doesn’t mean acids are verboten in a cast iron pan. A quick deglaze with wine, vinegar, or lemon juice, or a few tomatoes cooked in it will not completely ruin the pan. That said, repeated or extended simmering of very acidic ingredients can eventually cause the acid to break down the pan’s seasoning and transfer some iron into the food. How much iron? It depends on the food’s acidity, water content, length of cooking time, and the thickness of your pan’s seasoning. A study by the American Dietetic Association found that pasta sauce cooked in a cast-iron pan increased in iron content by 945%, which is quite a bit! The iron in cornbread, which is much less acidic, increased by only 28%. Depending on your dietary needs, some extra iron from cooking in cast-iron could actually be a good thing, helping to prevent iron-deficiency anemia. Maybe you won’t need to take as many iron supplements! Bottom line: for most people, cooking some acidic ingredients in your cast-iron pan will not ruin the pan or your health. If your pan does lose its seasoning, you can easily re-season it.
Up your game: Join our Pitmaster Club. Try it out for free for 30 days. No credit card is needed. No spam. Join now and Be Amazing!

How to clean a cast iron pan
MYTH: You can’t use soap to clean cast iron
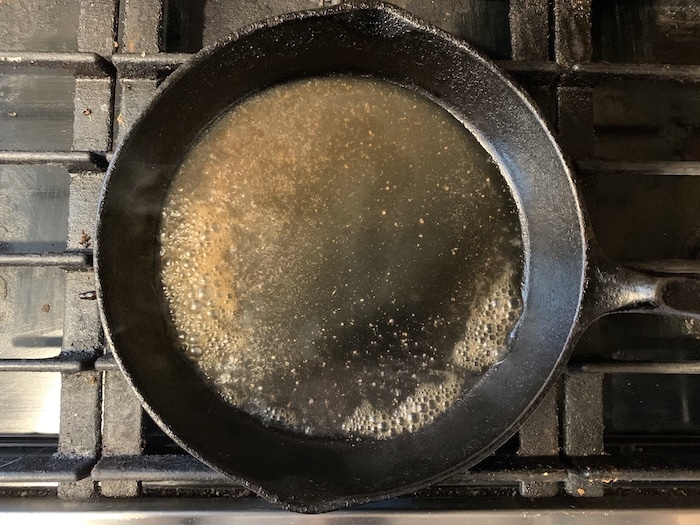
BUSTED. A few drops of dish soap will not ruin a cast-iron pan. The key is not to scrub off the seasoning. Skip the steel wool and abrasive cleaners like Comet, and never soak the pan in hot, soapy water for an extended period of time. How do you clean the pan? The only hard and fast rule is to keep it out of the dishwasher. Some folks scrub with kosher salt or use chainmail scrubbers, but I’m always wary of scraping off the seasoning. One of the easiest, gentlest, and most effective methods is to simply deglaze the pan. After searing a steak, for instance, make a pan sauce by adding a splash of wine or stock: deglaze by scraping the pan bottom with a flat wooden spatula to loosen the glaze called fond, that built-up brown sheen of flavor stuck to the pan. Whisk in some butter and fresh herbs to complete the sauce. The brilliance of deglazing is that it captures flavor and cleans your cookware in one step. Even if you don’t want to make a sauce, you can use the same process with plain water, simmering the water for a minute and scraping the pan bottom with a spatula, then dumping out the water. Just avoid using ice-cold liquids when you deglaze. You don’t want to send your pan into thermal shock! Repeated thermal cycling, especially extreme temperature changes, can weaken the material over time. Use hot tap water, or if you’re using stock, heat it up first. If you do need a bit of soap to clean the pan, a few drops, some warm water and soft scrubbie will do the job. After washing, dry the pan as thoroughly as you can with a kitchen towel. You can even place it over low heat (or in your oven or grill if they’re already on) to evaporate any water from nooks and crannies, especially on the underside. Your goal here is to avoid rust by eliminating moisture. As a final safeguard against rust during storage, if you really want to go all out, you can rub a very thin sheen of cooking oil onto the surface of the pan with a paper towel. Then cool and store the pan. The oiling step isn’t strictly necessary but helps to build and maintain your seasoning. If you go to cook with a cast-iron pan that’s been sitting a while, is sticky, or smells off, heat the pan until it’s smoking hot to burn off the surface oil, then rinse as described above, and proceed with cooking.

How to repair rusted cast iron
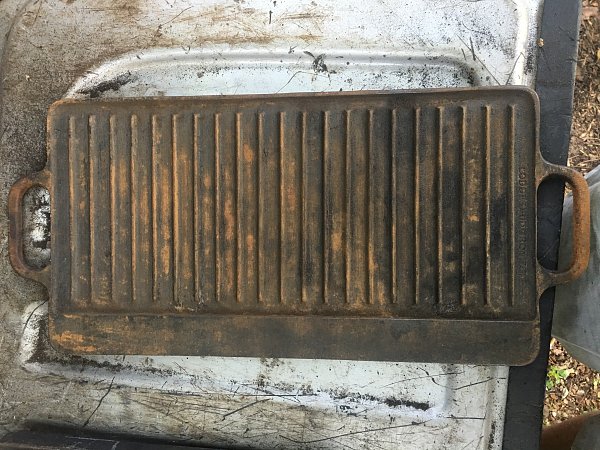
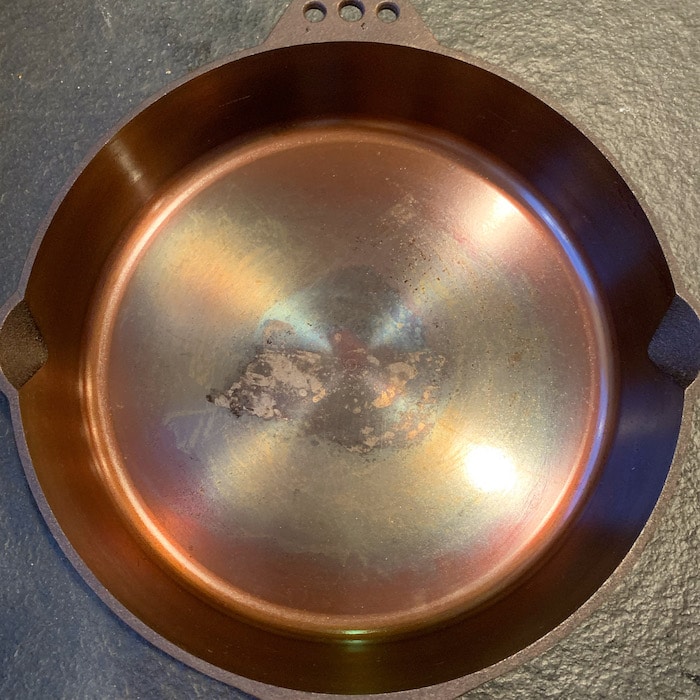
Here’s our best overall advice for cast-iron care: build up a thick seasoning on your pan and don’t let it go. What if your seasoning is completely gone and your pan is rusty? No problem. You can repair it. Strip it down by sanding it and/or scrubbing it with steel wool and an abrasive cleaner like Comet. Get all the gunk and rusty bits off so you’re down to the gray iron. Just be careful not to make the pan too smooth. On a microscopic level, the imperfections, irregularities, and uneven surfaces on your cast-iron help the seasoning bond to the metal. If your pan is too smooth, the seasoning may not adhere. Once your rusty pan scrubbed or sanded so it’s relatively smooth, wash the pan, and season it several times to re-build the seasoning. For badly rusted cast-iron, especially pans with intricate ridges and valleys like cornbread pans, the easiest and most thorough way to restore it is with an electrolysis bath. Check out some videos online, or if you’re a member of our Pitmaster Club, go to the topic “Restoring Cast Iron via Electrolysis Bath.” For this method, you’ll need a manual battery charger, a plastic tub, some washing soda (sodium carbonate), copper wire, and some steel plates or old cookie sheets (not stainless steel or aluminum). Electrolysis uses electricity to convert the ferric oxide (red rust) to ferrous oxide (black rust) so it can be removed. It loosens the built-up crud and rust in flakes that can then be removed just like scraping off an old coat of paint. Electrolysis is complete when the pan is bare and gunmetal gray in color. Caution: electrolysis does produce hydrogen gas as a byproduct, so do it outside in a well-ventilated area that isn’t near any flame. Here’s a nice advantage of this method: once you have your e-bath set up, you can reuse it several times to restore several pans. For vintage cast-iron collectors, electrolysis is definitely the way to go. Lots less elbow grease required.


High quality websites are expensive to run. If you help us, we’ll pay you back bigtime with an ad-free experience and a lot of freebies!
Millions come to AmazingRibs.com every month for high quality tested recipes, tips on technique, science, mythbusting, product reviews, and inspiration. But it is expensive to run a website with more than 2,000 pages and we don’t have a big corporate partner to subsidize us.
Our most important source of sustenance is people who join our Pitmaster Club. But please don’t think of it as a donation. Members get MANY great benefits. We block all third-party ads, we give members free ebooks, magazines, interviews, webinars, more recipes, a monthly sweepstakes with prizes worth up to $2,000, discounts on products, and best of all a community of like-minded cooks free of flame wars. Click below to see all the benefits, take a free 30 day trial, and help keep this site alive.
Post comments and questions below
1) Please try the search box at the top of every page before you ask for help.
2) Try to post your question to the appropriate page.
3) Tell us everything we need to know to help such as the type of cooker and thermometer. Dial thermometers are often off by as much as 50°F so if you are not using a good digital thermometer we probably can’t help you with time and temp questions. Please read this article about thermometers.
4) If you are a member of the Pitmaster Club, your comments login is probably different.
5) Posts with links in them may not appear immediately.
Moderators