YOU ARE HERE >> AmazingRibs » Ratings & Reviews » Ratings Reviews And Buying Guides » Grill-Smoker Combos Such As Kamados And Pellet Burners » BBQube Kamado Go 275
BBQube Kamado Go 275
All of our reviews are done independently by our team of testers and are in no way influenced by advertising or other monetary compensation from manufacturers. Click here to learn more about our unbiased product review process.
Published On: 5/12/2020 Last Modified: 10/27/2025
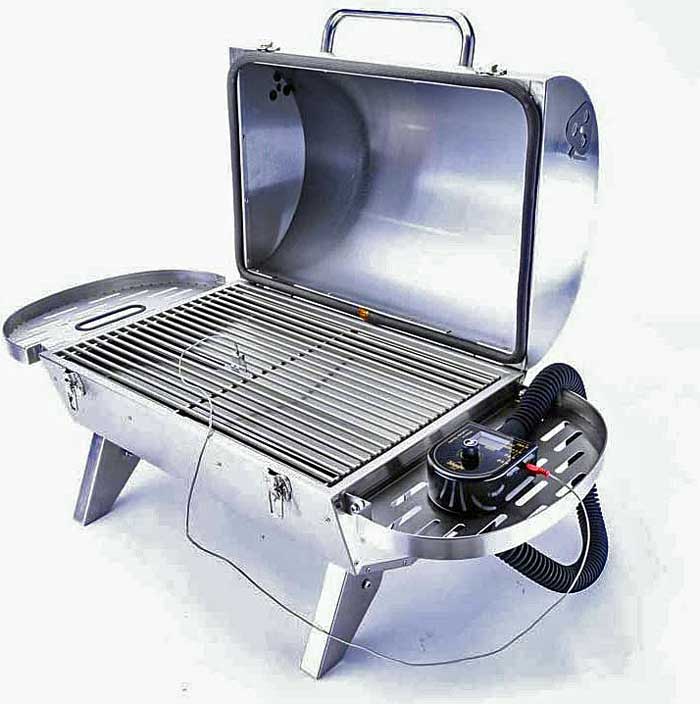
The BBQube Kamado Go 275 is a portable charcoal-fired smoker/grill that will appeal to tailgaters and backyard chefs. It is designed to act as a smoker with its included temperature controller or as a grill for searing foods. This review examines the smoker functionality using the thermostatic controller as well as the cooker’s performance as a searing grill. If you’re wondering why it’s called a Kamado, we asked the manufacturer the same question and got this answer: “The grill’s top lid is entirely double-walled, just like the Akorn Kamado. I just made it into a rectangular shape so the cooking area can be better utilized. I’m also a big fan of the Weber Go-Anywhere grill but wish it were bigger and more efficient. So I called this the Kamado-Go to indicate that it is an efficient cooker like a kamado and very portable at the same time.”
Construction
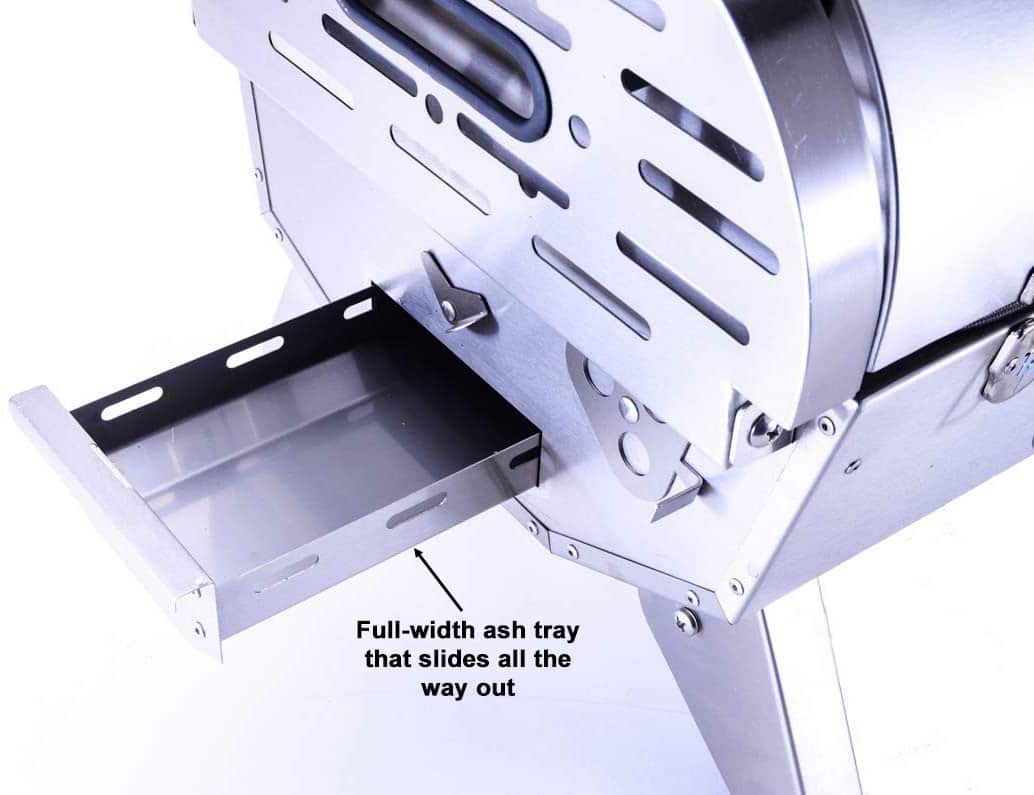
The cooker itself is a stainless-steel clamshell design with a well-sealed latching lid. The lid is arched to give the cooker a large enough volume to cook a good-sized chicken or a pork butt. It has short folding legs that add to its stability and keep the bottom of the cooker safely above the tailgate or table top. There is a small folding shelf on each side that can hold the temperature controller and miscellaneous cooking tools. The cooking surface is a one-piece 275 square inch (1774 square centimeters) rectangular arrangement made from heavy-duty stainless steel measuring 13.25 x 20.5 inches (33.7 x 52 centimeters). Beneath the grill surface is an easily inserted or removed heat deflector that doubles as a grease catcher. There is a slot at one end of the deflector that channels grease and fat into the ash tray beneath it. Below the heat deflector is a trough-shaped space to accommodate the charcoal. Beneath this space is a smaller grill surface that sits above a removable full-width ash tray. This tray slides out the left side of the cooker to empty the spent fuel, making it easy to clean up. I wondered if the exterior stainless steel would discolor from heat, but I saw no evidence of that. A word to the wise: some of the parts have quite sharp edges and corners. I’d suggest some emery cloth or a file to deburr the prickly bits before first use.

Thermostatic controller
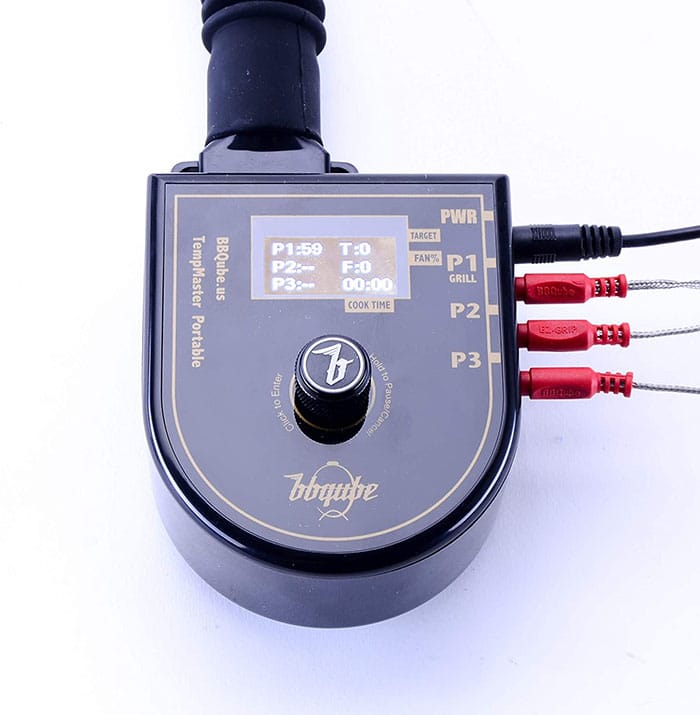
The cooker comes with a thermostatic controller and three temperature probes. One probe that clips to the grill surface is intended to measure the internal temperature of the cooker, and two others are intended to track food temperatures. The probe dimensions are summarized here:
Long food probe (L-shaped): length: 6″ (150mm), diameter: 0.157″ (4mm), tip: 0.087″ (2.2mm), cable: 44″ (1.1m);
Short food probe (L-shaped): length 2″ (50mm), diameter: 0.157″ (4mm), tip: 0.087″ (2.2mm), cable: 44″ (1.1m);
Cooker temperature probe: grill clip and 44″ (1.1m) cable.
The temperature accuracy of the probes is very good. The controller has a self-contained fan that forces air through a flexible silicone tube to a port on the right side of the cooker where it is directed toward the burning fuel.
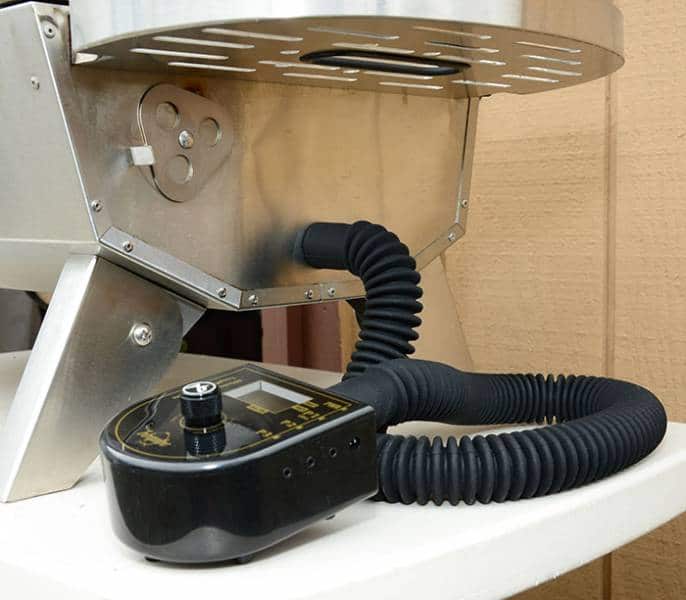
The amount of air flow controls the cooker’s internal temperature – the more air, the hotter the fire. The controller is powered by a supplied AC adapter or an optional battery pack. According to the manufacturer, the battery pack will power the controller for 20 hours.
Like what you’re reading? Click here to get Smoke Signals, our free monthly email that tells you about new articles, recipes, product reviews, science, myth-busting, and more. Be Amazing!
The controller allows the user to select the desired cooking temperature and monitor two separate pieces of food. An app, for both Apple and Android, connects the phone and the controller via Bluetooth, and allows the user to monitor temperatures and receive alarms. The app will display the current temperature of each probe, and presents a graph of temperature versus time. What the app CANNOT do is control the controller. In other words, you cannot set up or change the settings on the controller via the app; it is read-only, a significant disadvantage. The data collected by the app disappears if it is inadvertently closed or crashes, resulting in a total loss of the temperature profile. The controller comes with a carrying case that will hold the controller, the temperature probes, the optional battery pack, and AC adapter.
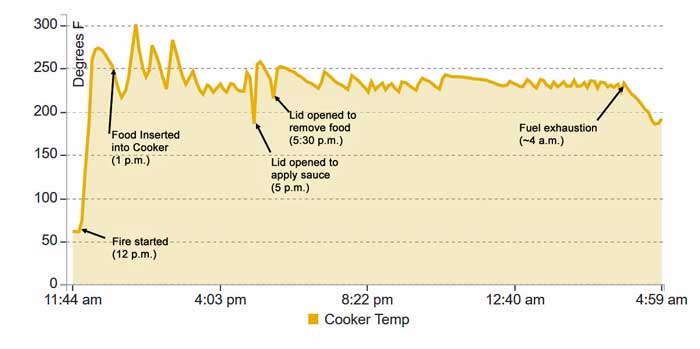
The controller is pretty bare-bones, lacking the programmability and open-lid detection features found on many other controllers. Should power be interrupted momentarily, all settings are lost instead of resuming the cooking profile. The temperature control algorithm is crude: the fan runs at full speed (for the cooker type selected during setup) when the temperature is below the chosen target, and it stops completely when the temp rises above the target. More sophisticated thermostats use a proportional controller for more precise temperature regulation. See the graph for the temperature response over time. (Note: This controller is a reduced-feature version of another BBQube thermostatic controller reviewed here.) Click on the image below to see a larger version of the time/temp graph.
Operation
To fire up the smoker, you remove the grilling surface and heat deflector and pour charcoal along the width of the lower grill. The instructions say to light 6-8 briquets in a chimney and pour them at one end of the charcoal array, presumably the end nearest the air intake. The idea is to have the charcoal slowly burn from the lit end to the other end of the fuel trough. Forced air is fed from the thermostatic controller to the right side of the ash tray, promoting fuel burning at a rate necessary to maintain the desired temperature. When I followed the manufacturer’s lighting instructions, I got a lot of temperature overshoot, followed by large temperature swings of nearly plus or minus 45°F. The temperature eventually settled down, but I would use less lit charcoal next time to avoid this problem.
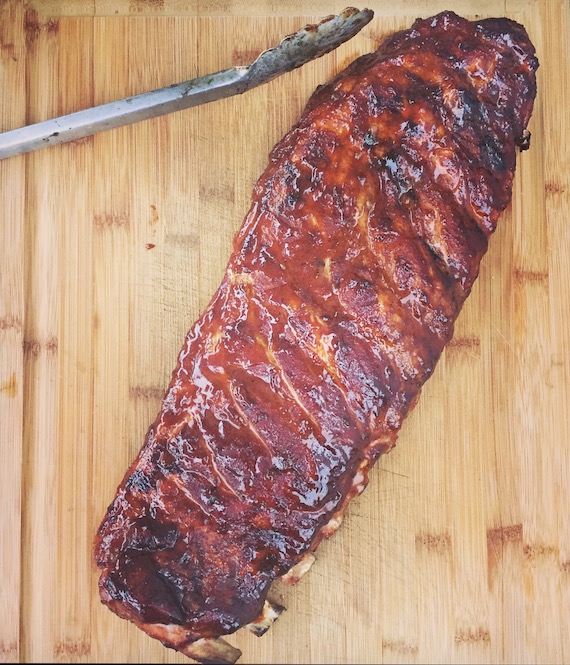
I was initially skeptical of the cooker’s fuel capacity, wondering if it could be used for more than a few hours at a time. I was pleasantly surprised to find that a full load of charcoal ran for 16 hours at 225°F with an ambient temperature that ranged from around 50° to 65°F. I used a Fireboard thermometer to record the internal temperature of the cooker. For this cook test, I lit the cooker at noon, added a rack of ribs at 1 p.m., sauced it after four hours, and removed it half an hour later. The cooker continued to maintain temperature until about 4 a.m. the next morning. This should be more than adequate for a pork butt or brisket. And the ribs came out great using our most popular ribs recipe.
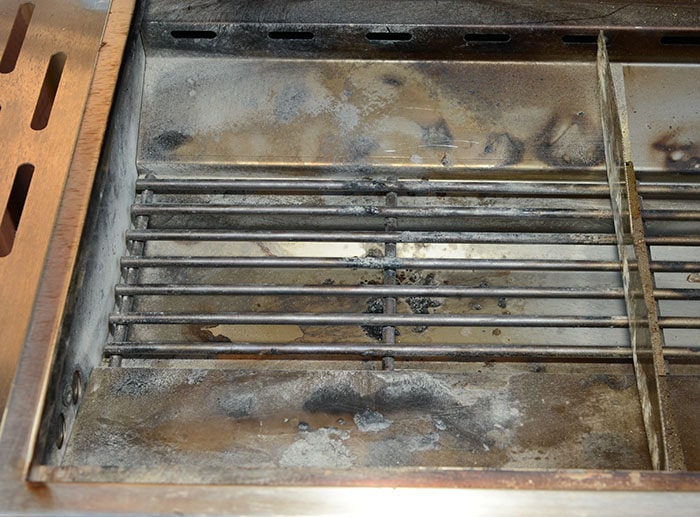
To use the cooker as a grill, remove the heat deflector so that the food sits directly above the charcoal. When I tested the grilling function, I used the left side of the grill, but I don’t think it makes any difference which side you use, unless you are also using forced air from the blower to increase the heat. In that case, putting the fuel on the right side would probably be preferable (the instructions are mute on the subject). If you want to use two-zone cooking, there is an adjustable/removeable fence that can be positioned left or right in the fuel trough to constrain the lit fuel to just the high-temp side. The fence can be seen on the right side of the photo here.
There are also four adjustable vents, two in the base and two in the cover, that can control the convective airflow through the unit. When used in the grilling mode, these vents became too hot to open or close with bare hands; you’ll need a thermal glove or a pair of pliers. You can also program the thermostatic controller to output an adjustable percentage of its airflow capacity if additional heat is desired. If used in this manner, I suspect the idea would be to light all the desired amount of charcoal in a chimney and pour the lit coals into the grill directly. When testing the grill function to quickly cook a flank steak as a London Broil, I used about a half-chimney-full of charcoal briquets and set the cooker up so that only the left side was fueled.
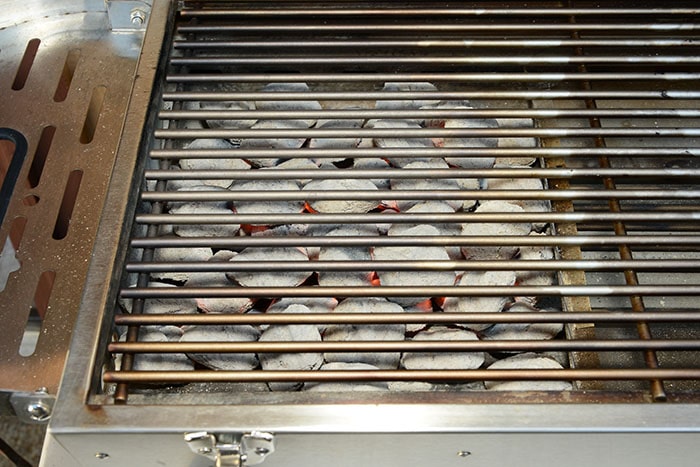
I got more than enough heat to sear the meat properly.
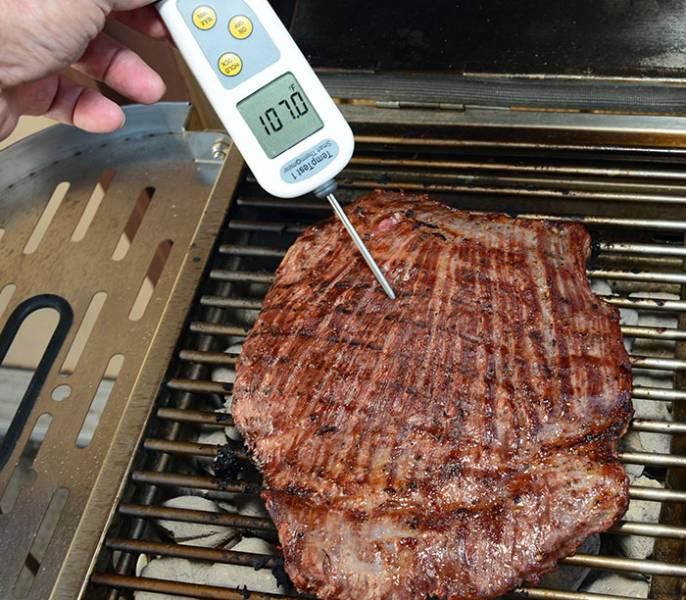
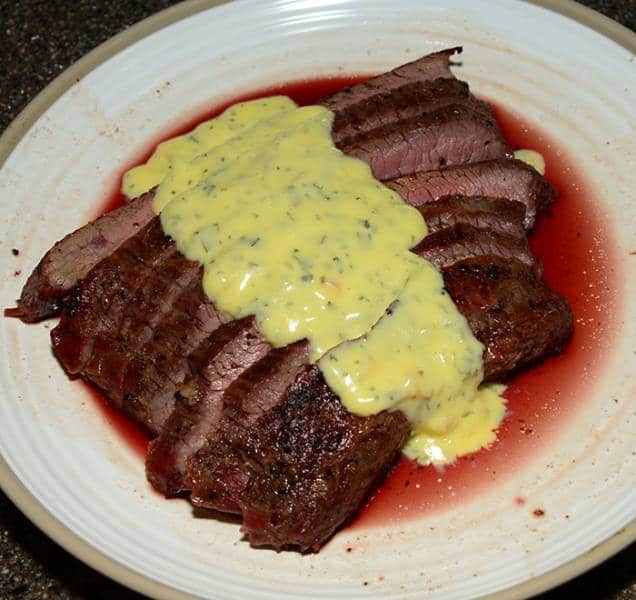
Flank steak likes a really hot fire for a quick sear; if you cook it slowly it is best left to shoe leather. Otherwise, the cooking is pretty straightforward, as shown here in our Crusty Flank Steak recipe. You could also cook the steak as a more elaborate London Broil as explained here. I kept it simple and cooked the flank steak as quickly as possible, monitoring the internal temperature with a my Thermoworks TempTest 1 instant-read thermometer. I pulled the meat from the fire when the thickest part read 120°F, allowing for perhaps another ten degrees of additional temperature rise. I let the meat sit for only a couple of minutes, then sliced it diagonally across the grain. I’m a big fan of sauce bearnaise, so I whipped up a batch to spoon over the top.
I cooked burgers a few days later with similar results. (Sorry, no photos!) Can’t complain about the cooker’s performance.
Observations
The overall build quality is good. The unit is all brushed stainless steel with stainless hardware as well. Portable grills have to balance weight and ruggedness, and this product seems to have found a happy medium, weighing in at 30 pounds (14 kg). There was some minor shipping damage that pushed the lid handle in a fraction of an inch, but a couple of firm taps with a soft hammer restored the proper shape. This is a packaging issue.
One of my pet peeves is the quality of users’ manuals. The instructions that come with this unit are inadequate, and the “manual” that can be downloaded from the company’s website is similarly useless. I have a lot of experience with equipment like this, so I was able to sort things out, but a less-experienced user would probably wind up scratching his or her head. Come on guys, you can do better than two sheets of paper. Give your customers some useful guidance, please.
Up your game: Join our Pitmaster Club. Try it out for free for 30 days. No credit card is needed. No spam. Join now and Be Amazing!
Conclusion
Despite my misgivings about the controller and the instruction sheets, I like this cooker. It is attractive and appears well-built. It uses fuel much more efficiently than my Weber Smokey Mountain, and it will burn long enough to cook just about anything. I suppose that is why the manufactuer put “kamado” in the name. I like that it can be used as either a smoker or a grill, and that it’s portable. I’d recommend buying the optional battery pack if you plan to operate off the grid with any regularity.
Warranty
The product comes with a one-year limited warranty. The included documentation has links to the company’s website where support, instructions and phone numbers will be found.
Click the buttons below to search our complete database of reviews:
Product Information:
-
Model:Kamado Go 275
-
Item Price :399.00
*Price Subject To Change -
Where to buy: ** buying from one of these suppliers will help support this website.
-
Review Method:Cooked On It
We have hands-on experience testing this product. We have also gathered info from the manufacturer, owners and other reliable sources. -
Primary Function:Grill, Smoker, Combination Grill and Smoker, Tailgater
-
Fuel:Charcoal
-
Primary Capacity:Small (about 13 burgers) : 275 square inches
Manufacturer:
-
BBQube

A group of barbecue loving engineers focused on design and production of temperature controllers.
-
Bill McGrath, AmazingRibs.com Chief Thermometer Reviewer - Bill McGrath is AmazingRibs.com's Thermometer Maven. He has sophisticated equipment, an electrical engineering degree from Cornell University, and an MBA (almost) from UC Berkeley.

High quality websites are expensive to run. If you help us, we’ll pay you back bigtime with an ad-free experience and a lot of freebies!
Millions come to AmazingRibs.com every month for high quality tested recipes, tips on technique, science, mythbusting, product reviews, and inspiration. But it is expensive to run a website with more than 2,000 pages and we don’t have a big corporate partner to subsidize us.
Our most important source of sustenance is people who join our Pitmaster Club. But please don’t think of it as a donation. Members get MANY great benefits. We block all third-party ads, we give members free ebooks, magazines, interviews, webinars, more recipes, a monthly sweepstakes with prizes worth up to $2,000, discounts on products, and best of all a community of like-minded cooks free of flame wars. Click below to see all the benefits, take a free 30 day trial, and help keep this site alive.
Post comments and questions below
1) Please try the search box at the top of every page before you ask for help.
2) Try to post your question to the appropriate page.
3) Tell us everything we need to know to help such as the type of cooker and thermometer. Dial thermometers are often off by as much as 50°F so if you are not using a good digital thermometer we probably can’t help you with time and temp questions. Please read this article about thermometers.
4) If you are a member of the Pitmaster Club, your comments login is probably different.
5) Posts with links in them may not appear immediately.
Moderators