


The Weber Slate Rust-Resistant Griddle is an upscale version of Weber’s standard griddle line, and we suspected it was coming! Available in both 30” 3-burner and 36” 4-burner configurations, Slate boasts a pre-seasoned, ready-to-cook-on carbon steel cooktop, an upgraded cart with drawers or doors, foldable and modular side shelf configurations, and a unique cooktop temperature gauge. That’s quite a host of convenient creature comforts and styles over their standard griddles.
Residential griddles aren’t new to the cooking scene. They have long been versatile tools, great for anything from eggs and pancakes to veggies, burgers, steak, fish, and so much more. They make frying, sautéing, and searing large amounts of food simple and fun, all while keeping the fumes outside. While one or two names have dominated this space for years, we’re seeing more brands developing their own griddles. Weber, a household name and massive player in the outdoor cooking space for generations, is no exception. Enter Slate.

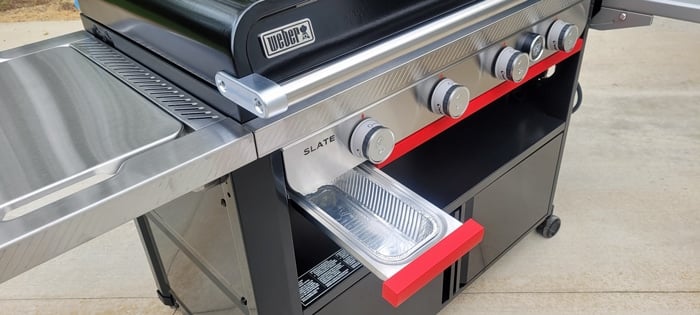
Top-down
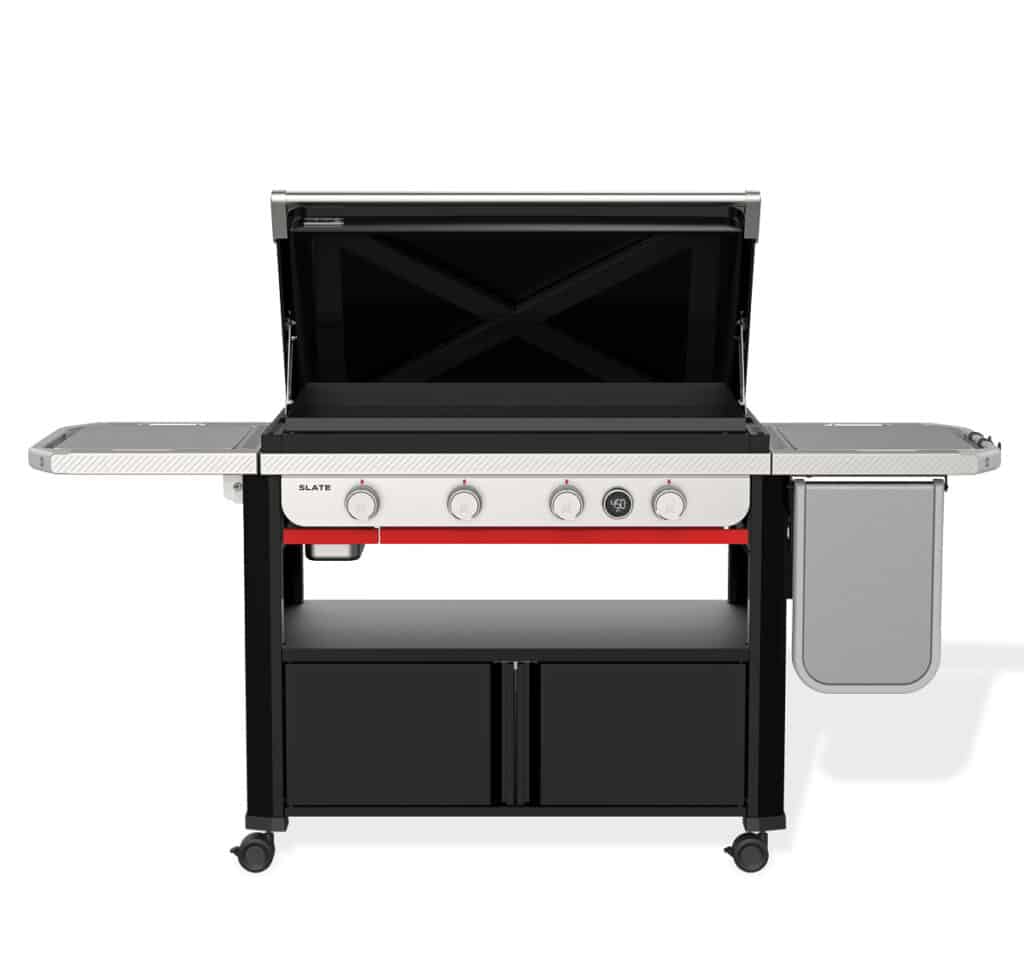
At 77″ wide with both shelves up, 26.5″ deep (or more with the extension shelf in place), and just over 50″ high with the lid up, the Slate 36” is one of the largest freestanding griddles available. Weighing in at 198 pounds without the propane tank, it is also one of, if not the, heaviest. Nothing flimsy here!
Like what you’re reading? Click here to get Smoke Signals, our free monthly email that tells you about new articles, recipes, product reviews, science, myth-busting, and more. Be Amazing!
It has a conveniently attached, hinged lid, which is meant to protect the cook surface when not in use, and is to be left open when in use. As if to remind us it is not meant to be used when cooking, Weber’s website and User Manual for Slate periodically refer to it as the “protective hard cover.” We’ll stick with “lid” here. The lid has reinforced bracing underneath to prevent denting, should your cats or a fat raccoon want to hop up and investigate the smells after dinner.
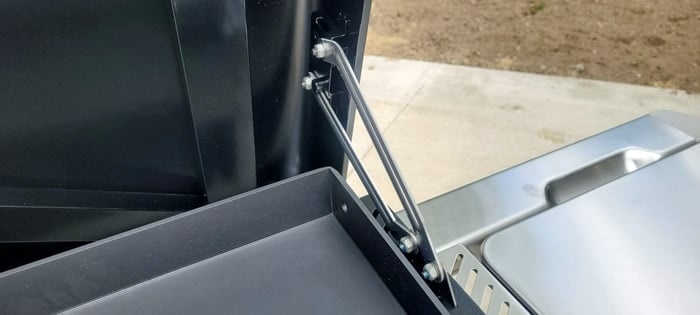
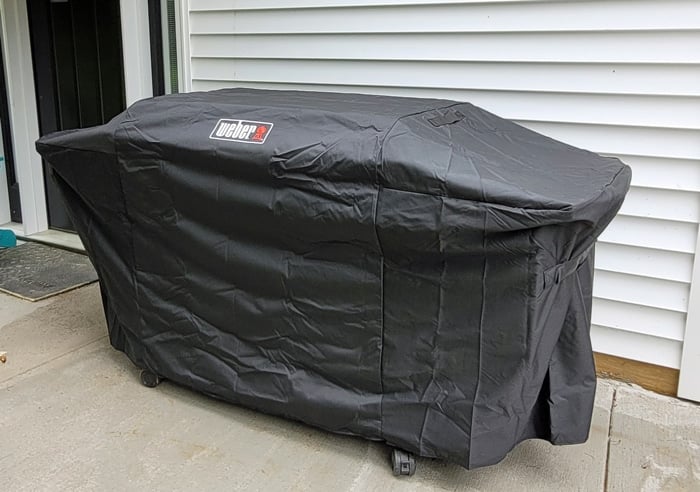
The lid hinge design on Slate is an upgrade over the standard Weber 36” 4-burner griddle hinges (Weber’s standard 28” 3-burner griddle does not have lid hinges, but all Slate models do). They are strong enough to hold the lid up even in windy conditions, yet it is easy enough to lift and lower with minimal effort. The lid does a great job at its intended purpose — protecting the cooktop from rain and debris. Weber also offers a nice custom Slate cover for an additional charge.
Opening the lid requires an extra 8 inches of space from the back of the unit to a wall or deck rail for clearance.

The Cooktop
The extra-large 36″ x 21″ (756 sq. inches) removable, pre-seasoned carbon steel griddle top nestles into the cookbox nicely. At that size, you can cook for the whole firehouse, or use a single burner for a smaller meal. Weber claims this cooktop has space for 30 burger patties which is quite optimistic. Well, maybe if they’re small patties, or all touching, you could squeeze in 30. Realistically speaking, there is easily room to smash and flip 16 to 20 or so quarter-pound smash burgers.
Up your game: Join our Pitmaster Club. Try it out for free for 30 days. No credit card is needed. No spam. Join now and Be Amazing!
Weber states this cooktop “gets transformed under extreme heat and pressure [which] case hardens and bonds the surface, reducing the ability for moisture to collect and rust to form. It is then pre-seasoned with food-safe oils that condition the metal for an extra boost of rust resistance and a natural, easy-release cooking surface right out of the box ” (italics ours). We’re going to test that.
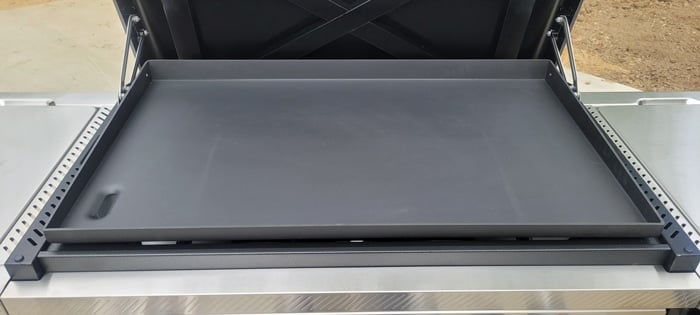
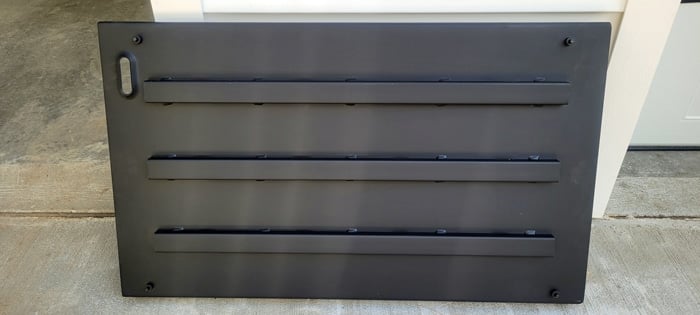
Weber’s cooktops include reinforcement on the underside to prevent warping- a nice touch.
Drain System
The grease drain is a small rectangular hole on the left side. Scrape all the gunk down that slot to deposit it in a slide-out grease tray below. Some griddlers complain grease drains up front make it easy to splash grease on yourself during clean up but I didn’t find this to be a problem. As with many things, paying careful attention to what you’re doing and not being over-zealous when scraping hot grease is key. My only complaint is that the hole could be bigger since it’s smaller than a few others I’ve used, but functionally it works fine.
Weber’s removable grease tray on the Slate is the same as on their standard griddle, but it blends into the red trim on the front of Slate for a more seamless appearance here. Weber includes one disposable custom-fit foil grease tray liner to facilitate cleanup, and replacement liner packs are available for purchase.
Ignition
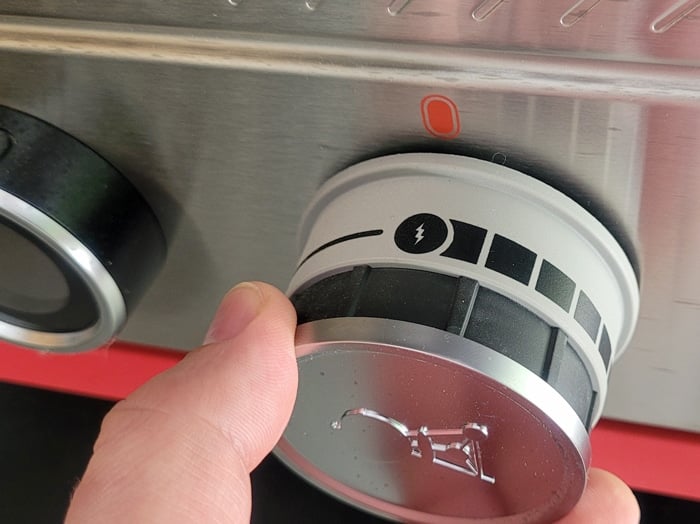
There is no electronic ignition here, so you don’t need any power source to light or operate the Slate. Each of the 4 burners lights independently with a simple twist of their respective knob. A mechanical system creates a spark at each burner as you twist the knob to the ‘start’ position, indicated by a lightning bolt on the knob. Gas flow is simultaneously activated at this position so ignition happens quickly.
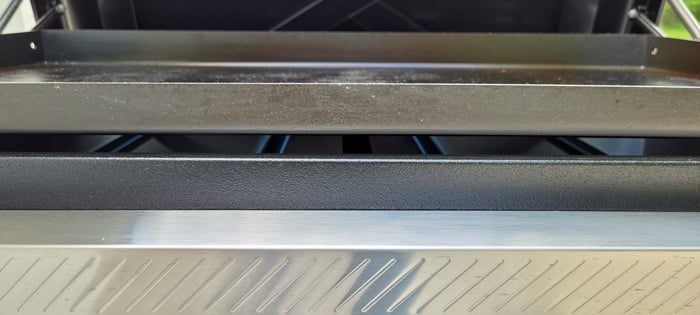
Since the cooktop sits about a half inch above the chassis, ignition can easily be verified by peeking under the cooktop to ensure sweet, blue flamage.
Lighting
Weber recommends lighting the burners starting with the furthest to the left and working to the right, specifically in that order. They also recommend using all four burners when preheating, however, you do not need to use all four burners when cooking.
Push the knob inward and slowly turn to the start position (lightning bolt) until it clicks, and keep the knob pressed inward for two more seconds. You can verify that the burner is lit by peeking under the cooktop as we show above. Repeat as needed.
Preheating
We often recommend preheating your griddle on low or medium to avoid potential warping of the cooktop from sudden high heat, but Weber states that you should preheat the Slate according to what you’re cooking, stating “If you’re cooking pancakes, preheat on LOW. If you’re cooking smash burgers, preheat on HIGH.” The intentional use of hot-rolled carbon steel, plus reinforcement bars on the bottom side of the cooktop, alleviates concerns of warping.
The four stainless steel burners are 12,000 BTUs each, for a total heat input of 48,000 BTUs. Weber states the Slate reaches over 500°F, and they’re right, I hit about 566°F according to my infrared thermometer with the burners on HIGH for 15 minutes. The bottom of the cook box has vented shields to prevent small vermin from crawling up inside and making a home, a positive change from Weber’s standard griddle with open holes.
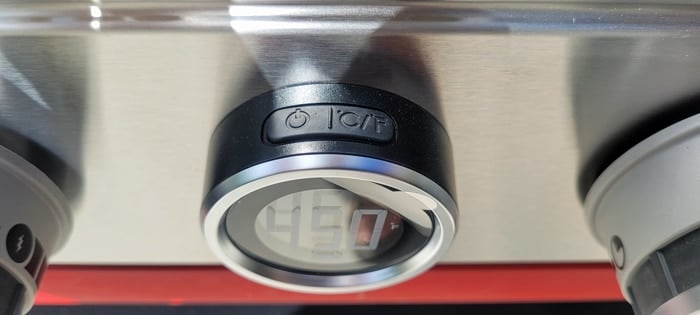
Digital Temperature Display
Unique to the Slate, and the griddle market as a whole, is the Digital Temperature Display. Nestled among the front control knobs, this round display conveniently shows a digital LED readout of the cooktop’s temperature. No infrared thermometer? No problem.
Want a new set of tools? Check out Meathead’s new book, The Meathead Method. It’s a toolbox that will elevate all your cooking. Alton Brown calls it “The only book on outdoor cookery you’ll ever need.”
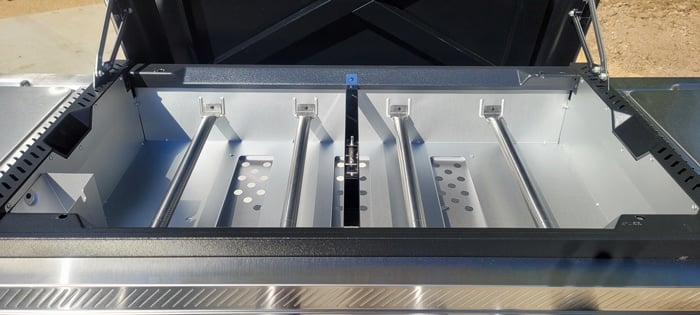
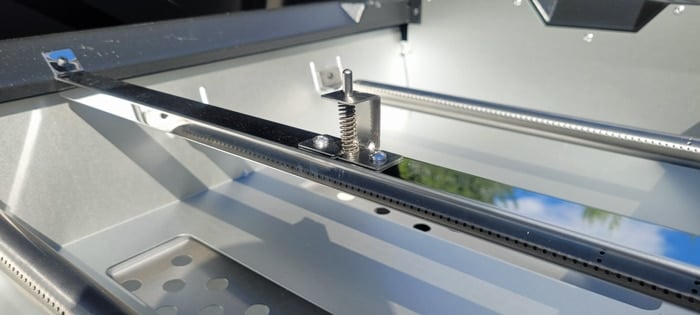
The sensor for the display, located near the center of the cooktop, is a spring-loaded upward-facing probe that rests tight against the cooktop when it’s in place.
You can turn the display on or off at will, and can set it to either °F or °C. This is the only piece of the Slate that is electronic, and it’s powered by two included AA batteries. The display auto-dims, turns off automatically if the griddle cools, and displays a low battery warning when appropriate. The battery box is located inside the lower compartment on the right sidewall for easy access to change batteries. This display comes standard on the 36” model and is optional on the smaller 30” three-burner Slate. Yeah, I know what you’re going to ask, “But is it accurate?” More on that later.
Manual Lighting
As with most manufacturers of outdoor gas appliances, Weber includes a wire “matchstick holder” on a chain underneath tucked up near the propane hose. This is to hold a match to light the burners in the event of ignitor failure. Light a match, insert it into the end of the holder, and insert your new firestick under the cooktop to the burner you need to light, and press and turn that burner’s knob. Repeat. Since the knobs contain a mechanical ignitor not dependent on any outside power source, the odds of failure are slim, but it’s nice to know you have a backup.
Side Shelves and the Weber Works Accessories
Large 18.5 x 24.5-inch side shelves on either side give you plenty of workspace. The left side shelf folds down for storage, saving you several inches of overall width. The right side shelf is stationary and does not fold. Both side shelves also contain a removable stainless steel insert. When in place, this insert is the shelf surface. Once removed, you can place any of the compatible Weber Works add-ons on, or in, the shelf frames.
If you fold the left side shelf, the removable insert wants to fall out. There is nothing in place to securely anchor the insert and prevent this. As you can see here, it wants to dangle precariously.
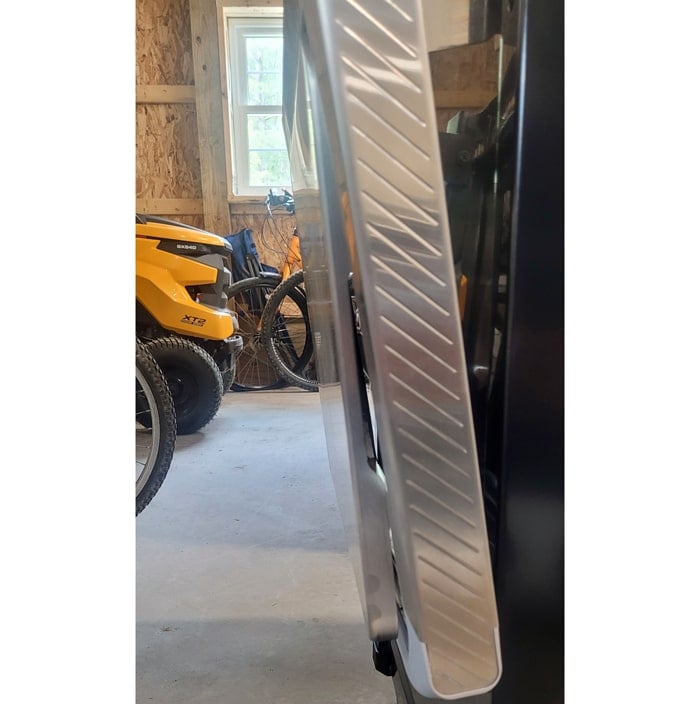
Weber points out, “There are stainless steel tabs that hold the side table in place. These tabs are not immediately visible, but they are there and they hold the insert in a hanging position while you fold the table down. We note that these tabs do not “lock” the side table in place, but do hold it in place.”
Indeed the insert never actually dropped out clanging to the floor, but if it makes you nervous, I recommend removing this insert before folding this shelf. Thankfully there’s plenty of storage space in Slate’s cart to keep it nearby.
Workspace
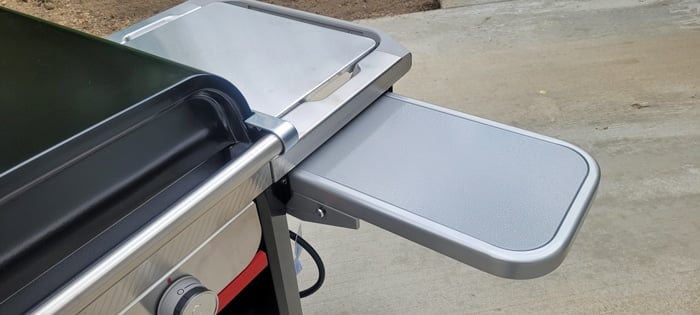
The Slate also has an available extendable side table which folds forward to give an additional 11.5 x 15.5 inches more workspace on the right side. This table, a.k.a. sturdy shelf, comes standard on the 36” four-burner model and is an upgrade option for the 30” three-burner model.
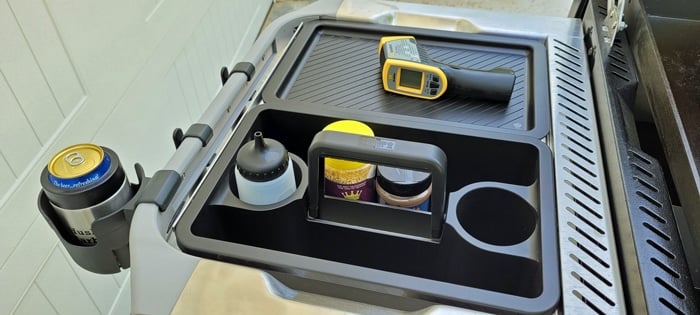
Shown below is the beverage holder and the Weber Works Caddy installed in the left side shelf. The beverage holder is wide enough to fit a Yeti metal insulated can cooler or a tumbler. The Caddy fills up half the shelf’s space and its own lid comes off and slips into the shelf beside it for extra shelf surface space. Handy. The caddy has a fold-up handle to let you carry your seasonings; oil and water bottles; thermometer; cheese; etc. from the house to the Slate and back. Further accessories that will fit inside or on the Slate’s side shelves include a custom cutting board, sealable storage bin, paper towel holder, condiment bin, and even a frame to hold a trash bag. Weber has thought of it all.
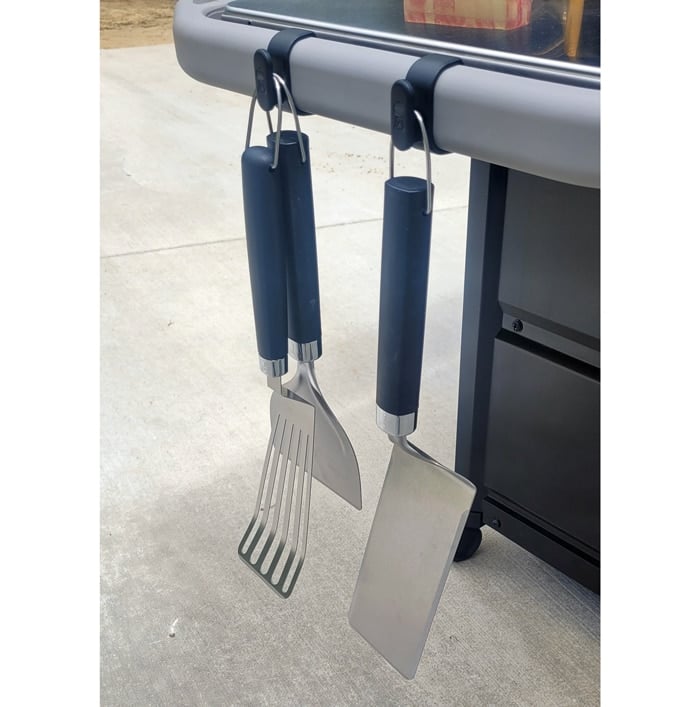
To add to the slew of convenient add-ons, the Slate also comes with two moveable clip-on utensil holders, shown below, with more available for purchase, as well as a premium custom Slate cover.
Legwork
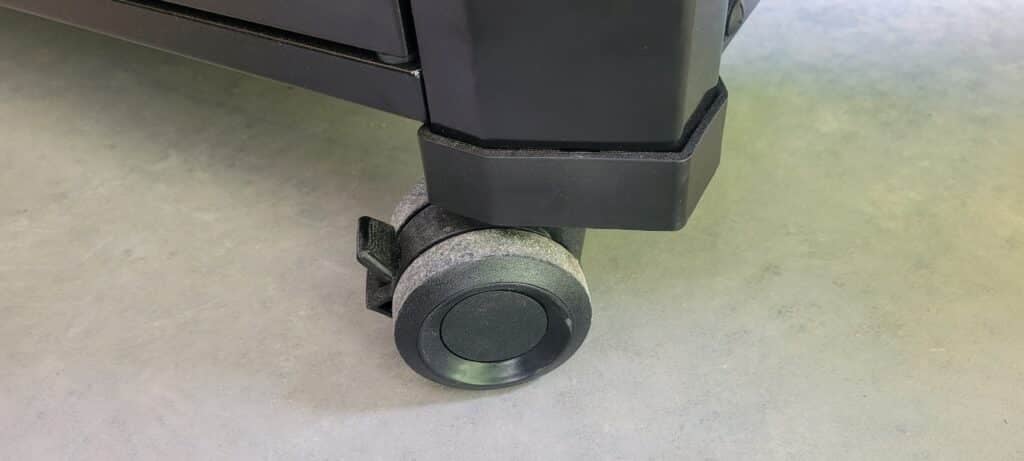
Another nice touch is that all 4 of Slate’s legs have swiveling casters for easy movement, and the front 2 are lockable so if you don’t want it to move you are covered. I find that the casters will hobble over the gaps in my deck boards with effort, however, they’re not large wheels, so it’s a struggle to move over grass as you’d expect, and I don’t recommend it. The heavy cooktop creates most of Slate’s weight, so removing it and the propane tank allows you to lighten it up considerably if you need to move it out to the backyard or up the stairs of your back deck.
Tank Storage and Fuel Gauge
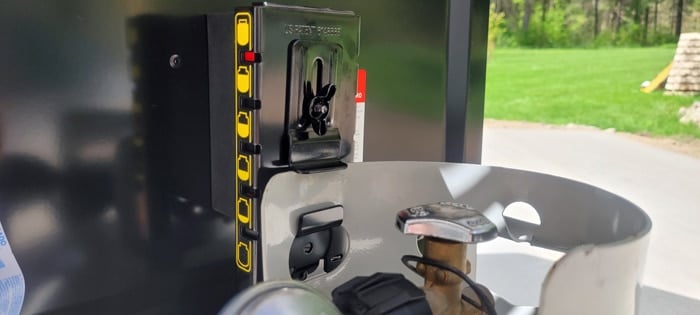
On the right side beneath the shelf is a convenient hook to hang a standard 20-pound propane tank which doubles as a fuel gauge. This hook is a mechanical spring-loaded scale that attempts to show your current remaining fuel with red bars near the various yellow tank-level indicators. Here you can see a full tank does indeed show “full.” Its accuracy with lower tank levels is still unclear. At the very least these indicators give you a great idea where your fuel level is so you needn’t be hit with bad news mid-cook. You just have to remember to look before you cook.
The right side wall features two small rubber knobs for the bottom of the tank to rest against so it doesn’t bounce against the cart.

“Ready to cook on right out of the box”? Let’s Test That.
Weber claims the Slate it is “pre-seasoned and ready to cook on right out of the box…without waxing or oiling.” No further seasoning required? Hmm, this is my skeptical face. So of course I had to test that. I decided an egg would be a good test, since we all know a bad cooktop makes for a terrible experience cooking eggs. How would Slate fare with an egg cooked on it “right out of the box,” pre-heated to a good egg-cookin’ temp of 300° to 325°F?
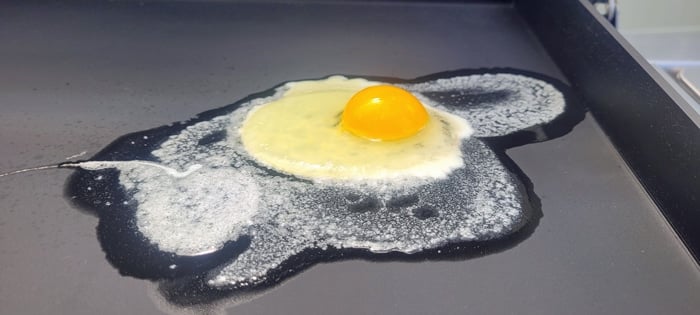
Marvelously!
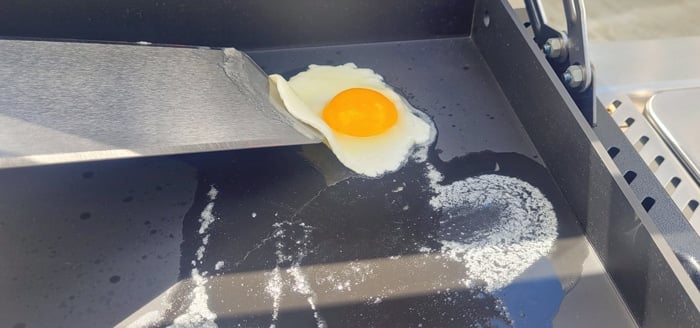
With a little melted butter underneath (because no one cooks eggs on bare steel, seasoned or not), Weber’s griddle spatula slid the egg around almost like a hockey puck on ice. It reminded me of a brand-new Teflon pan. The egg lifted and flipped perfectly with zero stick. Nice job, Weber.
Seasoning and Maintaining Your Steel Cooktop
The impressive results above are not meant to imply that you shouldn’t, or can’t, season the cooktop further. It is, in fact, a rolled carbon steel cooktop. Slate’s Owner’s Manual says “Initial seasoning is not required but if you choose to add another layer of seasoning to your griddle please see seasoning instructions below,” and later, “For optimal results, you may want to add another layer of seasoning to your griddle.” So of course, I did.
Slate’s Owner’s Manual gives some specific seasoning instructions. Other sources have their preferred methods which vary slightly, but all are similar. The generally accepted idea is to add a thin coat of a neutral, high smoke point oil such as avocado or grapeseed oil, to the entire steel cooking surface, as well as the accessible exterior sides. Allow the griddle to heat up on HIGH and smoke off the oil. This darkens the cooking surface and adds a layer of seasoning, keeping it stick-free and rust-resistant. Weber only suggests doing this process once to season, but you can repeat this process a few times, allowing each thin coat to smoke off in between. Weber recommends regularly scraping and then re-seasoning in this manner every two to three cooks to stay in good condition.
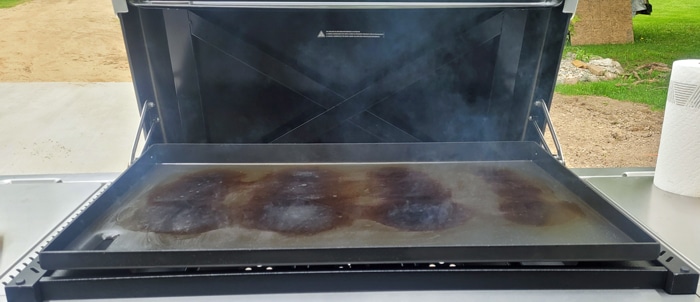
Here is the Slate during the seasoning process. The darkening might be unsightly, but it is normal so never fear. As you continue to cook on it and maintain the seasoning it will develop more of an overall patina and will not be as pronounced as you see here.
Cooking Tests
First up was a general temperature zone “bread test.” I heated the Slate up to 400°F per the built-in display. Bread slices were placed in quick order and flipped in 3 minutes. Wow! They got toasted more than expected in only three minutes. The results indicate fairly even temperatures across the surface, with the back area being slightly cooler and the center being slightly hotter. All in all, not bad. But, was the cooktop actually 400°F? You guessed it — more on that later.

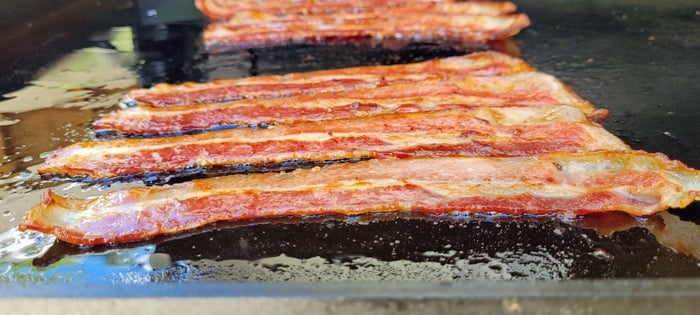
Next, who doesn’t love a griddle for breakfast foods? So, a package of thick sliced bacon seemed proper. Weber’s handy cast iron press shown here will also allow me to test the difference between pressed bacon and bacon cooked au-naturel. In the background, you can see the un-pressed bacon’s edges curling up like they do.
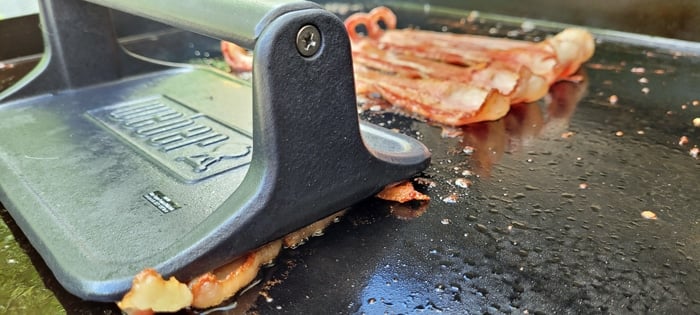
Pressed bacon gets my vote. Nice uniform slices easy to handle and stack on sandwiches.
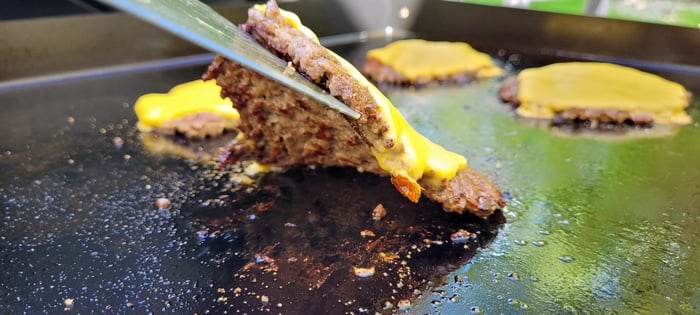
Smash Burger Test
Next, smash burgers.
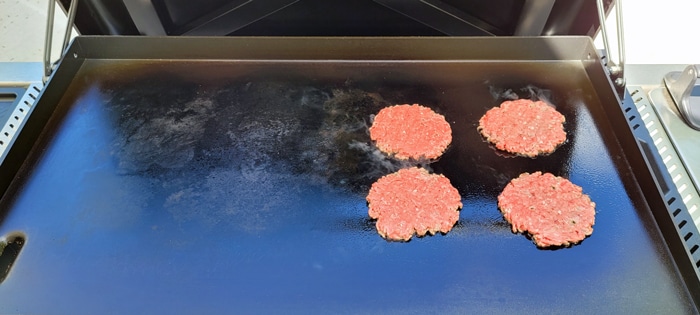
Following The Flat Top King’s “How To Make The Perfect Smash Burgers” recipe, which works on any brand of flat top grill, I got to work. I preheated the griddle on HIGH aiming for about 425°F. I used one pound of ground chuck, divided it into 4 parts, and made loosely 1/4-pound packed balls. Once the griddle reached the proper temp, it was time to place them on the cooktop and smash. Weber’s grill press and a small sheet of wax paper worked beautifully.
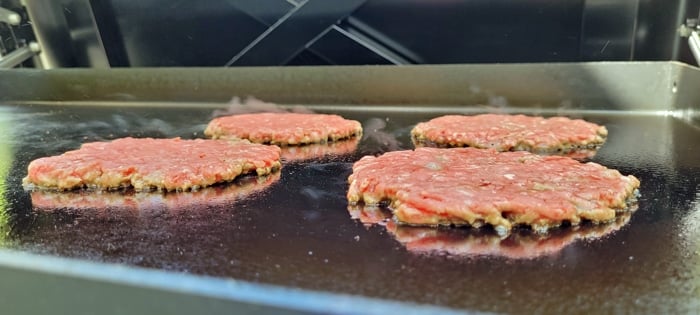
Here you see how much space four quarter-pound patties take up. You can definitely cram them closer together, but a 30-patty capacity? I’ll leave that up to you to decide, but it’s not realistic to me. Make them in batches if you need to cook a lot.
Unlike flipping a burger on a grill grate, with smash burgers you need to work your spatula from the side of the patty in a quick ‘sawing’ motion to release it from its grip on the cooktop surface until it’s separated, then carefully flip it. The thin patty and full contact of the meat to the griddle surface give smash burgers their characteristic sear and crispy edges while maintaining an irresistibly juicy inside thanks to the quick, hot cook.
Yes, grilled burgers are great, but if you’ve never had a proper smash burger cooked on a flat-top griddle, you are missing out. Make it a priority.
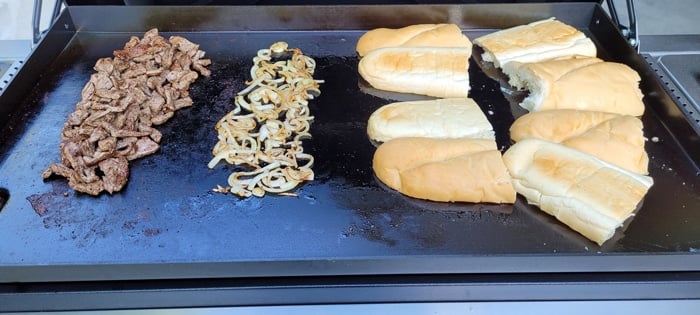
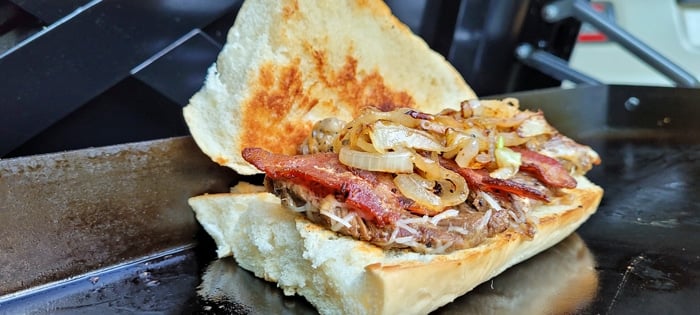
Cheesesteak Test
Next up, cheesesteak sandwiches. Cooking cheesesteaks utilizes different temperature zones since lightly sautéing veggies takes a lower heat than browning meat and toasting bread. For the cook below, I set the left burner on MEDIUM-HIGH, the second burner on LOW, and the right two burners on MEDIUM. The Slate shined, as expected. Making my own riff on the classic, American cheese was added and mixed into the thin sliced seasoned steak once cooked, and Monterey Jack topped it, plus I can’t forget the traditional butter-sautéed onions. And since I’m not labeling this a “Philly,” I decided the bacon I cooked earlier would make a great addition to these cheesesteaks, and the family unanimously agreed. “Huskee’s bacon cheesesteaks” are a new favorite.
Click here for a basic Cheesesteak Recipe.
Display Accuracy
Mentioned earlier, Slate comes with a unique Digital Temperature Display readout located on the front panel. The sensor is a physical probe in contact with the center of the cooktop at all times, in between the second and third burners. The idea is, of course, to tell you the cooktop’s temp without requiring an infrared thermometer. But is it accurate? Drumroll…
Yes and no.
At common cooking temperature ranges of 300° to 400°F, there was an average variance of about 40°F between the onboard display and my infrared, with Slate’s display reading on the low end. However, at high temps, such as the 500s while seasoning and doing other testing, the display and my infrared thermometer were only 10°F, or less, apart. This is when pointing the infrared at the approximate center location of the display’s own probe.
Is the display averaging 40°F low at normal cooking temps enough to cause real-world problems? Maybe.
Accuracy Issues
If you’re cooking something more sensitive to heat such as eggs, and you trust the display but you’re actually cooking 40°F higher, you could brown your eggs prematurely. Realistically speaking, most things cooked on a griddle are moved around regularly, or are flipped fairly quickly, which makes variances less of an issue. In fact, it’s not uncommon to see temperature differences in this range on most griddles. This is especially true if you go from directly overtop of a burner to the area in between them. And remember, Slate’s sensor probe is in one single place on the cooktop and never moves, but we’ll be cooking on the entire cooktop, which we all expect to have highs and lows as we move the food around. Even skillets aren’t perfectly uniform, after all.
Statement from Weber
Weber explains, “The Weber development team leveraged 11 test locations on the griddle surface to record the griddle surface temperature(s) with all valves set to the same burner intensity. For example, with all valves set to ‘Low’ the 11 surface temperatures were measured along with the Digital Read Out Thermocouple under the griddle measuring the griddle bottom temperature. This griddle surface to bottom temperature profile was then recorded as all valve burner intensities were increased (from Low to Med-Low, to Med, to Med-High and then to Hi).”
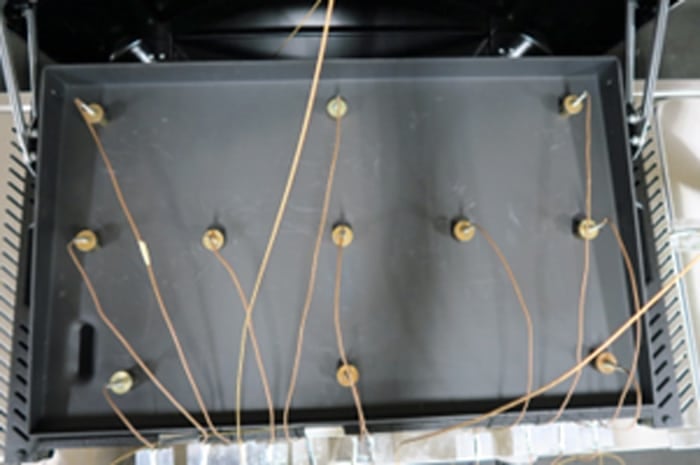
“The Digital Read Out device is programmed to display the average griddle surface temperature based on the surface-to-bottom correlation data. As this is an average griddle surface temperature, there may be some areas of the griddle surface that are hotter than the displayed temperature, and some that are lower than the displayed temperature, but the overall griddle average is well aligned to the display temperature. The intent is to help guide consumers that the griddle average temperature is aligned with what they intend to cook (375 degrees for pancakes, 450 degrees for burgers/vegetables, and 550 degrees for steaks/searing), without the need to purchase a separate IR thermal measurement device.”
I say use that display, let it help and guide you, but do not toss out your infrared.
Assembly
Assembly took about two hours. I worked alone, aside from my son helping me set the cookbox on the cart. Weber recommends having two people for assembly, and states it should take about 90 minutes. I suppose it would go quicker with another person, but I wasn’t in a hurry.
Conveniently, the only tool you’ll need is a Phillips screwdriver. I found that a larger one worked better than a standard-sized one.
Common nowadays, the printed Assembly Guide has nearly no words, aside from a couple of key places where it instructs you to only finger-tighten something, otherwise, it is 99% pictures, and there are some spots where words would surely be helpful. You’re forced to pay very close attention to the details in the pictures if you want to succeed and not have to disassemble some parts and start over. Ask me how I know. Thankfully a QR code takes you to the BILT app with animated instructions, some helpful color-coding, and some, albeit minimal, verbal coaching; a vast improvement from the black and white printed manual for sure.
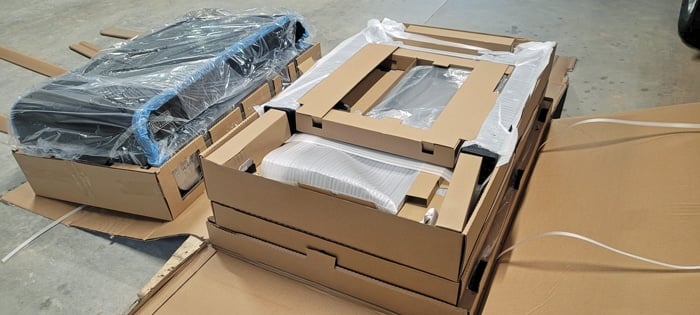
All the parts were there, with only one extra unneeded part, a clip (so be careful not to lose any screws!). Small parts were easy to find in separate baggies and larger parts were all well-protected and easy to identify during assembly. Cut the main box down at the four corners and all the main components are stacked in layers and packed extremely well, as you’d expect from a company that’s been doing this for decades. You’ll have plenty of cardboard to take to the recycling facility after assembly, that’s for sure.
App, Wi-Fi, Connectivity, and Electronics?
The Slate has no electronics aside from the digital temperature display, which is powered by two AA batteries. Therefore it is not Wi-Fi or Bluetooth capable, and there is no app to control the Slate. However, as mentioned above, Weber does utilize a handy app for assembly called BILT (a free install for Android and iPhone) and is easily accessible by scanning the QR code on the Assembly Guide or on the box. This offers a welcome improvement from the black and white pictures-only printed guide.
Final Thoughts
The Slate has been a pleasure to cook on over the last month of testing. Its ease of use ‘right out of the box’ as advertised, featuring a great nonstick cooktop, smooth looks, solid build, powerful burners capable of quick heat-ups, and handy creature comforts and add-ons make it a solid player in the freestanding griddle space. And with the name Weber, you know you’re getting long-term reliability and top-notch customer service should you need it.
At $999 as of the time of this writing for the 36” four-burner model tested here, is it worth the $420 bump up from Weber’s standard 36” four-burner griddle? Value is of course a personal choice, but if you’re familiar with Weber’s upper-tier products, the Slate is sure to fit right in and last many years as a member of your family of outdoor cookers. With only two minor qualms: the floppy side shelf insert and a consistent 40°F average variance between the built-in temperature display and a trusted infrared thermometer at common cooking temperatures, Slate met all expectations and performed like a grand champ.
We award the Slate 36” Rust-Resistant Griddle our Platinum Medal.
Weber Slate Warranty
Cookbox
5 years, no rust through/burn through (2 years paint excluding fading or discoloration)
Hard cover assembly
5 years, no rust through/burn through (2 years paint excluding fading or discoloration)
Stainless steel burner tubes
5 years, no rust through/burn through
Carbon steel cooktop
5 years (excluding rust)
All remaining parts
5 years (excluding normal wear and tear)
We thank Weber for providing a unit for our tests.


Why We Require You To Sign In Before You Can Post Comments
Before you can post a comment or question you must sign into our commenting partner, Disqus. This is helps make sure everyone hanging around the grill is civil. We do not tolerate nastiness, racism, porn, inappropriate language, or attacks on others. All comments are the property of AmazingRibs.com and we reserve the right to quote them, edit them, delete them, and block people from making future comments.
Please leave comments and questions on the page devoted to the same subject so others can see them and our answers when they are reading about that subject. You must enable JavaScript to use the comments section, and you must accept cookies to post comments. Note that the software that runs Disqus is different from the Pitmaster Club so members need to sign into that separately.
Moderators