The first thing to do is look at the bird and remember who is winning this contest and remind yourself that you are smarter than a dead bird. It is not hard once you understand the logic. Here’s a 1 minute video that proves the point.
Go ahead and parade the whole bird around the room and take a few bows, but do the carving in the kitchen, not on the dining table. You need elbow room, you don’t need adoration or the heckling, and you certainly don’t need to ruin the tablecloth.
The second thing to do is to reach for the best carving knife you own. Some folks prefer an electric knife, but I prefer a good carving knife. Just make sure it is sharp or the skin will give you fits. Good carving knives should be professionally sharpened every year or so depending on how often you use them. A honing steel is no substitute for a real sharpening. You can do it yourself and I recommend some sharpening devices in my article about required kitchen tools, or you can take your knives (and lawn mower blade) to a pro once a year.

I have a nice Messermeister Meridian Elite 6 Knife Set but, don’t tell my professional chef friends, the knife I reach for most is my 7.5″ Rapala (above). This cheapo blade has a thin flexible dangerously sharp blade, a wicked sharp tip, and it’s only about $16. It is not strong enough to cut through bone, but there is nothing better for cutting things off bones. When it’s dirty, it goes in the dishwasher and you can’t do that with the fancy knives. When it is dull I hone it and when it no longer holds a razor edge, I chuck it and get a new one. To see all the different sizes available, click here.
Below I will describe the process of carving a turkey (BTW, carving is much easier if you butterfly the bird or break it down into parts before you even cook it).
The goal is to get as much of the meat off the bones as possible. You want to slice it across the grain so it is easier to chew, and you want as many pieces as possible to have a bit of tasty skin.
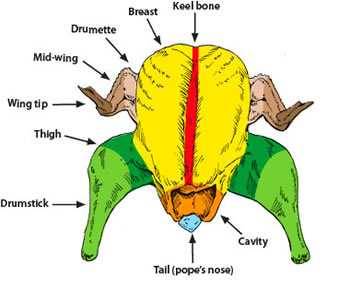
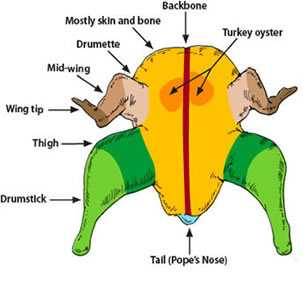
1) Hone the knife with a honing steel. A sharp knife has a razor thin edge, and with use that edge can bend. A honing steel can straighten it out. A honing steel is a rod that has a sandpaper like surface. I know you’ve see TV chefs hone knives by crossing the steel and knife in front of them and zip zop, they’re done. Don’t try it. It’s not accurate and it’s a good way to add your bodily fluids to the gravy.
Begin by placing the tip of the rod on a table and hold it vertical, perpendicular to the table. Hold the knife by the handle firmly in your other hand. Rest the part of the knife closest to your hand against the top of the steel and tilt it to a 45° angle. Then roll your wrist so it is halfway between 45° and the steel, about 22.5°. Draw the knife slowly towards your body gently sliding it downward towards the table at the same time. Hone the entire blade, right to the tip. Repeat the process on the other side of the blade. Hone each side alternatively about 3 or 4 times.
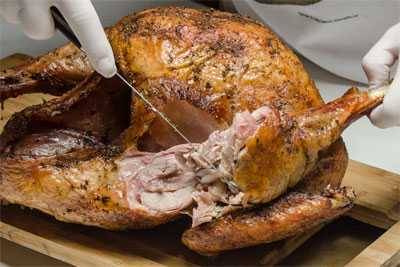
2) No need to rest the bird, just start hacking away fresh from the cooker. You will need a cutting board with gutters to catch the ample juices, and a serving platter or 2. Let’s start with the dark meat. Take a paper towel and grab the top of a drumstick and bend it until the joint between it and the thigh is visible. Flex it back and forth until you have a good clear shot at the knee from behind. Sever the meat around the joint, and then cut between the ball and socket to remove the leg.
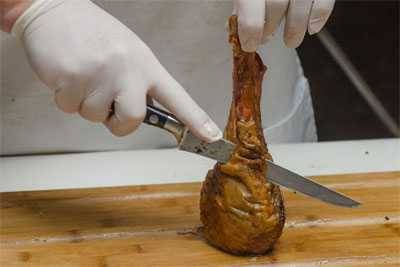
3) You can serve the drumstick whole for the cavemen like me, or you can stand it on the meaty end and slice downward, removing the meat. I usually carve one and leave one whole.
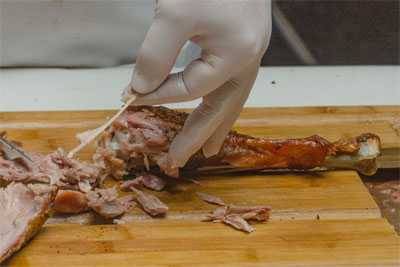
4) Now pull out those pieces of stiff tendon with your fingers. Repeat the process with the other leg.
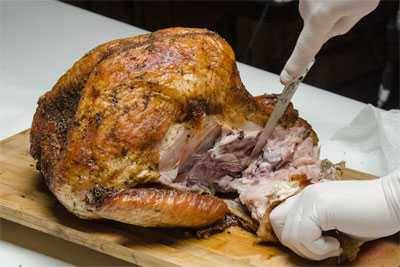
5) Now hold the thigh and cut through the skin that connects it to the body. Bend the thigh back to find the hip joint. Cut through the ball joint removing the thigh.
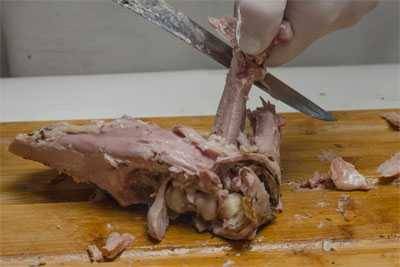
6) You can serve the thigh whole, but then the choicest pieces of dark meat go to only 2 guests. If you have more people who want thigh meat, you need to remove the bone so you can slice the meat. To do this, flip the thigh skin side down, and run the knife around the bone and under it until you can lift it out.
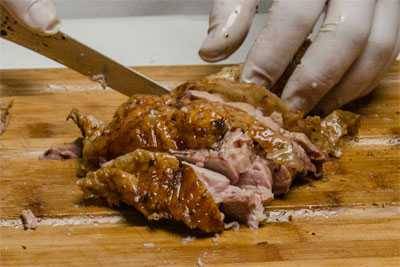
7) Now turn the thigh skin side up and cut it into slices across the grain. Repeat with the other thigh.
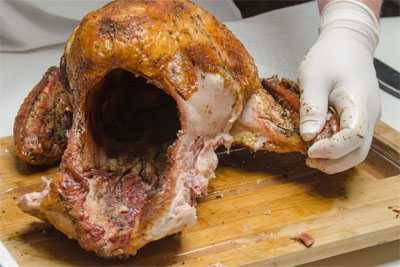
8) Now grabbing a wing, bend it back to locate the shoulder joint and cut through the tendons holding together the ball and socket.
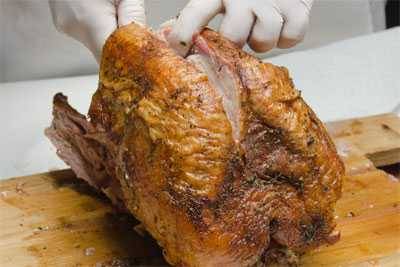
9) Now for the breasts. The old fashioned method was to cut slices off the breasts while they were still attached to the carcass. There are several things wrong with this approach. First of all, it is awkward. It is hard to get even slices especially as your knife approaches the rib cage, which is curved. The process is even more awkward because the carcass is wobbly. Besides, it’s not fair because the person who gets the first slice gets most of the skin! The old fashioned method has you cutting with the grain, and slices cut with the grain is always chewier than slices cut across the grain. The better plan is to remove each side of the breast from the carcass and then cut it into beautiful slices across the grain so it is more tender. Here’s how: In the middle of the two lobes is the breast bone, sometimes called the keel bone. Cut down along one side of the breast bone with long strokes until the knife hits the rib cage.
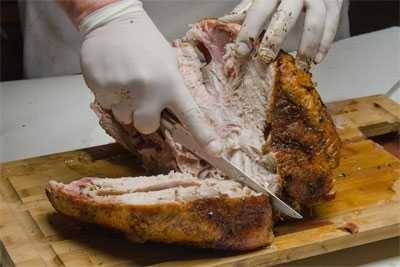
10) Then tilt the knife and work along the rib cage with long strokes until the breast falls away in one football shaped hunk. On the front the knife will slide along the wishbone. Don’t forget to pull it out from under the skin flap!
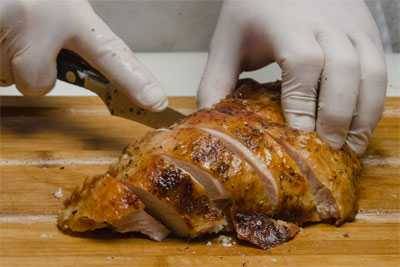
11) Lay each breast skin side up on a cutting board and slice it across the grain in slices at least 1/4″. I like thicker slices, especially if the meat is tender. But there is a trick to slicing it properly (I’ll bet you’re not surprised to hear that). Remember how we loosened the breast skin to put rub under it? It is no longer firmly attached to the meat. If we’re not careful the skin will slip slide around and you won’t get neat slices with skin with each slice of meat. The trick is to have a really sharp knife. Place it on the center of the breast near its handle. Place the thumb and forefinger of your free hand on either side of the knife pressing down on the skin gently. In one gentle steady stroke, with slight downward pressure, draw the knife toward yourself across the skin, cutting down through it and into the meat. If you use a dull knife or a serrated knife, or if you use a sawing motion, the skin will move around. This takes a bit of practice.
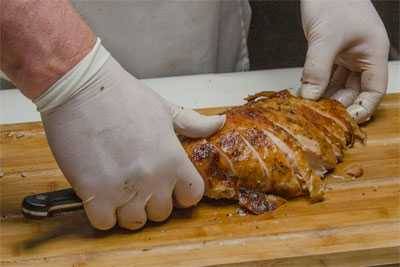
12) When you have the meat cut, re-assemble it into a breast shaped presentation in order to keep the meat warm. If you are careful, you can slide your knife under the assembly and lift the whole thing onto the serving platter. On second thought, play it safe and use a spatula.
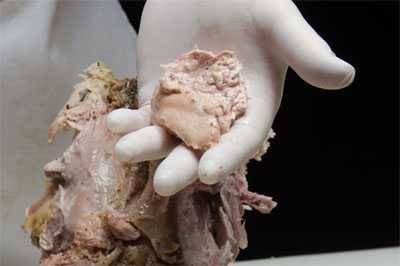
13) Just before serving the bird, give yourself a reward. Flip the carcass over so the backbone is facing up. Run your fingers along the sides of the backbone and near the joints where the wings were attached, right under the shoulder blades, you’ll find tender, juicy blobs of meat, each about the size and shape of the meat from a large oyster, hence the nickname, turkey oysters. You can pop them out with your fingers. Savor them for a job well done.
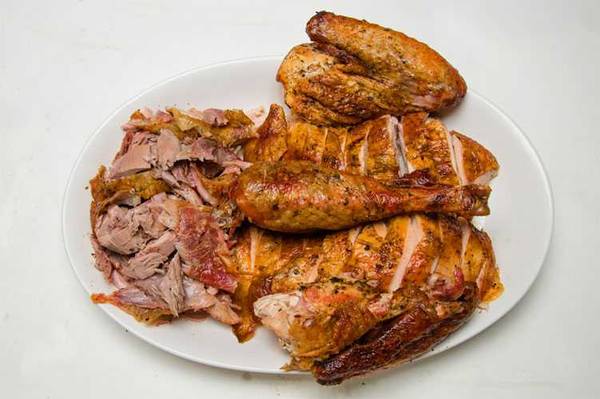
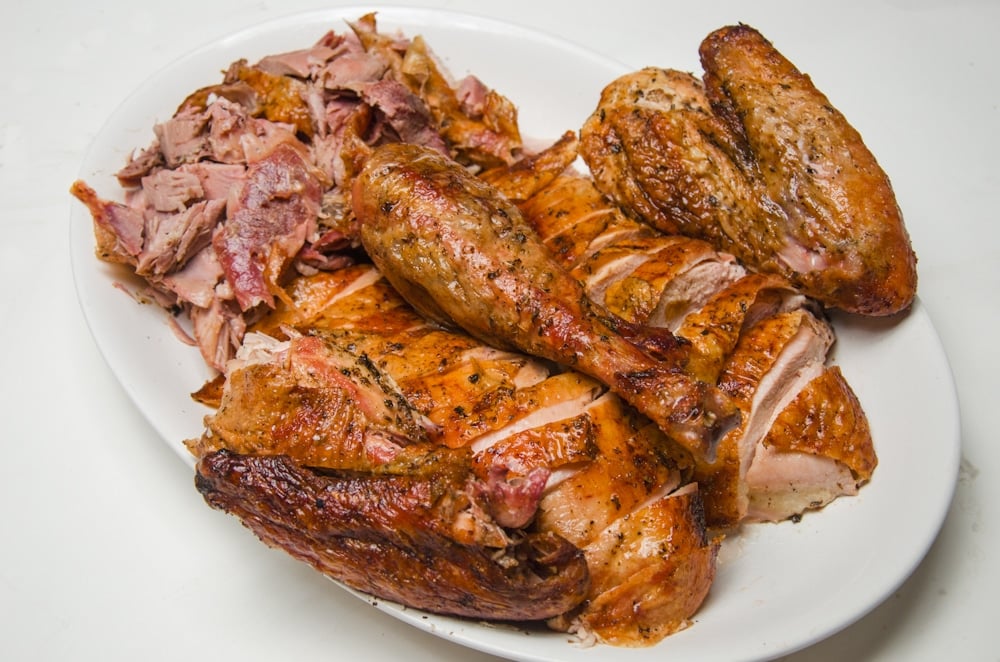
14) Now, if you made the superb thin, clear gravy in my BBQ and Grilled Turkey Recipe: The Ultimate Turkey Easily Adapted To Cooking Indoors recipe, pour a little gravy over the top of the meat in the platter, enough to moisten it but not drown it.


High quality websites are expensive to run. If you help us, we’ll pay you back bigtime with an ad-free experience and a lot of freebies!
Millions come to AmazingRibs.com every month for high quality tested recipes, tips on technique, science, mythbusting, product reviews, and inspiration. But it is expensive to run a website with more than 2,000 pages and we don’t have a big corporate partner to subsidize us.
Our most important source of sustenance is people who join our Pitmaster Club. But please don’t think of it as a donation. Members get MANY great benefits. We block all third-party ads, we give members free ebooks, magazines, interviews, webinars, more recipes, a monthly sweepstakes with prizes worth up to $2,000, discounts on products, and best of all a community of like-minded cooks free of flame wars. Click below to see all the benefits, take a free 30 day trial, and help keep this site alive.
Post comments and questions below
1) Please try the search box at the top of every page before you ask for help.
2) Try to post your question to the appropriate page.
3) Tell us everything we need to know to help such as the type of cooker and thermometer. Dial thermometers are often off by as much as 50°F so if you are not using a good digital thermometer we probably can’t help you with time and temp questions. Please read this article about thermometers.
4) If you are a member of the Pitmaster Club, your comments login is probably different.
5) Posts with links in them may not appear immediately.
Moderators