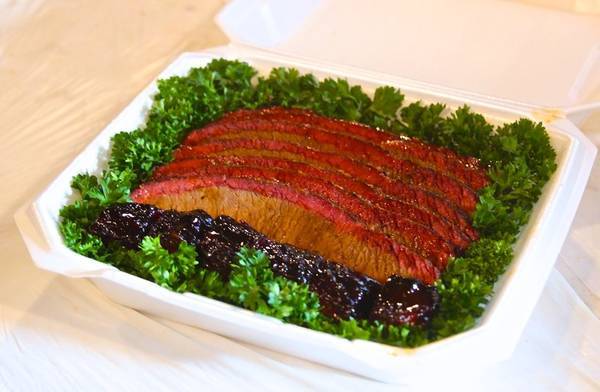
Create first-place-worthy smoked brisket thanks to this recipe from top competition BBQ team Travis Clark of Clark Crew BBQ.
To anyone schooled in the art of true Texas brisket, many things about competition-style brisket seem blasphemous. In the Lone Star State, success is the product of simplicity: the brisket is lightly trimmed, seasoned with salt and pepper, then smoked for 12+ hours until ultra-tender. That’s it.
Enter the world of competition BBQ, however, and brisket becomes an entirely different beast. Teams vie to pack maximum flavor into the one or two bites taken by each judge. For competition-style brisket, most, if not all, of the external fat is removed for maximum bark creation and flavor retention; salt and pepper are replaced with layers of complex rubs; flavor and moisture enhancers are injected deep within the meat, and the whole thing is wrapped in foil (i.e. the Texas crutch) halfway through the cooking process to ensure tenderness.
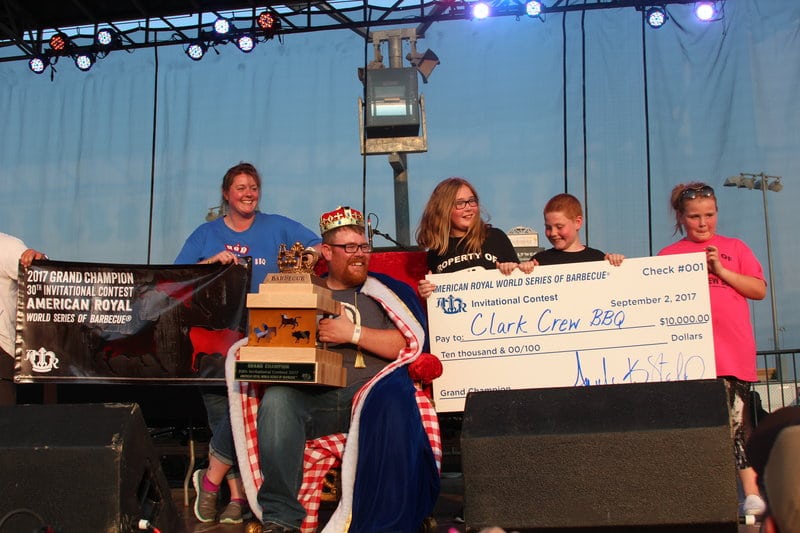
Given the complexity of creating an award-winning brisket, I turned to Travis Clark of Clark Crew BBQ for his input. One of the hottest cooks on the circuit, winner of the 2017 American Royal Barbecue Invitational, and owner of Clark Crew BBQ restaurant in Oklahoma City, OK, Travis certainly knows his way around a brisket. He even offers classes posted on the team’s website.
“I’ve been cooking brisket a long time, and it is by far my favorite category to cook in a competition,” says Travis. “In fact, I’ve won a World Championship title in brisket and our team has been named KCBS Team of the Year in brisket. While there are lots of ways to do it, I want to share my award-winning method with you.”
Lucky us! I asked him where to begin. His reply: “My favorite way of preparing brisket for competition is to start with an 18 to 20 (8.2 to 9.1 kg) pound Snake River Farms American Wagyu brisket. Once you try one of these,” says Travis, “it’ll be impossible to go back to anything else!”
Starting with Wagyu beef does seem like a great way to beat the competition right off the bat. “You’ll also notice that I separate the point from the flat, as they both cook differently, and that helps create better bark over the entire surface. Typically I’ll trim the brisket on Tuesday for a Friday/Saturday competition in order to cut down on the on-site prep work.” Good tip! “I also inject my competition brisket, as I really feel that it enhances this tough cut. Once injected, I like to start the brisket hot and fast before dropping the temperature. I find this does something really special to a Wagyu brisket, including creating a great sear and plumping it up. Finally, there are three keys to a successful competition brisket – always burn a clean fire free of thick black smoke, always wrap the brisket based on color versus temperature, and pull the brisket based on how tender it feels.”
You can see why Travis has won so many brisket competitions. Here is his complete competition brisket recipe. Note that some portions of the recipe are based on his personal experiences, such as exact measurements for the four rubs, overall cooking time, and the look/feel of the meat. That said, this interpretation of Travis Clark’s technique is sure to produce excellent results at your next contest!
Makes:
Takes:
Ingredients
- 1 packer Wagyu brisket (18-20 pounds (8.2 to 9.1 kg))
- 6.5 ounces Kosmos Q Brisket Mop
- 20 ounces beef broth or beef consommé
- 2 tablespoons of your favorite BBQ sauce
- 2/3 cup Kosmos Q Reserve Blend Brisket Injection
- 24 ounces water
- 1 teaspoon ground white pepper
- 3 tablespoons Kosmos Q Texas Beef rub
- 3 tablespoons Big Poppa Smokers Double Secret Steak rub
- 5 tablespoons Eat Barbecue Most Powerful Stuff rub
- 3 tablespoons Kosmos Q Hot Dirty Bird rub
- 1/4 cup of your favorite BBQ sauce
These recipes were created in US Customary measurements and the conversion to metric is being done by calculations. They should be accurate, but it is possible there could be an error. If you find one, please let us know in the comments at the bottom of the page
Method
- Prep. Combine the Kosmos Q Brisket Mop, beef broth, and BBQ sauce in a jar with a tight fitting lid and shake until combined. Refrigerate for a least two days before smoking the brisket.
- Prepare the brisket by separating the point from the flat (learn more about the anatomy of a whole brisket here) then removing as much of the fat and tough silverskin as possible.
- Prepare the injection by combining the Kosmos Q Reserve Blend Brisket Injection, water, and white pepper in a large bowl and blend well.
- Pour the injection mix into a narrow container so that it is easy to suck the liquid up with the injector (learn more about injectors and injecting here). Place the brisket flat in a full sized aluminum pan. Fill the injector with liquid and insert the needle into one side of the brisket flat, pushing it as close to the center of the brisket as possible. Slowly push the plunger while gradually easing the needle out of the brisket. Continue injecting the brisket every 1 1/2 inches (3.8 cm), then repeat on the opposite side, filling it with as much of the injection liquid as possible [at least 12 ounces or 1 1/2 cups (355 mL)]. Inject the brisket point all over with as much liquid as possible, at least 4 ounces [1/2 cup (118.3 mL)]. Let the brisket rest for 30 minutes before adding the rub.
- Lightly season the brisket and flat with Kosmos Q Texas Beef rub. Follow with a light coating of Big Poppa Smokers Double Secret Steak rub. Add a medium coating of Eat Barbecue Most Powerful Stuff rub. Lastly, add a light coating of Kosmos Q Hot Dirty Bird rub.
- Place the brisket flat and point in a clean aluminum pan and chill overnight uncovered.
- Fire up. Prepare a smoker for indirect cooking. Alternatively, you can set up a charcoal grill for 2-zone cooking by placing a chimney full of lit charcoal briquets on one side of the grill's charcoal grate in order to create direct and indirect cooking zones. Adjust the smoker or grill vents to bring the temperature to about 400°F (204.4°C) and add 4-5 fist sized chunks of your favorite smoking wood to the charcoal for flavor.
- Cook. Remove the brisket flat and point from the aluminum pan and place on the smoker or the indirect side of the grill and allow them to smoke for 30 minutes to create a good sear and plump them up.
- Reduce the temperature of the smoker or grill to 275°F (135°C) and allow the brisket to cook until it has a nice mahogany color and the beginning of a nice bark, approximately 160-170°F (71.1-76.7°C) internal temperature. Wrap the brisket flat in a double layer of aluminum foil along with 6-8 ounces [3/4 to 1 cup (177.4-236.6 mL)] of the mop mixture. Wrap the brisket point in a double layer of foil along with 4-6 ounces [1/2 to 3/4 cup (118.3-177.4 mL)] of the brisket mop. Return the flat and point to the smoker or indirect side of the grill and continue cooking until they are tender, approximately 203-206°F (95-96.7°C) internal temperature for the flat and 210°F (98.9°C) for the point.
- Once tender, remove the flat and point from the smoker or grill and carefully vent the foil to release the steam to stop the cooking process. Place the meat in a holding box such as a Cambro or faux Cambro for at least an hour.
- Serve. Once you are ready to prepare the brisket for the turn-in box, unwrap the point from the foil, reserving the liquid. Cut the brisket point into 3/4-inch to 1-inch (1.9 to 2.5 cm) cubes. Brush the burnt ends with your favorite BBQ sauce and place in an aluminum half pan. Place the pan on the smoker or the indirect side of the grill for approximately 5 minutes to set the sauce.
- Remove the brisket flat from the foil and add the liquid to the liquid from the point. Pour all the liquid from the foil through a fine mesh strainer to separate the liquid (“au jus”) from any solids.
- Slice the flat against the grain. The slices should be approximately the thickness of a pencil [about 1/4” (6.4 mm)]. Brush both sides of each slice with the au jus. Turn in brisket slices and burnt ends according to contest rules (traditionally in a “blind” Styrofoam turn-in box).


High quality websites are expensive to run. If you help us, we’ll pay you back bigtime with an ad-free experience and a lot of freebies!
Millions come to AmazingRibs.com every month for high quality tested recipes, tips on technique, science, mythbusting, product reviews, and inspiration. But it is expensive to run a website with more than 2,000 pages and we don’t have a big corporate partner to subsidize us.
Our most important source of sustenance is people who join our Pitmaster Club. But please don’t think of it as a donation. Members get MANY great benefits. We block all third-party ads, we give members free ebooks, magazines, interviews, webinars, more recipes, a monthly sweepstakes with prizes worth up to $2,000, discounts on products, and best of all a community of like-minded cooks free of flame wars. Click below to see all the benefits, take a free 30 day trial, and help keep this site alive.
Post comments and questions below
1) Please try the search box at the top of every page before you ask for help.
2) Try to post your question to the appropriate page.
3) Tell us everything we need to know to help such as the type of cooker and thermometer. Dial thermometers are often off by as much as 50°F so if you are not using a good digital thermometer we probably can’t help you with time and temp questions. Please read this article about thermometers.
4) If you are a member of the Pitmaster Club, your comments login is probably different.
5) Posts with links in them may not appear immediately.
Moderators