


Kick canned baked beans to the curb in favor of this home made masterpiece!
They don’t call it Beantown for naught. For it was in Boston that the notion of mixing beans with molasses was conceived and still reaches the peak of perfection there.
Because beans can be dried and stored forever, they have been a popular source of protein for centuries. In France, stewed or baked beans reached their zenith in cassoulet, a recipe for beans baked in an earthenware pot with sausages, poultry, pork, and even pork skins. In Spain it was Alubias con Arroz, Beans and Rice, often perked up with chorizo, a spicy sausage, or another version without the rice called Fabada. In Portugal it is Feijoada, beans, beef, and pork stewed together. In Germany Westphalian Stew was built on with bacon and beans.
The Boston bean tradition may have been pilfered from native North Americans. The Penobscot tribe in Maine was known to cook beans by digging a hole in the ground, lining it with large rocks, heating them by starting a wood fire, and then placing a clay pot of beans in the hole, covering it with dirt, and letting it simmer for up to eight hours.
Boston became a major port of entry for goods to the colonies, and among the highest volume imports was molasses, dark cane sugar from the Caribbean. Nobody knows who had the bright idea of baking beans in a pot with salt pork and molasses, but the canned combo now occupies miles of shelf space in every American grocery. Well, you can buy it canned, with all the additives and artificial ingredients, or you can make it properly and to your taste from scratch, with real molasses. And it’s easy. As background, you should read my article on the Science of Beans.
These are not sweet, but you can make them sweet
The original Boston Baked Beans were baked in an earthenware pot, but it can be made in just about any pot or saucepan. The original recipe was sweetened with molasses, but the beans were not as sweet as you expect them to be, and I have stayed true to tradition with this recipe
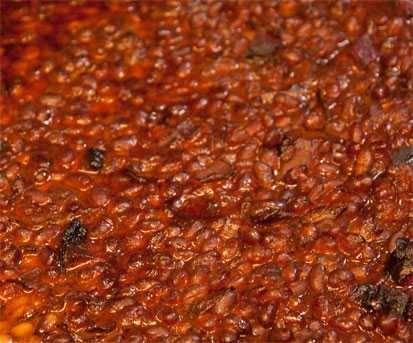
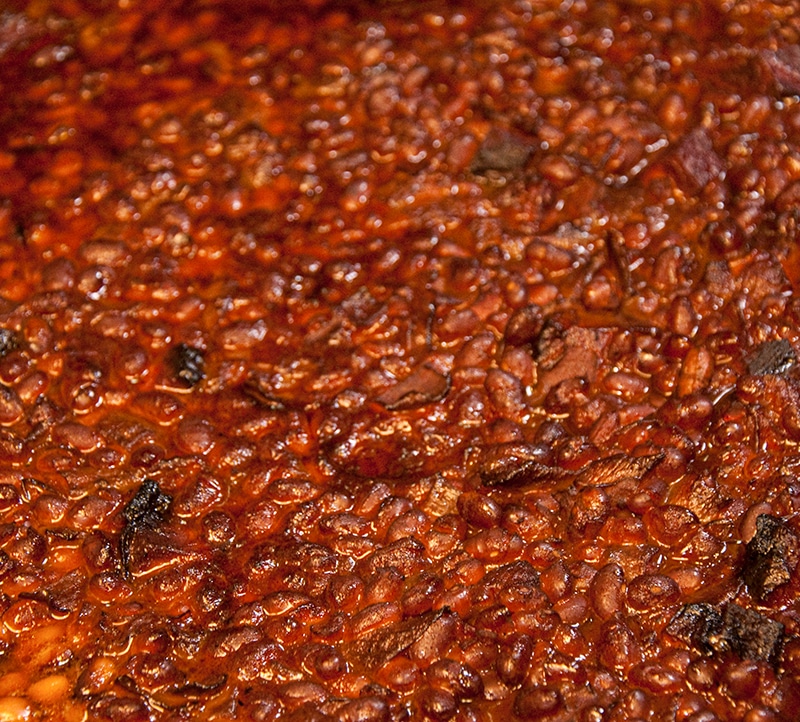
Your kids are probably not gonna like the traditional original Boston Baked Beans recipe below because the dominant taste is, well, beans. Most of us are used to the sweet stuff. Here’s how you can amp these up the way barbecue restaurants do. This is how the beans in the picture above were cooked.
Make the home made baked beans recipe below and then taste them. If you want them sweeter and richer, add 1/4 to 1/2 cup (59.2 to 118.3mL) of sweet tomato based Kansas City style BBQ sauce. The exact amount will depend on the brand of sauce. Then taste again. Not sweet enough? Add brown sugar a tablespoon at a time. When it is just right, cook another 5 minutes before serving with your favorite BBQ staples and sides.
Now if you REALLY want to take these beans over the top, place the pan in your smoker directly below the meat so they can catch all of those flavorful drippings.
Why molasses?
Molasses is important because in colonial days Boston was a major importer of the sugar syrup from the Caribbean. It was made into rum which was sent to Africa to trade for slaves who were sent to the Caribbean to make more molasses.
The Great Molasses Flood in 1919 killed 21 people and injured more than 100 when a vat exploded and unleashed more than 2,000,000 gallons of the sticky stuff. According to newspaper reports, 30 foot waves of molasses crashed through the streets destroying buildings and sweeping away horses and wagons.
There are three grades of molasses and any one will work in this recipe. Click here to read more about molasses.

Simple BBQ Boston Baked Beans Recipe
Rate this RecipeIngredients
Method
- Prep. Coarsely chop the onion.
- Cook. You can cook on a stovetop, in your indoor oven, in your smoker under the meat, or on your grill for 2-zone cooking.
- On the smoker or grill. Over the hot part of the grill, on the sideburner, or indoors on your stovetop, warm a 9 x 13" (23 x 33cm) pan and add the bacon. Cook the bacon until brown on both sides, but remove it before it is hard and crunchy. Pour off all but 1 tablespoon of the fat and save it in the fridge for another day.
- Add the onion and cook until it is limp, but not brown. The bacon residue on the bottom of the pan may get really dark. If this happens, add a few tablespoons of water to deglaze the bottom, and scrape off this flavorful fond with a wooden spoon. As the water evaporates, the onions will fry and sizzle.
- Add 2 cups (473.2mL) hot water or stock. If you use dried beans add 3 cups (709.8mL) hot water or stock. Dump in the beans, molasses, mustard, bay leaf, pepper, and bacon. If you are using leftover barbecue meat, add it now. Stir thoroughly and bring to a boil and cut it back to a simmer immediately. Once they are back on the indirect side, start the smoke rolling.
- If you are cooking ribs, pulled pork, or beef brisket, you can put the beans in a pan under the meat. It will catch the flavorful rub laden drippings (fat and all). If you have a hot side, every 30 minutes rotate the pan 1/4 a turn so one side is not always facing the heat, and stir, scraping the bottom, to prevent the beans from sticking to the bottom and burning. Cooking time will be about 2 to 3 hours depending on several variables. Exact cooking time will have to do with the variety of bean, your grill, the weather, and other variables. If you used dried beans, cooking time will depend on how long you soaked. Regardless of method, stir regularly to make sure they don't stick and burn. If the beans begin to dry out, add water. If they are too watery, take off the lid and turn up the heat to evaporate water. Taste the beans to see if they're the right tenderness for you after about 1 hour if you used canned beans, and 3 hours if you used dried. If needed, when they are ready, you can take them off and put them on a burner with a lid on the pot, flame on low, and hold beans for hours. Just before serving, taste and add salt, pepper, barbecue sauce, or more molasses if you like.
- On a stovetop. Do it in a pot with a cover on and turn the flame to just above low and simmer, don’t boil, for 2 to 3 hours.
- In the oven. Do it in a pot with a cover on, put the pot on a middle rack and set the temp for 325°F (162.8°C).
- How to sweeten them. Make the recipe below and then taste them. If you want them sweeter and richer, add 1/4 to 1/2 cup (59.2 to 118.3mL) of sweet tomato based Kansas City style barbecue sauce. The exact amount will depend on the brand of sauce. Then taste again. Not sweet enough? Add brown sugar a tablespoon at a time. When it is just right, cook another 5 minutes.
- Serve. Serve the baked beans while still hot.


Why We Require You To Sign In Before You Can Post Comments
Before you can post a comment or question you must sign into our commenting partner, Disqus. This is helps make sure everyone hanging around the grill is civil. We do not tolerate nastiness, racism, porn, inappropriate language, or attacks on others. All comments are the property of AmazingRibs.com and we reserve the right to quote them, edit them, delete them, and block people from making future comments.
Please leave comments and questions on the page devoted to the same subject so others can see them and our answers when they are reading about that subject. You must enable JavaScript to use the comments section, and you must accept cookies to post comments. Note that the software that runs Disqus is different from the Pitmaster Club so members need to sign into that separately.
Moderators