


Curing meats such as bacon, ham, or pastrami is fun and the results are often better than store bought. But curing is very different from any other recipe because you are using a preservative, sodium nitrite. You must read and thoroughly understand my article on the Science Of Curing Meats before attempting to cure meat or before you ask any questions regarding this corned beef brisket recipe.
About homemade corned beef
When we mention homemade corned beef your first question has to be “Why bother?”. And the answer is simple: Making your own corned beef brisket recipe is better than anything you could ever pick up at your local grocery store.
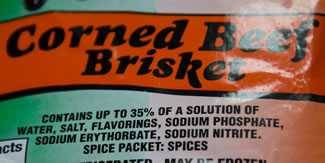
Why? The commercial stuff, especially the cheap stuff mass marketed for St. Patrick’s Day for Irish wannabes, is usually made by taking shortcuts that result in odd flavors and gelatinous textures.
The homemade stuff from this corned beef recipe can also be cheaper. And it’s easy. And you can customize it. Once you’ve had the real deal, you can’t go back. It just takes time. So start now.
Corned beef has no corn. OK, maybe the steer ate some corn, but no corn is harmed in the process of corning beef. Actually, to be precise, corn was the old British name for grain before corn on the cob was discovered in North America and usurped the name. “A corn of salt” was as common an expression as a “grain of salt” is today. So corned beef is really just another name for salted beef.
History
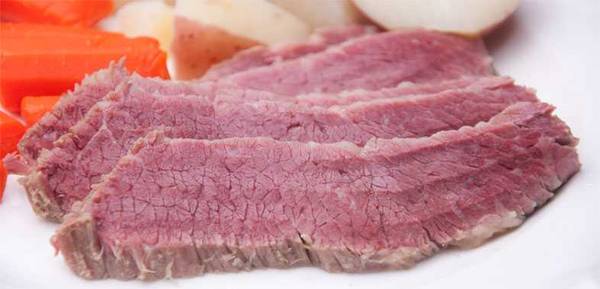
Corned beef was a World War II staple among civilians in Great Britain and among the troops in Europe because fresh meats were hard to come by. It came in a can. Sliced corned beef is especially popular in Jewish delicatessens where it is a sandwich staple. But, you can make it even better with our corned beef recipe!
So corning has become another name for curing or pickling. Yes, we are pickling the meat in this corned beef brisket recipe. These are ancient processes invented for preserving meat by packing it in salt or soaking it in a concentrated brine, long before refrigerators. In recent years, people have also begun curing meat by injecting it with salt. The process was probably discovered when some ancient hunter speared a deer and it fell into the ocean and washed ashore a couple of weeks later. Surprisingly instead of bloating and turning foul, the meat had been preserved, and tasted pretty good.
The process
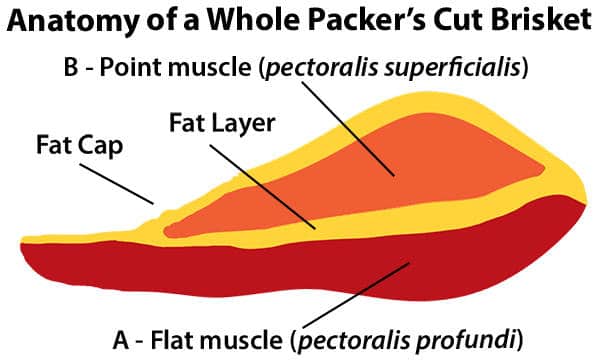
A vital part of the process for this corned beef recipe is your selection of the meat. Corned beef is usually a section of the brisket. It is sometimes made from navel, but that cut is so fatty and sinewy that I cannot recommend it. The waste is great and the and eating experience is inferior. I have seen other muscles used, but not very often. Brisket is cut from the pectoral muscles, a pair of thick muscles from the steer’s chest, and a whole “packer” brisket is a large hunk of meat made of two muscles and can weight 12 to 18 pounds. It can be bought whole, but is usually cut near the middle and sold as flat or point.
These are heavily worked muscles and are tough cuts. Making them into corned beef is a great way to tenderize and flavorize this otherwise lesser cuts, and a great way to preserve meat in the days before refrigeration. Do it!
Since this corned beef recipe uses beef brisket, which is thicker at one end than the other, we recommend you separate the two muscles, the point and the flat, if they are not already separate when you buy the meat. This will leave you with slabs no thicker than 3-inches and will speed the curing time and insure that the cure penetrates all the way to the center. While you’re at it, remove the copious amounts of fat from between the two muscles. It does nothing to enhance flavor, in fact, it tastes yucky, and it impedes movement of the cure.
My experience
When I was in high school I lived in Florida on Merritt Island (MIHS Mustangs, Class of ’67), spitting distance from Cape Canaveral as Cape Kennedy was known then. Many of the parents of my classmates worked on the space program. When there were launches at night, you could read a newspaper in my backyard by the light. The ground trembled, and the dogs howled.
I was also a lifeguard at a hotel on Cocoa Beach that was partially owned by the seven original astronauts. And because they hung out there, I got to know them. I even got darkroom lessons from the AP photographer who had a room there that he used as a darkroom. Just up the road was my favorite restaurant, Wolfie’s, a deli famous for corned beef and pastrami and pickled green tomatoes.
The corned beef sammy in space
Gus Grissom was my favorite of the Seven Originals. He and John Young rode the first manned two-man Gemini capsule on March 23, 1965. Well, it turns out that the astronauts loved Wolfie’s too. Since they didn’t love the food they were given to eat in space, Young slipped a corned beef sandwich from Wolfie’s into his space suit. Young had the honor of being the first astronaut to be reprimanded about his behavior in space because of this stunt. These guys were test pilots, fearless, ladies men, and jokesters, who didn’t always play by the rules. We won’t get into what happened in the room they kept for themselves at the hotel. I’ll never tell. Unless you’re buying.
While I’m reminiscing, I’ll never forget the evening of January 27, 1967. I was at a Mustangs basketball game when the game stopped and the PA asked all NASA engineers and other contractors to report to the Cape. We later heard that Gus, Ed White, and Roger Chaffee had burned to death in a pre-flight practice in the Apollo 1 capsule. I was heartbroken at the passing of my hero. I always think of him when I have a corned beef sammy.
Awesome Corned Beef Recipe

Takes:
Ingredients
Adjusting Curing Ingredients
Cure time: 0.8 days
These recipes were created in US Customary measurements and the conversion to metric is being done by calculations. They should be accurate, but it is possible there could be an error. If you find one, please let us know in the comments at the bottom of the page
Method
- Prep. Find a proper non-reactive container large enough to handle 1 gallon (3.9 L) of brine and the meat as described in our article Science Of Curing Meats Safely. Clean it as described.
- Mix the cure ingredients and the distilled water. Stir until they dissolve.
- Trim. If the meat you buy has two layers of meat separated by a layer of fat, you have both flat and point muscles. Separate them and remove the fat. Also remove as much fat as possible from the exterior unless you plan to use some of it for pastrami. In that case, leave a 1/8″ (3.2 mm) layer on one side. Because corned beef is cooked in simmering water, the fat just gets gummy and unappetizing. But if you plan to make pastrami from it, you will be smoking the meat and in that case the fat gets succulent and lubricates the sandwich. I like to buy a full packer brisket and separate the point from the flat, and cut the flat in half. That gives me 3 manageable hunks of 2 to 4 pounds each. If you leave the point attached to the flat beneath, it will be very thick and take longer to cure, and there’s an ugly hunk of fat between them.
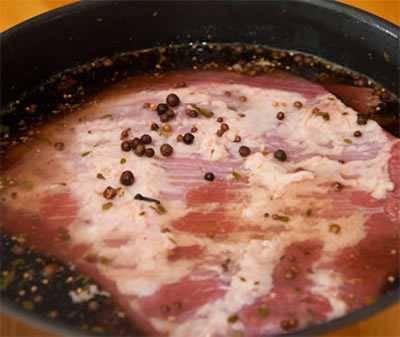
- Cure. Add the meat to the curing solution. If you have more than one slab do not let them lie on top of each other. If you do, they will act like one thick slab and curing will take much longer. The meat might float, so put a plastic bowl filled with brine on top of the meat until it submerges. The meat will drink up brine so make sure there is enough to cover it by at least 1″ (25 mm) or else you’ll find the meat high and dry after a few days. Refrigerate. Let it swim for as long as the calculator tells you. Move the meat every day or so just to stir up the cure. The liquid will get cloudy from juices that come out of the meat, but it should never smell bad. When you are done, the exterior of the meat will be pale tan or gray and if you cut into it, it should not look too different than normal raw meat, just a little pinker.
- Cook. Now decide how you want to cook it. You can make traditional corned beef and cabbage boiled dinner, you can make corned beef hash, you can make Rockin Reuben Sandwiches, or turn it into Close to Katz’s Pastrami like in this video from our friends at ThermoWorks.
Why We Require You To Sign In Before You Can Post Comments
Before you can post a comment or question you must sign into our commenting partner, Disqus. This is helps make sure everyone hanging around the grill is civil. We do not tolerate nastiness, racism, porn, inappropriate language, or attacks on others. All comments are the property of AmazingRibs.com and we reserve the right to quote them, edit them, delete them, and block people from making future comments.
Please leave comments and questions on the page devoted to the same subject so others can see them and our answers when they are reading about that subject. You must enable JavaScript to use the comments section, and you must accept cookies to post comments. Note that the software that runs Disqus is different from the Pitmaster Club so members need to sign into that separately.
Moderators