A Few Asian Style Seasonings Really Bump Up The Flavor Of Bacon
Curing meats such as bacon, ham, or pastrami is fun and the results are often better than storebought. But curing is very different from any other recipe because you are using a preservative, sodium nitrite. You must read and thoroughly understand my article on the Science Of Curing Meats before attempting to cure meat or before you ask any questions.
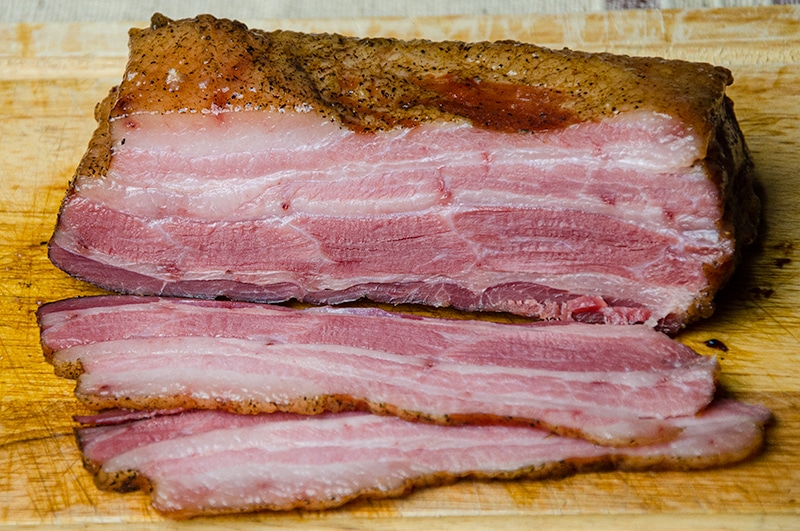
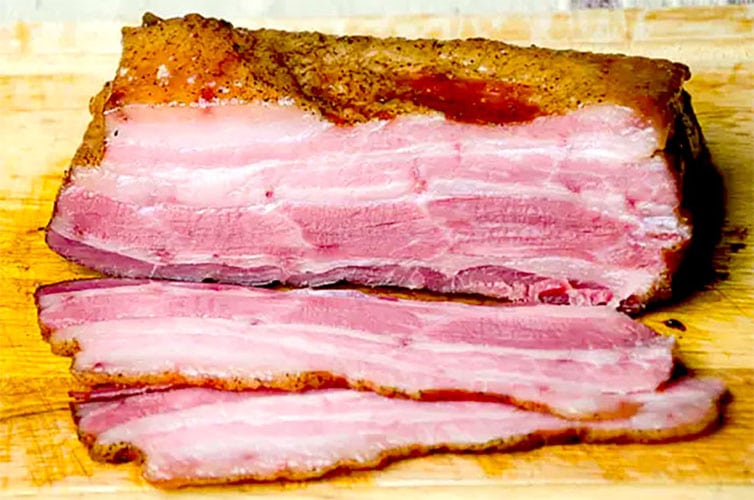
American style bacon, with its rich pork fat and meaty flavor, tastes good on just about everything. But sometimes, I want more from the bacon itself. A little honey, hoisin, soy sauce, ginger, garlic, and Sriracha do the trick. When added to the cure, these ingredients make bacon that’s perfect for fried rice, ramen, banh mi, or just eating with breakfast.
Makin’ bacon at home is surprisingly easy and the results are quantum leaps better than the stuff from large commercial producers. It is a simple two-step process: (1) curing, and (2) smoking. But pay attention to the raw material. Check out the notes below for important tips on ordering the meat. If you want to make more basic all-American style bacon, check out the recipe here. Or try my Maple Bacon, which is essentially the same process but with maple syrup. The Maple Bacon recipe also has a cool video of the entire process of making homemade bacon. Also, try the Asian Bacon.
Up your game: Join our Pitmaster Club. Try it out for free for 30 days. No credit card is needed. No spam. Join now and Be Amazing!
Takes:
Ingredients
Cure time: 0.8 days
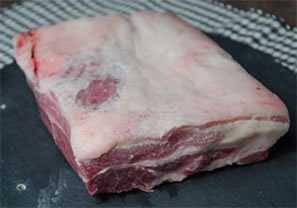
 Make sure you explain that you want raw bacon, not cured, and definitely not sliced. Ask your butcher to remove the skin but save it for you so you can make cracklins. You can freeze the skin until you are ready to make the cracklins. If you got sliced belly by mistake, marinate it in your favorite marinade, grill it in idividual slices, fast, or adapt this recipe for pork belly. An Asian marinade like teriyaki/huli huli is great. But don’t try to cure sliced pork belly.
As soon as you get your slab home, start the cure because raw pork fat does not age gracefully. It gets rancid and smells funky in only 5 to 6 days. That’s a flavor beloved in many European and Asian countries, but not so much in the U.S.
About the Prague Powder. Commodity grocery store bacon uses Prague Powder #2 which has a blend of salt, sodium nitrite, and sodium nitrate. It is often injected with the cure and sprayed with liquid smoke. The cured belly goes into the smoker at 100°F (38°C) for 30 minutes, then the temperature is reduced, after drying, to between 80 and 90°F (27 and 32°C) . That low, or cold, temperature is maintained for about six hours. The result is a raw cured meat that must be cooked before eating, and cooking it long enough can produce really crispy, bacon.
This old fashioned recipe calls for Prague Powder #1 only and smoking at 225°F (107°C). That cooks and pasteurizes the meat and makes it safe to eat right off the smoker. I do not recommend cold smoking at home. Yes, I know your Polish neighbor cold smokes his bacon the way his Papa taught him, but he is playing Russian roulette, especially with today’s meat supply. Click here for more on cold smoking and why I do not recommend it. After smoking it will not get as hard and crispy as commercial cold smoked bacon with nitrates. Of course, if you are like me, you don’t want your bacon crumbly, so this is not a problem.
A note about saltiness. Occasionally we get a reader saying it is too salty. Occasionally we get a reader who says it is not salty enough. We have learned that saltiness is a matter of personal preference. Make the recipe the way I like it and if you feel salt needs an adjustment, then add or subtract the Morton coarse kosher salt, not the Prague Powder #1.
These recipes were created in US Customary measurements and the conversion to metric is being done by calculations. They should be accurate, but it is possible there could be an error. If you find one, please let us know in the comments at the bottom of the page
Method
- Skin it. If the skin is still on the belly, remove it and use it to make cracklins. It is sometimes hard to tell if it is still there. It is usually a darker tan color compared to creamy colored fat. You should be able to make a cut in fat with your thumbnail. Your thumbnail will only make a dent in skin. Leaving skin on causes problems for salt penetration, and when you fry it, the skin gets very hard and you probably won't like the texture. Removing the skin can be tricky. Sometimes you can grip a corner and with a knife and peel it back by running the knife between the skin and fat. Sometimes you just have to shave it off with a sharp knife.
- Cure it. Pour everything except the meat into a zipper bag large enough to hold the belly. A 1 gallon (4 L) bag will hold a single 3 pound (1.3 kg) slab. Zip the bag and squish everything around until well mixed. Now add the belly, squeeze out the air as much as possible and squish some more rubbing the cure into the belly and coat all sides. Put the bag in a pan to catch leaks and place in the fridge at 34 to 38°F (1 to 3° C). The belly will release liquid so every day or two you want to gently massage the bag so the liquid and spices are well distributed, and flip the bag over. NOTE: If you use more than one slab in a bag it is crucial that the slabs do not overlap each other. Thickness matters!
- Rinse off the cure. Remove the belly from the bag, and throw the liquid away. Quick rinse it to wash off any thick deposits of salt on the surface. Most recipes tell you to let the slab dry for 24 hours so the smoke will stick better, but, as the AmazingRibs.com science advisor Dr. Greg Blonder has proven, smoke sticks better to wet surfaces, so this extra step isn't necessary.
- Fire up. If you are using a grill, set up for 2-zone cooking or fire up your smoker.
- Cook. Smoke over indirect heat at 225°F (107°C) until the internal temp is 150°F (65.5°C), about 2 hours. You can use any wood you like. Hickory is the tried and true. I'm partial to cherry and applewood. After smoking you should slice off the ends, which may be very dark and more heavily seasoned, and taste them right away. They will be more salty than the innards and the fat will be a bit stringy, but you'll love it all the same. Just wait til you cook up an inside slice!
- Cool. Now let it cool on a plate in the fridge. Cold bacon is easier to slice. Use on a slicer if you have one, or use a long thin knife to slice it. Try some thin and some thick slices. You can also cut bacon in cubes to make lardons and use them like bacon bits in salads, mashed potatoes, mac and cheese, baked beans, in sauces or to garnish chops, or roasts.
- Wrap it tightly with several layers of plastic wrap, and then a layer of foil, and refrigerate for up to 2 weeks or freeze for up to 3 months. Do not wrap in foil alone because it can react with the salt.
- Slice. Slice it across the grain. For evenly thick slices, a slicing machine is the best choice, but I rarely use mine because it is a pain to clean. Besides, I like to keep the slab intact and tightly wrapped in the fridge or freezer to reduce exposure to oxygen which can make the fat taste funny in a week or two. When I make bacon I usually shoot for hunks 6 to 8" (15 to 20 cm) wide across the grain to make sure my thin 9" (22 cm) knife and frying pan fit. If you put a slab in the freezer for 15 minutes or so it gets stiffer and easier to slice.
- Cook. When you are hungry, cook it just like you do storebought bacon.
- Save the bacon drippings. While your bacon is cooking lay out a section of newspaper several sheets thick, and cover it with a layer of paper towels. As soon as you take the bacon out of the oven, move it to the paper towel to drain. Let the fat in the pan cool a bit and then pour it in a glass jar and refrigerate. Hot bacon can melt a plastic tub, so be careful. Save the fat for up to a month and use it to fry. Broccoli and potatoes are especially good cooked in bacon grease.


High quality websites are expensive to run. If you help us, we’ll pay you back bigtime with an ad-free experience and a lot of freebies!
Millions come to AmazingRibs.com every month for high quality tested recipes, tips on technique, science, mythbusting, product reviews, and inspiration. But it is expensive to run a website with more than 2,000 pages and we don’t have a big corporate partner to subsidize us.
Our most important source of sustenance is people who join our Pitmaster Club. But please don’t think of it as a donation. Members get MANY great benefits. We block all third-party ads, we give members free ebooks, magazines, interviews, webinars, more recipes, a monthly sweepstakes with prizes worth up to $2,000, discounts on products, and best of all a community of like-minded cooks free of flame wars. Click below to see all the benefits, take a free 30 day trial, and help keep this site alive.
Post comments and questions below
1) Please try the search box at the top of every page before you ask for help.
2) Try to post your question to the appropriate page.
3) Tell us everything we need to know to help such as the type of cooker and thermometer. Dial thermometers are often off by as much as 50°F so if you are not using a good digital thermometer we probably can’t help you with time and temp questions. Please read this article about thermometers.
4) If you are a member of the Pitmaster Club, your comments login is probably different.
5) Posts with links in them may not appear immediately.
Moderators