



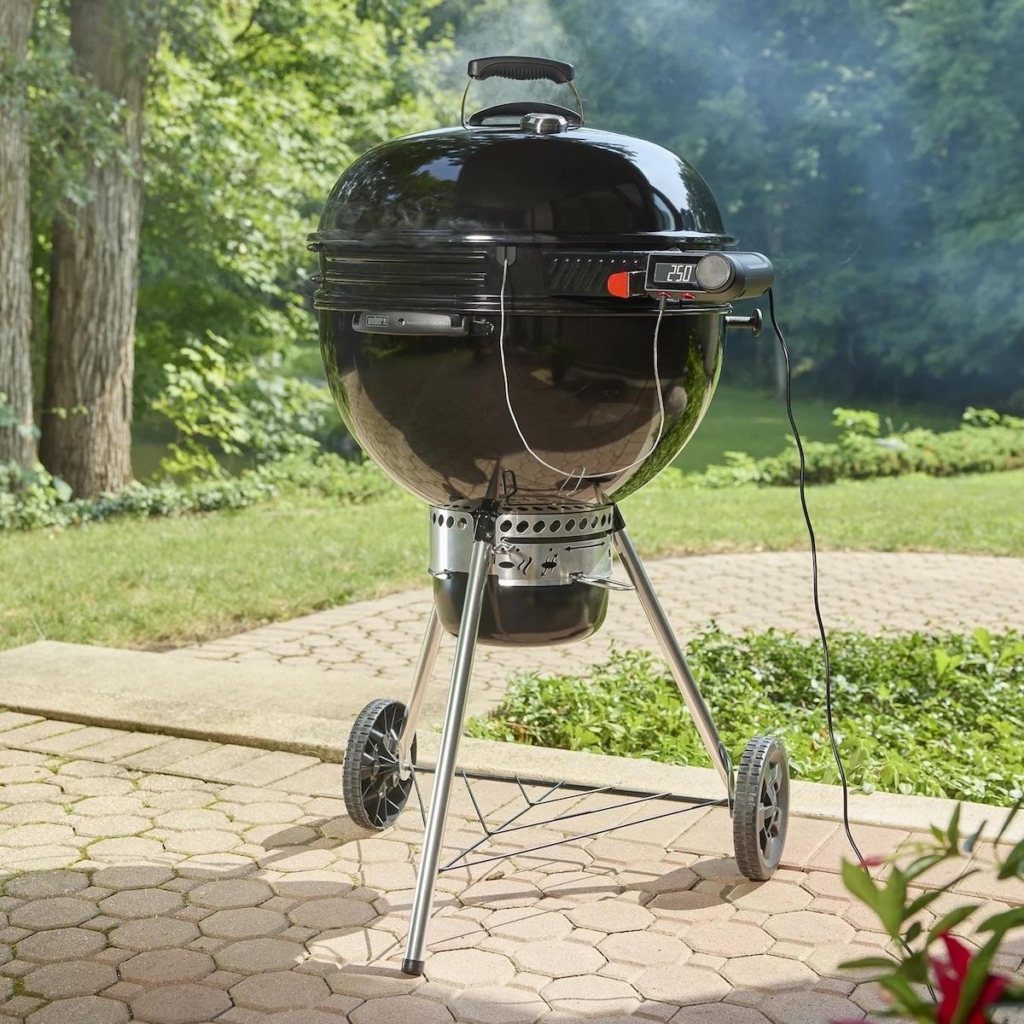
Is the Weber Kettle Smart Ring the one ring to rule them all?
These days, it seems like everything uses “smart” technology. Phone calls. Customer service. Parallel parking. And now the classic hands-on charcoal grill. You no longer need to manually adjust the airflow to help maintain a steady temperature in your trusty Weber kettle. Sure, there were a few third-party gizmos you could buy before. But now, Weber has its own: The Weber Kettle Smart Ring allows you to set a grill temp, add coals and firestarter, then monitor the entire cook from your phone or smart device. Weber dubs the Smart Ring a “Temperature Control Insert for 22″ Weber kettles.”
Weber Kettle Smart Ring construction
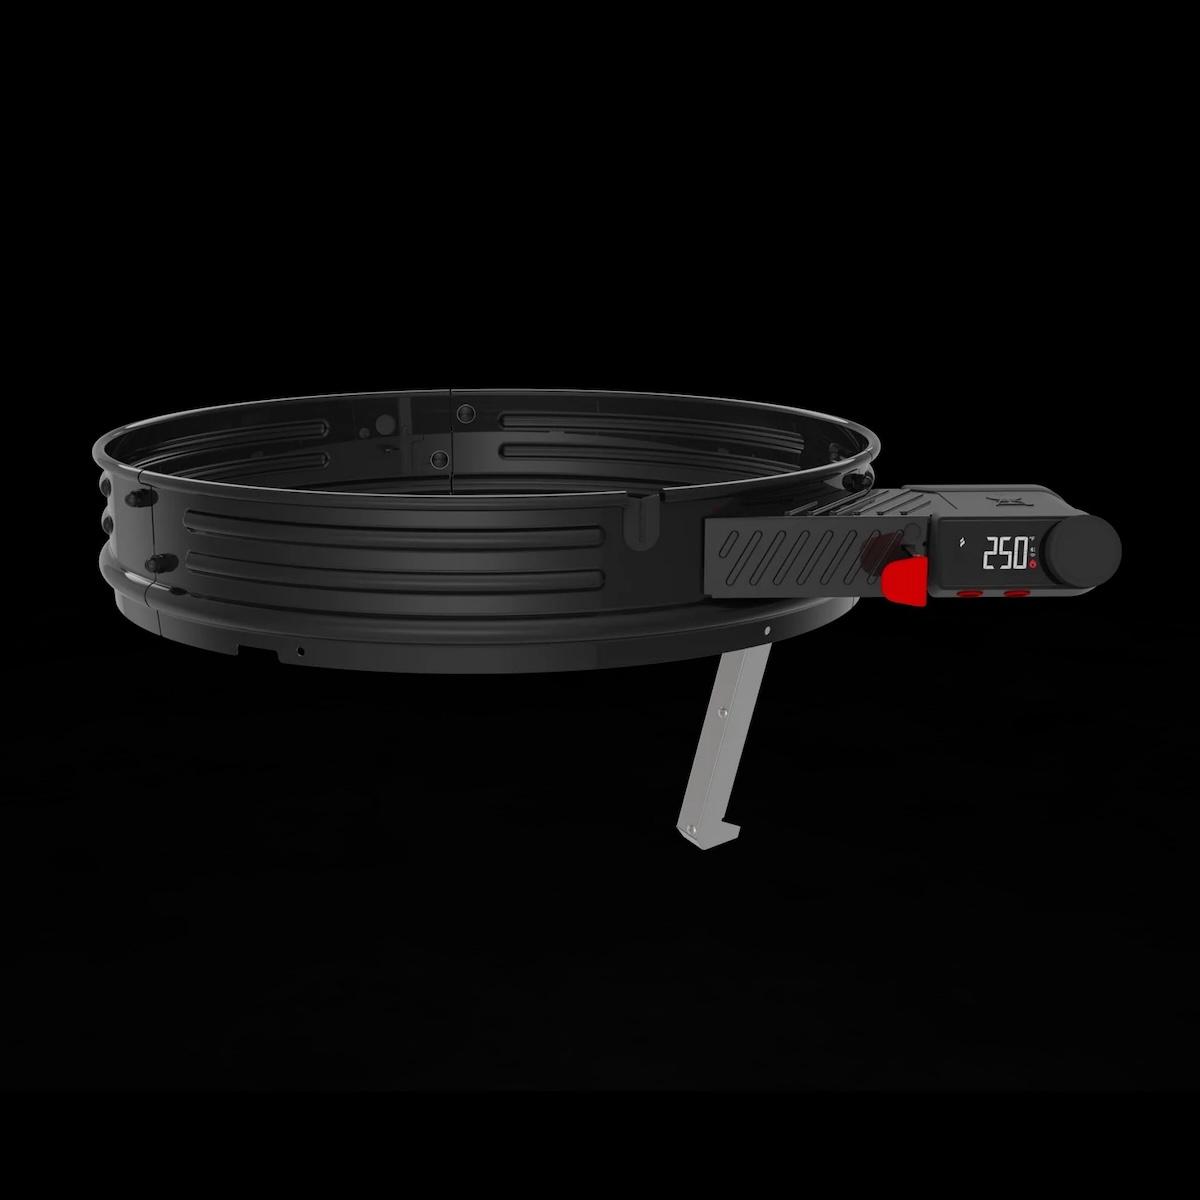
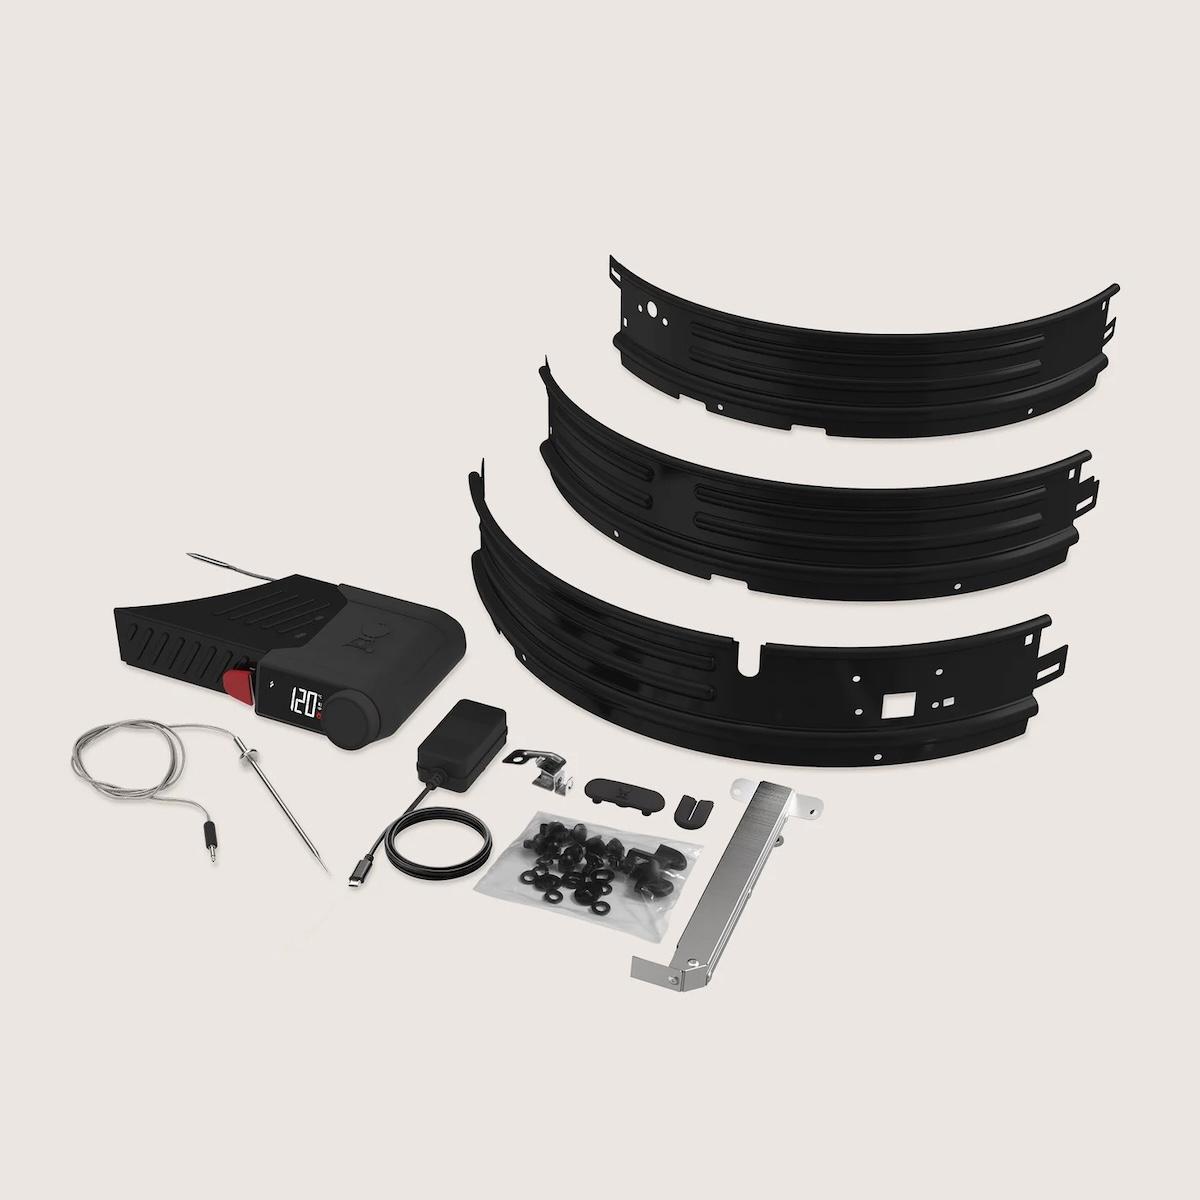
How does this magical modern device work? The Weber Kettle Smart Ring is a 4.5-inch-tall, 22-inch-round ring consisting of 3 painted heavy-duty steel plates that you screw together. You just set the assembled Ring right onto your kettle. A WiFi-enabled PID controller, LCD digital display, and built-in thermostatically controlled fan sit on the outer portion of the Ring, and the fan blows air into a rectangular chute with its opening positioned inside the lower portion of your kettle bowl, right near the coals. A thermocouple (grill temperature probe) sits fixed to the upper portion of the bowl near the cooking grate. The outer controller assembly also accommodates up to 2 meat temperature probes, and Weber supplies one meat probe with the Smart Ring.
Once you insert the Smart Ring, put the grate back on, and plug in the unit for power, you’re good to go. The grill lid fits right on top of the Ring just as it would on the kettle without the Ring. There’s even a heat-resistant rubberized slot in the front of the Smart Ring for the temperature probe cables so you don’t have to worry about pinching cables when you put on the lid.
You can leave the Smart Ring on your kettle grill permanently, or remove the Ring and store it separately, then put it back on the grill for your next cook. The entire thing weighs under 22 pounds, so it’s easy enough to take on and off. During my tests, I didn’t want any issues with extreme weather affecting the controller’s electronics, so I removed the Smart Ring between cooks and stored it in my garage, hanging on a bicycle hook.
Assembly
The Weber Kettle Smart Ring fits most 22-inch Weber kettle grills, including the Performer line. It does not fit the Jumbo Joe Premium and kettles with hinged lids.
Assembly is pretty straightforward and takes less than an hour for one person. Once assembled, I did notice some gaps in the seams between the 3 metal pieces of my unit. It’s probably not a big deal, but with the Smart Ring installed, my Weber kettle grill overall was not quite as well-sealed as without it.
The Smart Ring has its own built-in tabs for holding the cooking grate. With the Ring installed, the cooking grate sits 10 inches above the coal grate (without the Ring, the cooking grate sits only 5 3/4″ above the coal grate). So the Weber Kettle Smart Ring nearly doubles the distance from fire to food in your grill. That’s great for convection charcoal cooking such as roasting and low-and-slow smoking. But it’s not so great for searing directly over the coals to develop a dark crust on something like a steak. We’ll see if the 10-inch distance is a hindrance during my cook tests.
The Weber 22″ Performer Smart Charcoal Grill has a similar controller and fan assembly, but the fan and controller are built right into the bowl of the kettle, so the cooking grate sits only 5 inches above the coal grate. No grate height issues there. In fact, that unit puts the food even closer to the fire than the classic 22″ Weber kettle without the Ring. It’s something to consider if you’re in the market for a smart charcoal grill.
Weber Kettle Smart Ring grill setup
Most charcoal grillers don’t have an issue with firing up a pile of briquets and cooking hot dogs or diner-style burgers relatively quickly over a hot fire, especially with a 2-zone grill setup. The Smart Ring isn’t really designed for those hot and fast cooks. This device is targeted at maintaining steady low to medium temperatures for extended cooking with charcoal. On the controller, the minimum set temperature is 180°F and the max set temp is 425°F. Bonus: the display is nice and big so you can see the numbers from a good distance.
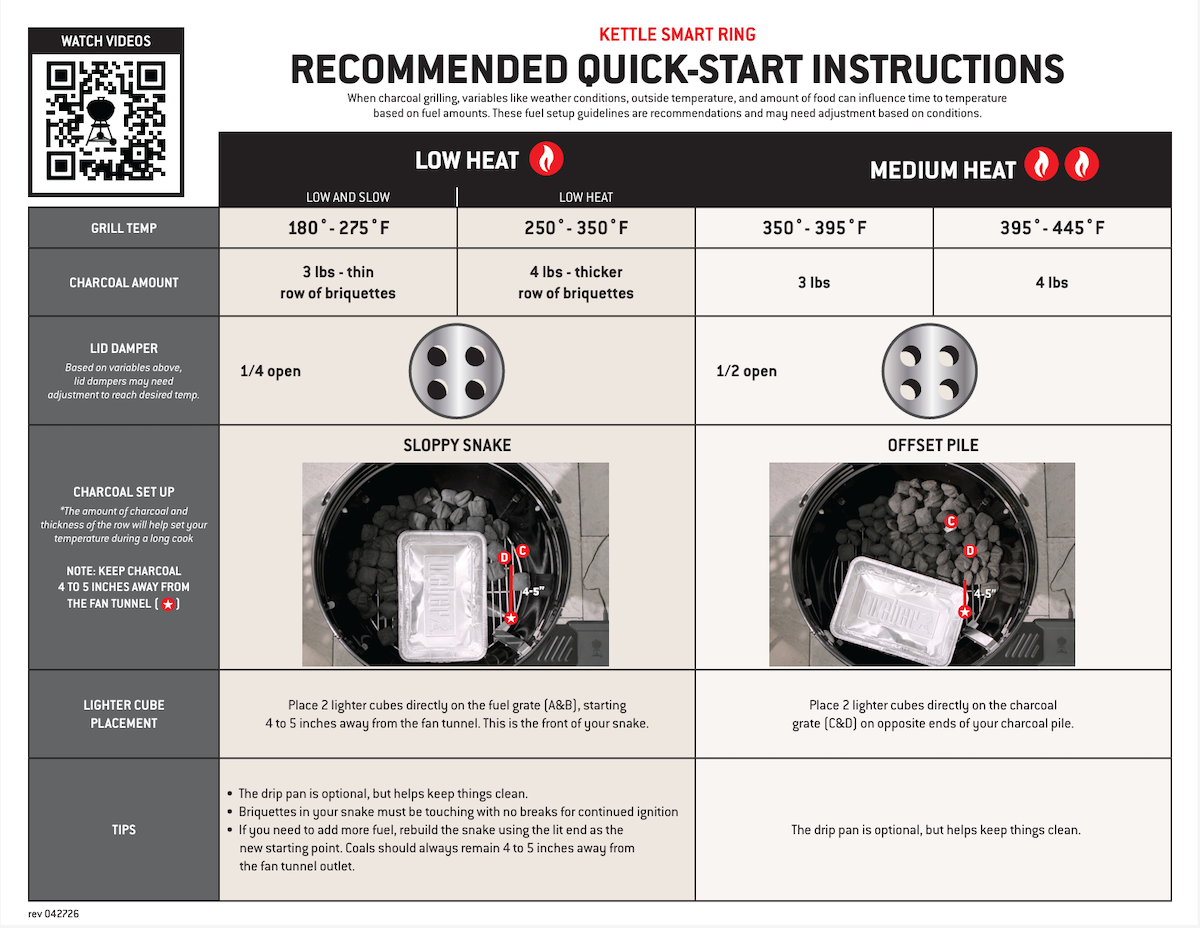
Weber’s manual includes diagrams of recommended charcoal setups for low to medium heat (see the image above). They also list the recommended weight of the charcoal. For instance, 4-5 pounds charcoal is recommended for cook temps <250°F, and 5.7 pounds is recommended for cooking at 325 to 425°F. For those who don’t have a scale in their backyard or patio (yes, me), I suppose you could eyeball it based on the weight listed on your bag of briquets. Or you can just look closely at the manual visuals. Follow those and you should be good. Keep in mind that the recommended setups do not account for the additional heat of added smoking wood. If you’re smoking foods like pork ribs, pork shoulder, brisket, or beef ribs, reduce the recommended amount of briquets by the weight of the wood chunks or chips you add. That way you’ll have better luck with hitting rather than overshooting your target temp. I say this from experience.
Be sure to open the fan door (big red pull tab), and mind the briquet placement: Weber warns in several places to keep your charcoal at least 4-5 inches away from the fan chute opening to avoid blocking airflow. Weber also warns against overloading the grill with charcoal, which could damage the electronics from excessive heat. Like I said, follow the pictures and you’ll be fine.
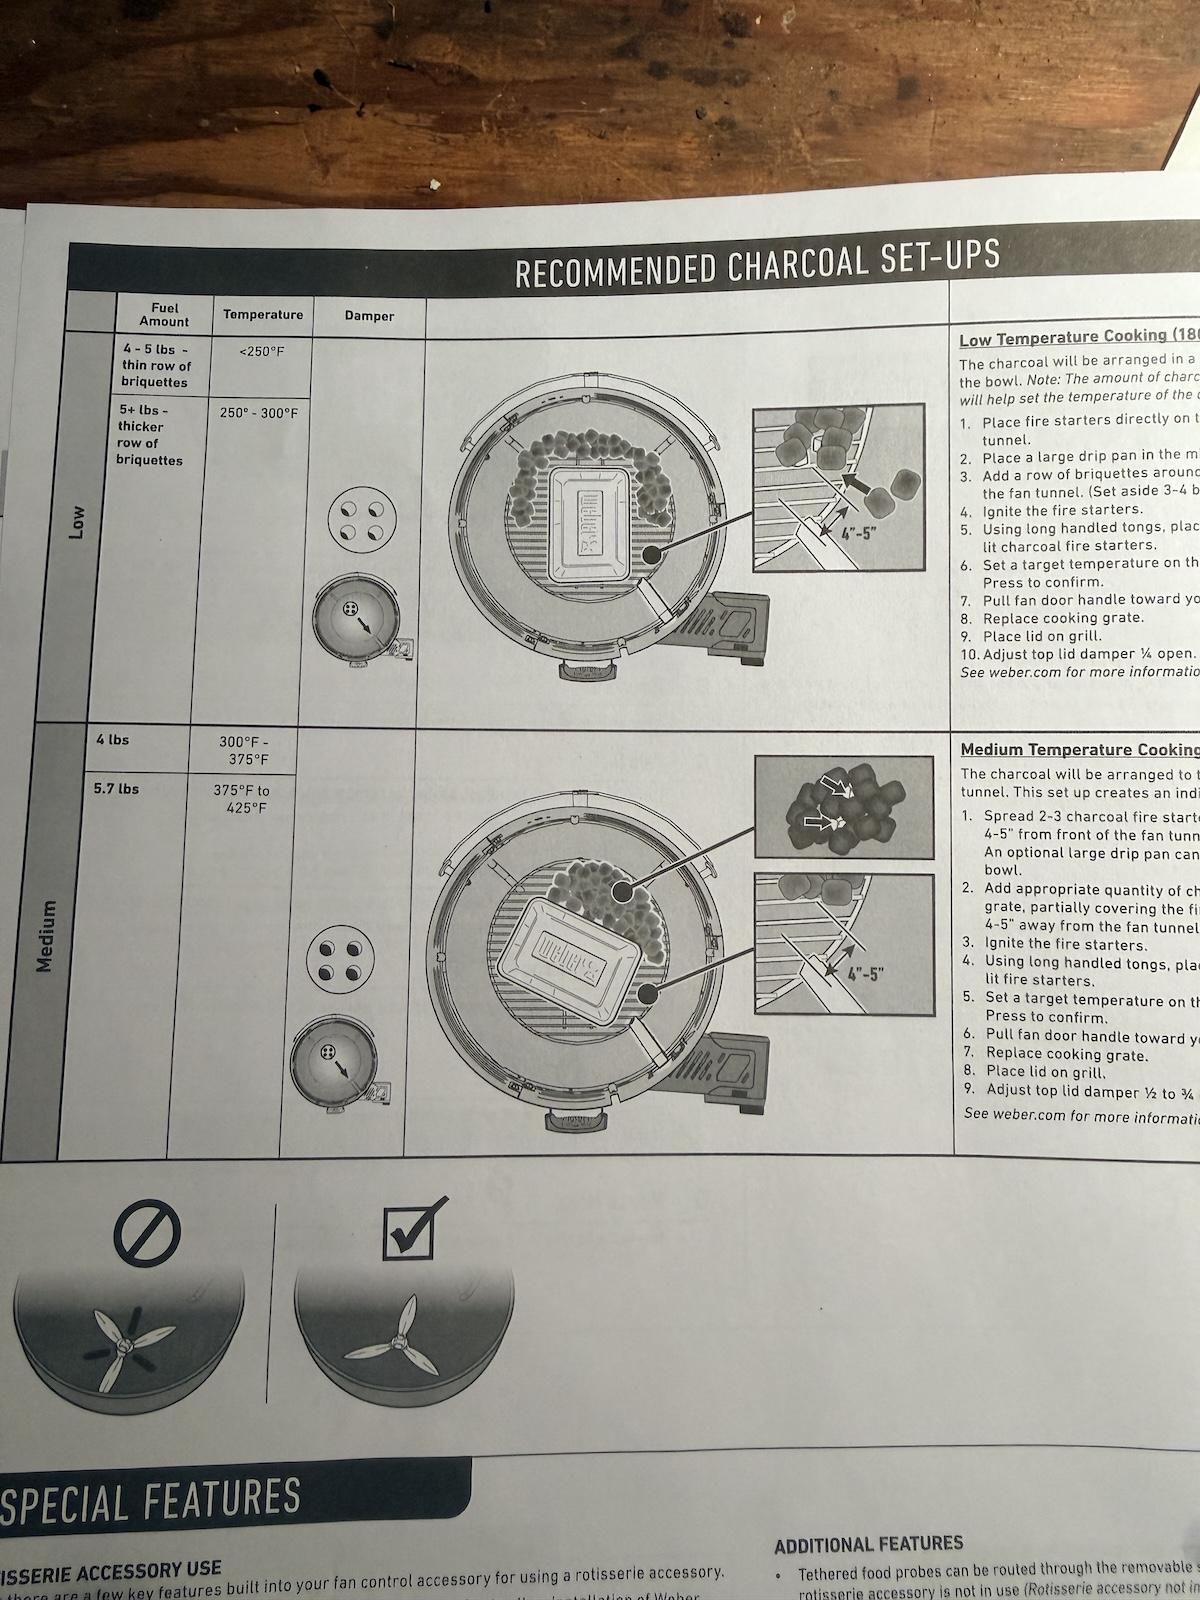
There’s a slight discrepancy in the recommended charcoal set ups in the printed user’s manual vs. the quick-start instructions (both included with the unit). Between the two guides, you should be able to find the right charcoal setup for the grill temp you’re trying to achieve.
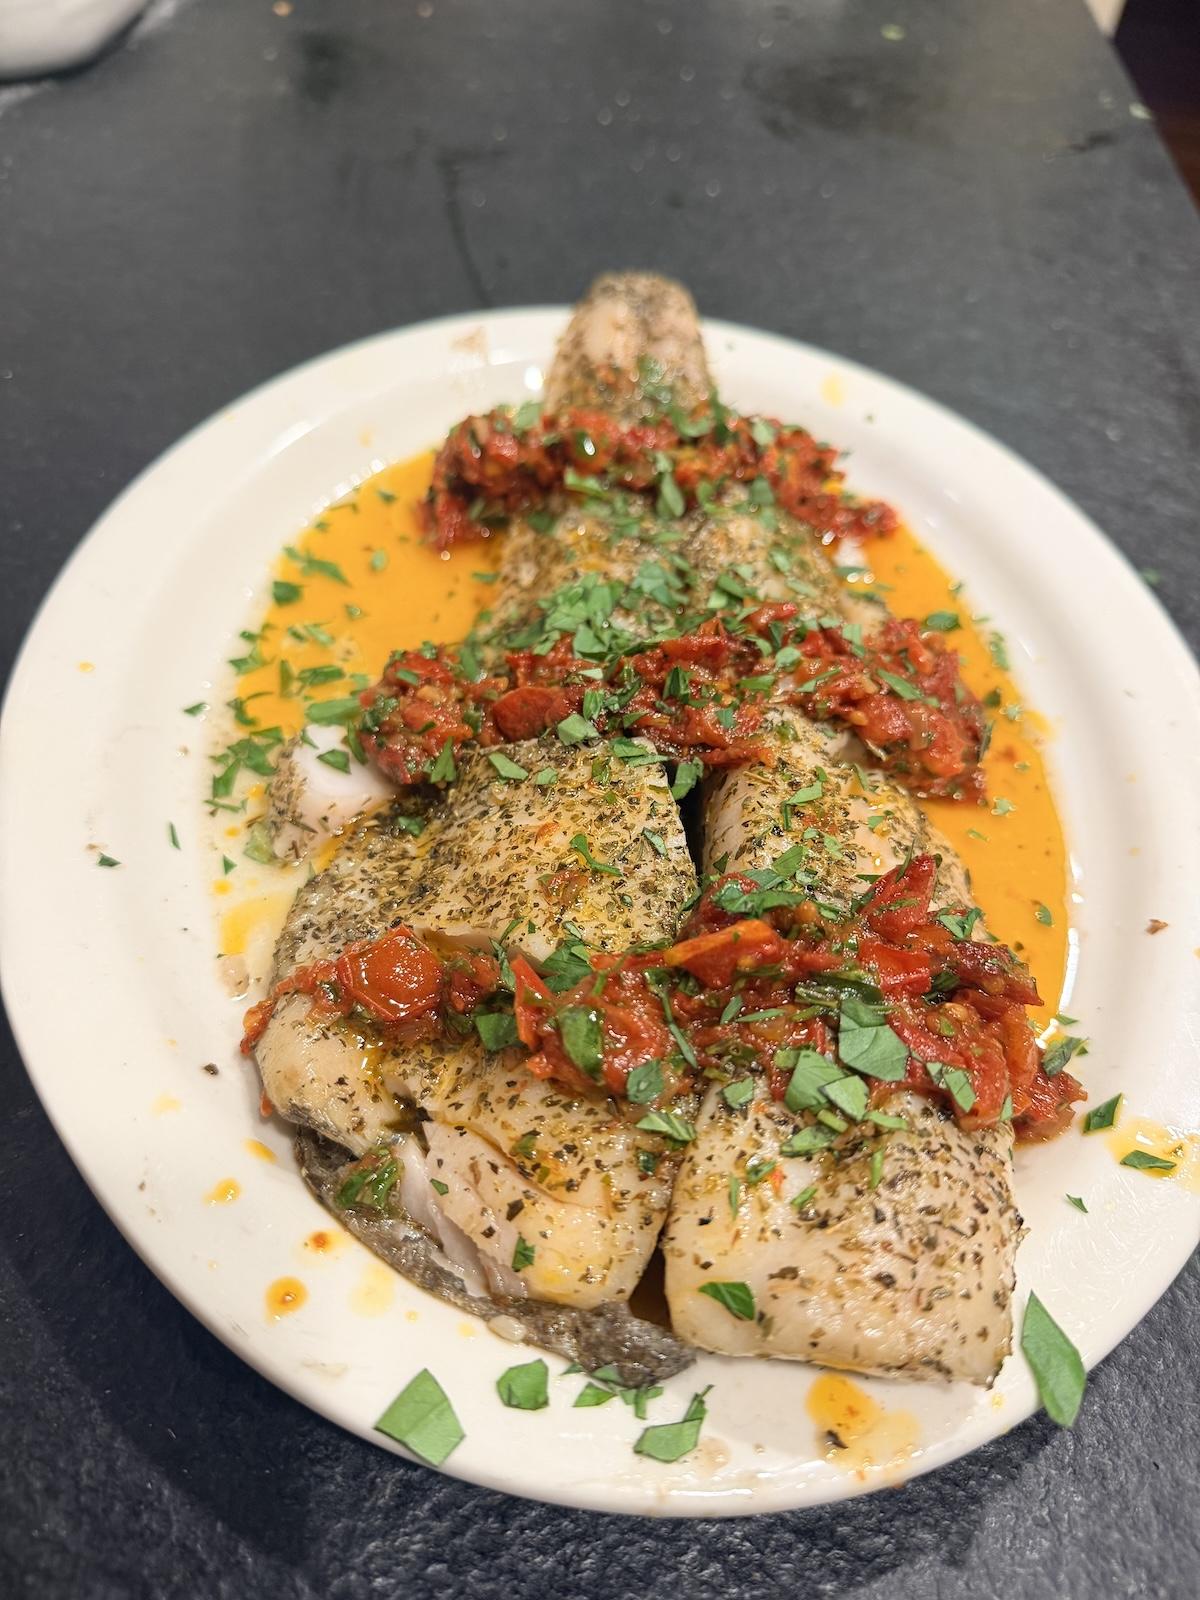
Will fish stick?
Let’s get cooking. In late summer, I bought some Alaskan black cod, which I don’t see often at my fish market, and decided to grill it. If you’re not familiar, black cod (a.k.a. sablefish) has a firm but silky texture and big flakes, sort of like Atlantic cod crossed with sea bass. It’s one of my favorite “sustainably harvested” fish.
On a Thursday at 6:30pm, I fired up my 25-year-old Weber kettle for medium heat with about 3 1/2 pounds of briquets. I was shooting for a 375°F cook temp and closed the bottom vents, leaving the top vents half open, per the Smart Ring manual instructions.
To power the Ring, Weber supplies a USB-C power cord, which is a modest 6 feet long, too short to reach my outlet. I used an extension cord. If an electrical outlet is too far from your kettle, you can also power the Ring with a 5V/2.4A power bank (not included).
To create a fish sauce, I sauteed some shallot and garlic in butter, hit it with a splash of sherry, and added diced plum tomatoes from the garden, then let it simmer on low until the grill and fish were ready, about 30 minutes. I added some chopped basil and parsley from the garden. Miraculously, the fish did not stick to the grate (thankfully, I reseasoned it). It was some of the best fish I’ve ever grilled.
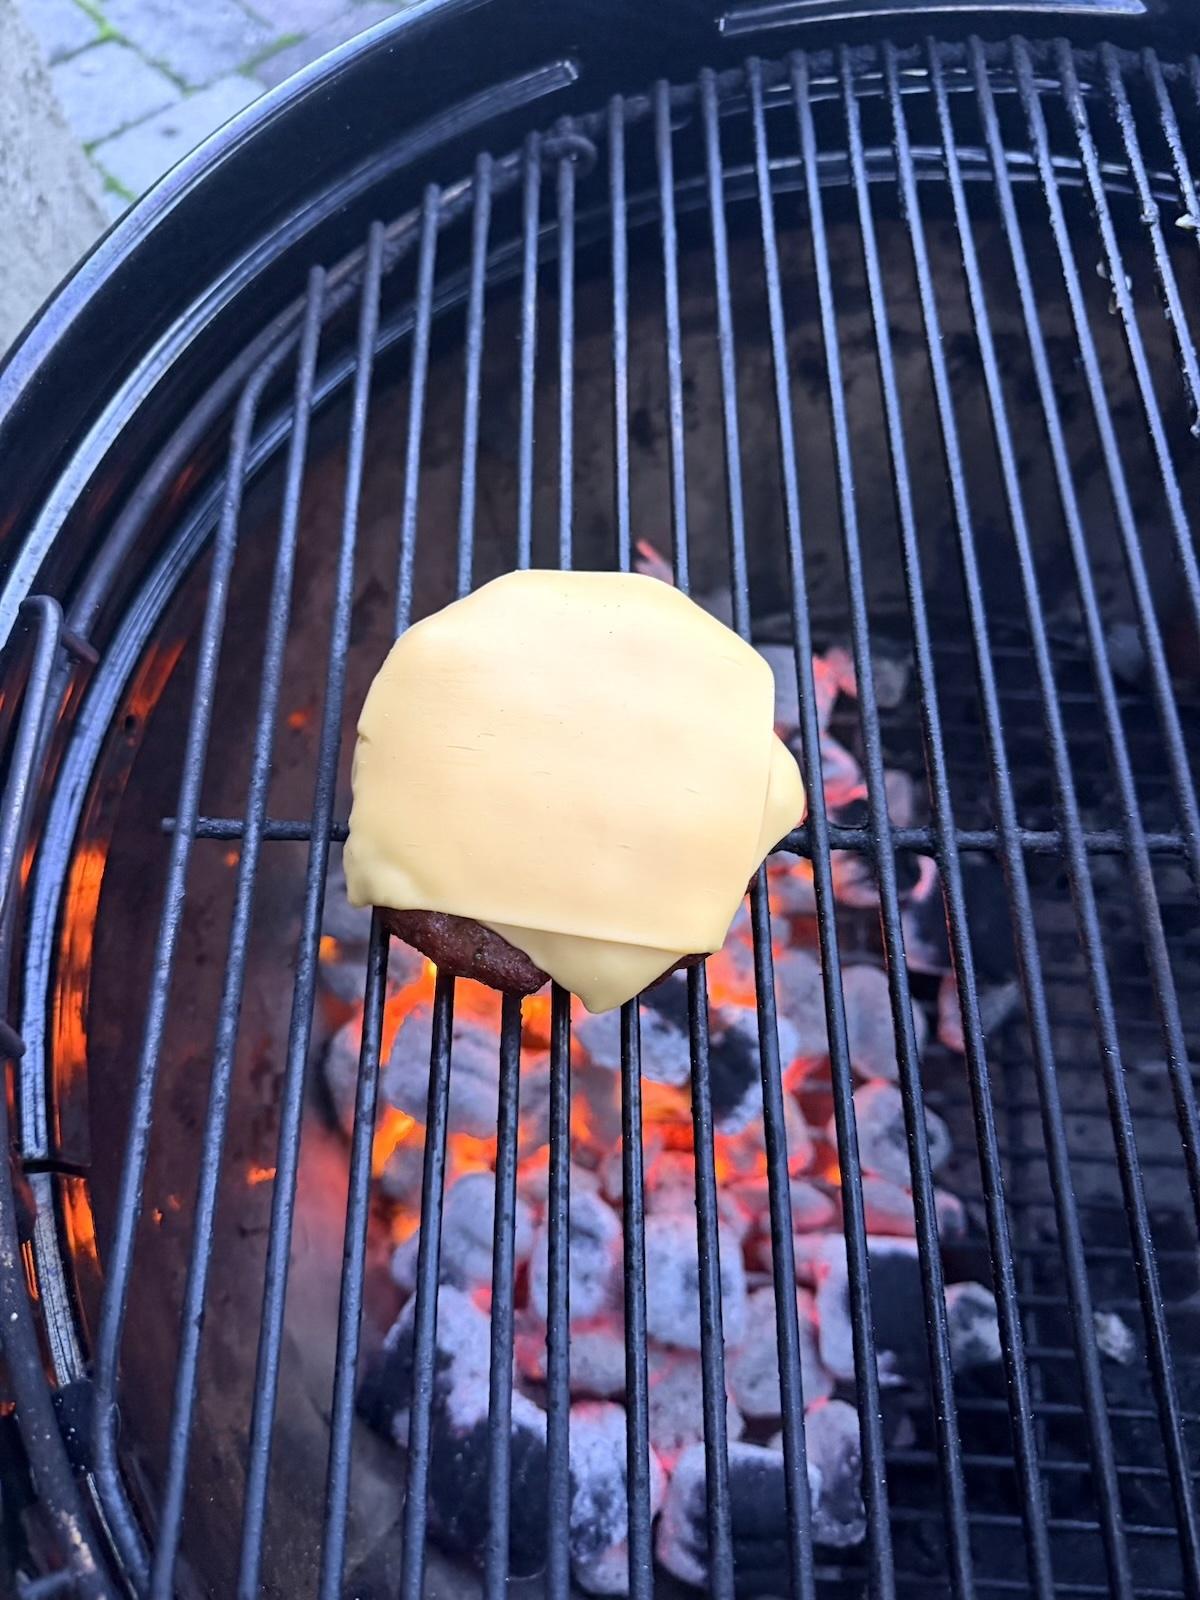
Burger time
For the next cook, I used the Weber Connect app to monitor things from my phone. I make burgers with Meathead’s Smoked Red Meat Seasoning & Dry Brine mixed in just before cooking. These got the reverse-sear treatment. Bacon, American cheese, lettuce, tomato, pickle relish, sriracha mayo, and brioche buns filled out the flavors and textures. I set up the supplied Weber food probe for this one, set an alert for 150°F, and pulled the burger when it hit that temp. They were nice and juicy with a good crust, although the exterior didn’t get quite as dark a sear on them as I like, partly because the cooking grate was so far away from the coal grate. More on that later.
Turning off the Smart Ring was a breeze: on the Weber Connect app, just press OFF. Or on the controller itself, press the dial for 3 seconds until it displays STOP, then press again to confirm STOP, and push the red lever on the unit to close the fan door.
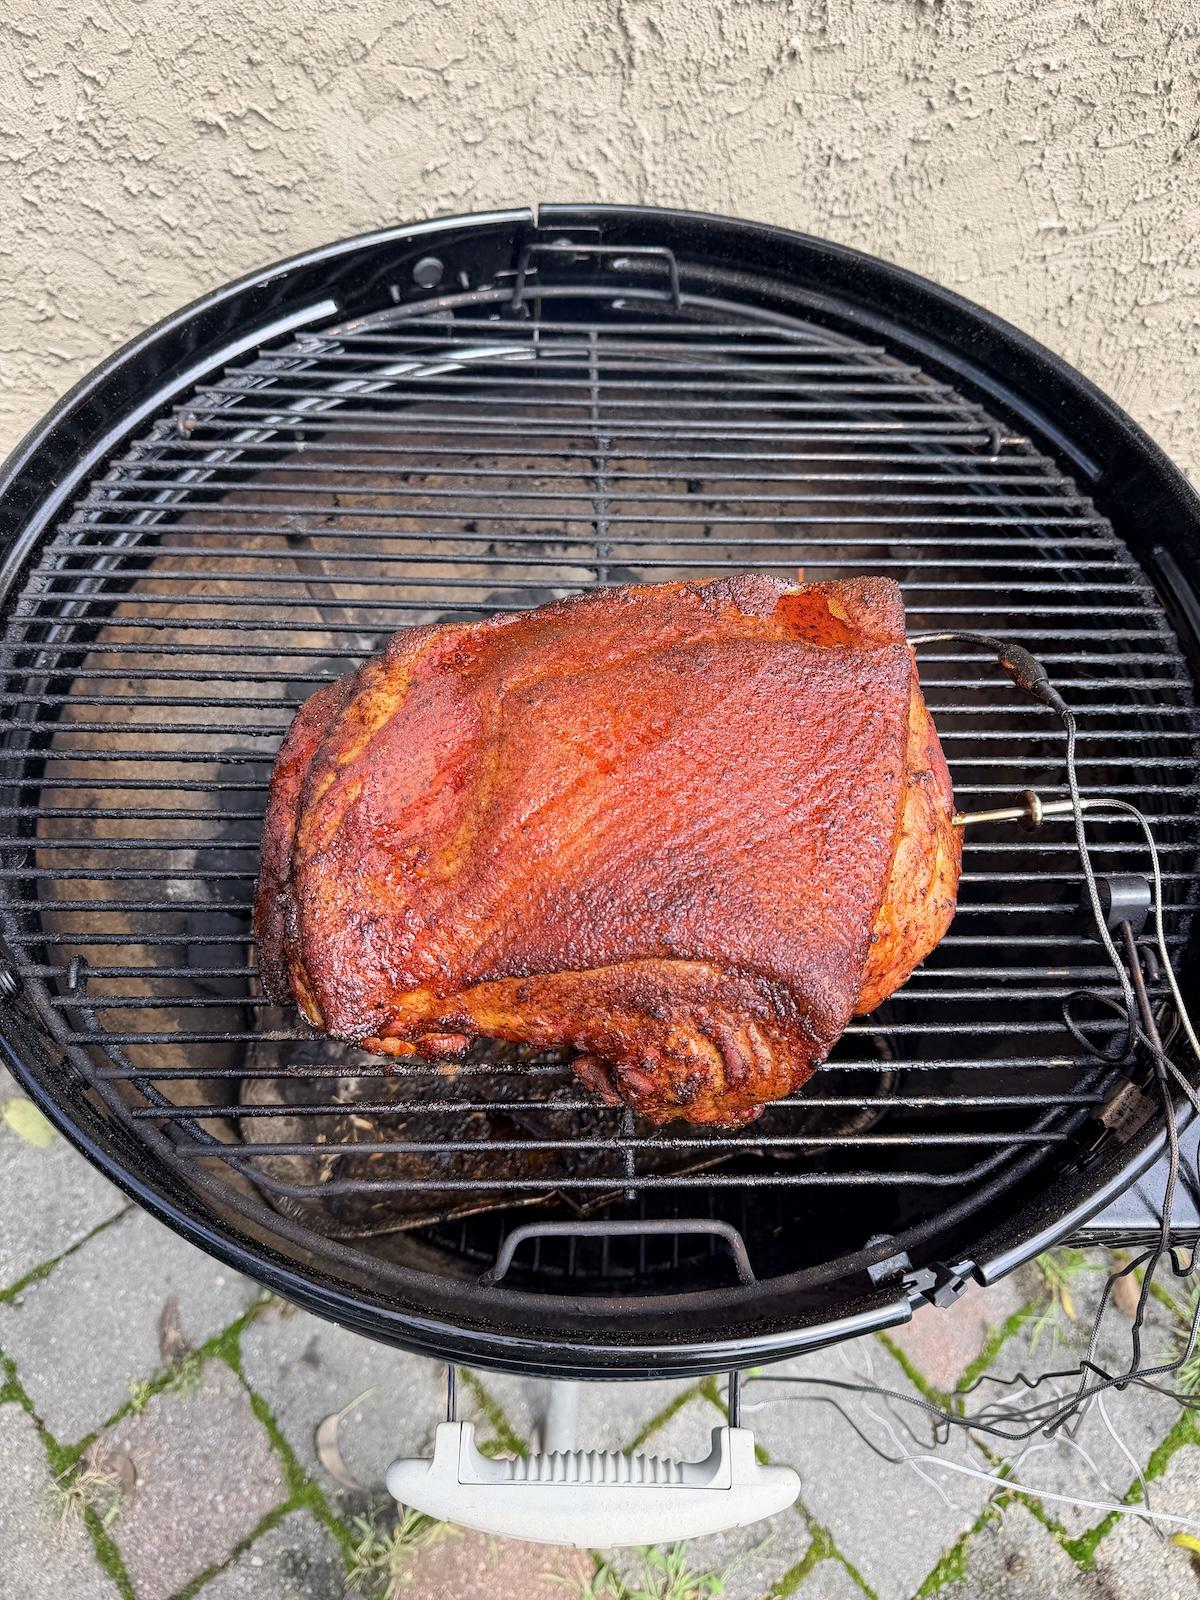
Pulled pork on the Weber Kettle Smart Ring
When it rains, smoking meat warms my soul. It was 9:30 am on a rainy Sunday by the time I got the pork on. I set a snake of briquets in the bowl, closed the bottom vents, left the top 1/4 open, and dialed in the Smart Ring for a 225°F set temp. I plunked a meat probe into the pork and set an alert on the Weber Connect app for internal doneness of 203°F. Then I slid some hickory chips into a smoker tube, dropped it on the snake, and closed the lid.
I monitored the cook on my phone, and the temp was hovering a little hotter than I like: more like 275°F than 225°F. That’s forgivable I guess, and pork shoulder is very forgiving. Maybe my snake was too thick. (That’s what she said! Okay, THAT was unforgiveable. Sorry.)
The snake lasted about 3 1/2 hours, then the grill temp started dropping. On the bright side, the rain let up! I set up a new snake, a little thinner this time, and the grill temp stabilized about 30 minutes later.
All in all, the pork turned out awesome. Not as smoky as the shoulder I get off my Pitts & Spitts Ultimate Upright Smoker Pit. But good.
I didn’t spritz or baste or mop or add any moisture, other than some water in a pan below the meat. But I did peek at the progress a few times. When you lift the kettle lid to check on things or spritz or mop, Weber recommends closing the fan door immediately so the PID does not register a massive temp drop and kick the fan into overdrive. That gives you a more steady temp reading. But I didn’t bother. Because: doesn’t the actual grill temperature drop when you open the lid? Don’t you want the fan to kick into overdrive to get back to the set temp ASAP?
It worked fine not closing the fan door.
Reverse seared steak
This past summer, I got sucked into Widow’s Bay, the comedy-horror tv show. Someone had an AppleTV subscription, and we watched a few episodes. In September, I broke down and got a subscription so I could keep watching the series. (They got me!) Anyway, the sub came with some free steaks from Butcher Box as a promotion. Ribeyes about 1 inch thick. The marbling was just so so. Maybe it was Choice meat. I dunno. But it was headed for a reverse sear.
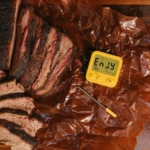
The Smart Ring manual doesn’t have a recommended charcoal setup for the reverse-sear technique. For a 250°F grill temp, the manual points to a thin U-shaped snake of briquets. That took maybe 5-10 minutes to get to temp. I put the steaks on at 7 pm on a fall evening. By 7:30, the meat had reached 115°F internal. Ready for searing. Ok, so now, how would I do the sear with the cooking grate 10 inches above the coal grate? I considered removing the steaks and cooking grate, piling up the available coals in the kettle then searing directly over the coals. But for a 250°F cook to last only 30 minutes, there were only maybe a dozen briquets on the coal grate. Not enough to pile into the inferno needed for a proper sear on two ribeyes. Plus, 10 inches above the coals is a little too far for a dark crust to develop before the heat would have overcooked the interior of the steaks. And it would have taken several minutes to remove the cooking grate, pile up the coals, and wait for them and the cooking grate to get really hot—even with the Smart Ring fan at full speed to reach a set temp of 425°F (the max).
Hm.
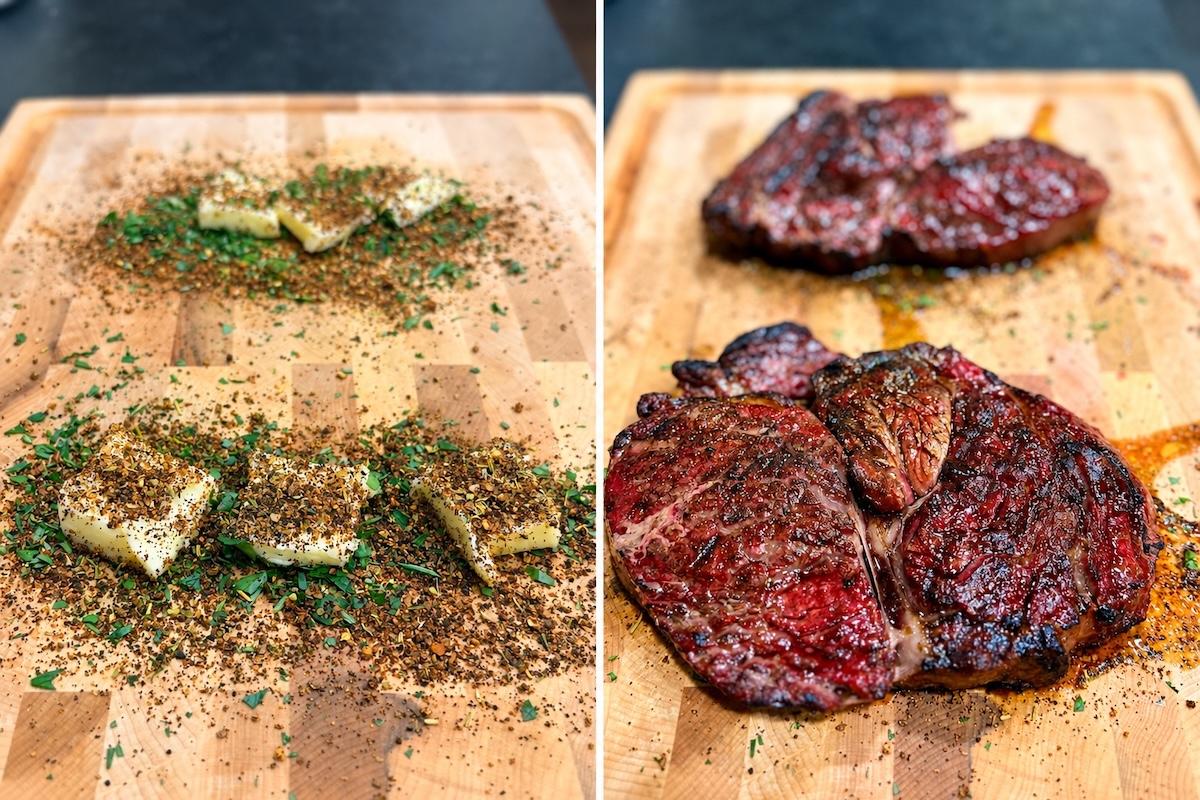
In the end, I opted to use the Afterburner Method. I set up two chimneys with fresh coals and grates (one for each steak), got them blazing while the steaks were cooking (it took maybe 10 minutes), then transferred the steaks at 120°F internal to the afterburners. Searing took 3 minutes, tops. I was taking pictures and sending screenshots of the Fireboard and Weber cook time/temp graphs and emailing them to myself for documentation. So the first side of the steaks got a little crispy and the 2nd side less crispy. But I still managed to get a great sear on them and pull them at about 135°F internal, just a little more done than I like.
I tossed ribeyes on a cutting board laced with butter, chopped fresh rosemary, thyme, and parsley from my garden, and Meathead’s Red Meat Rub. Instant board sauce. The meat was delish.
Pitmaster Club to the rescue
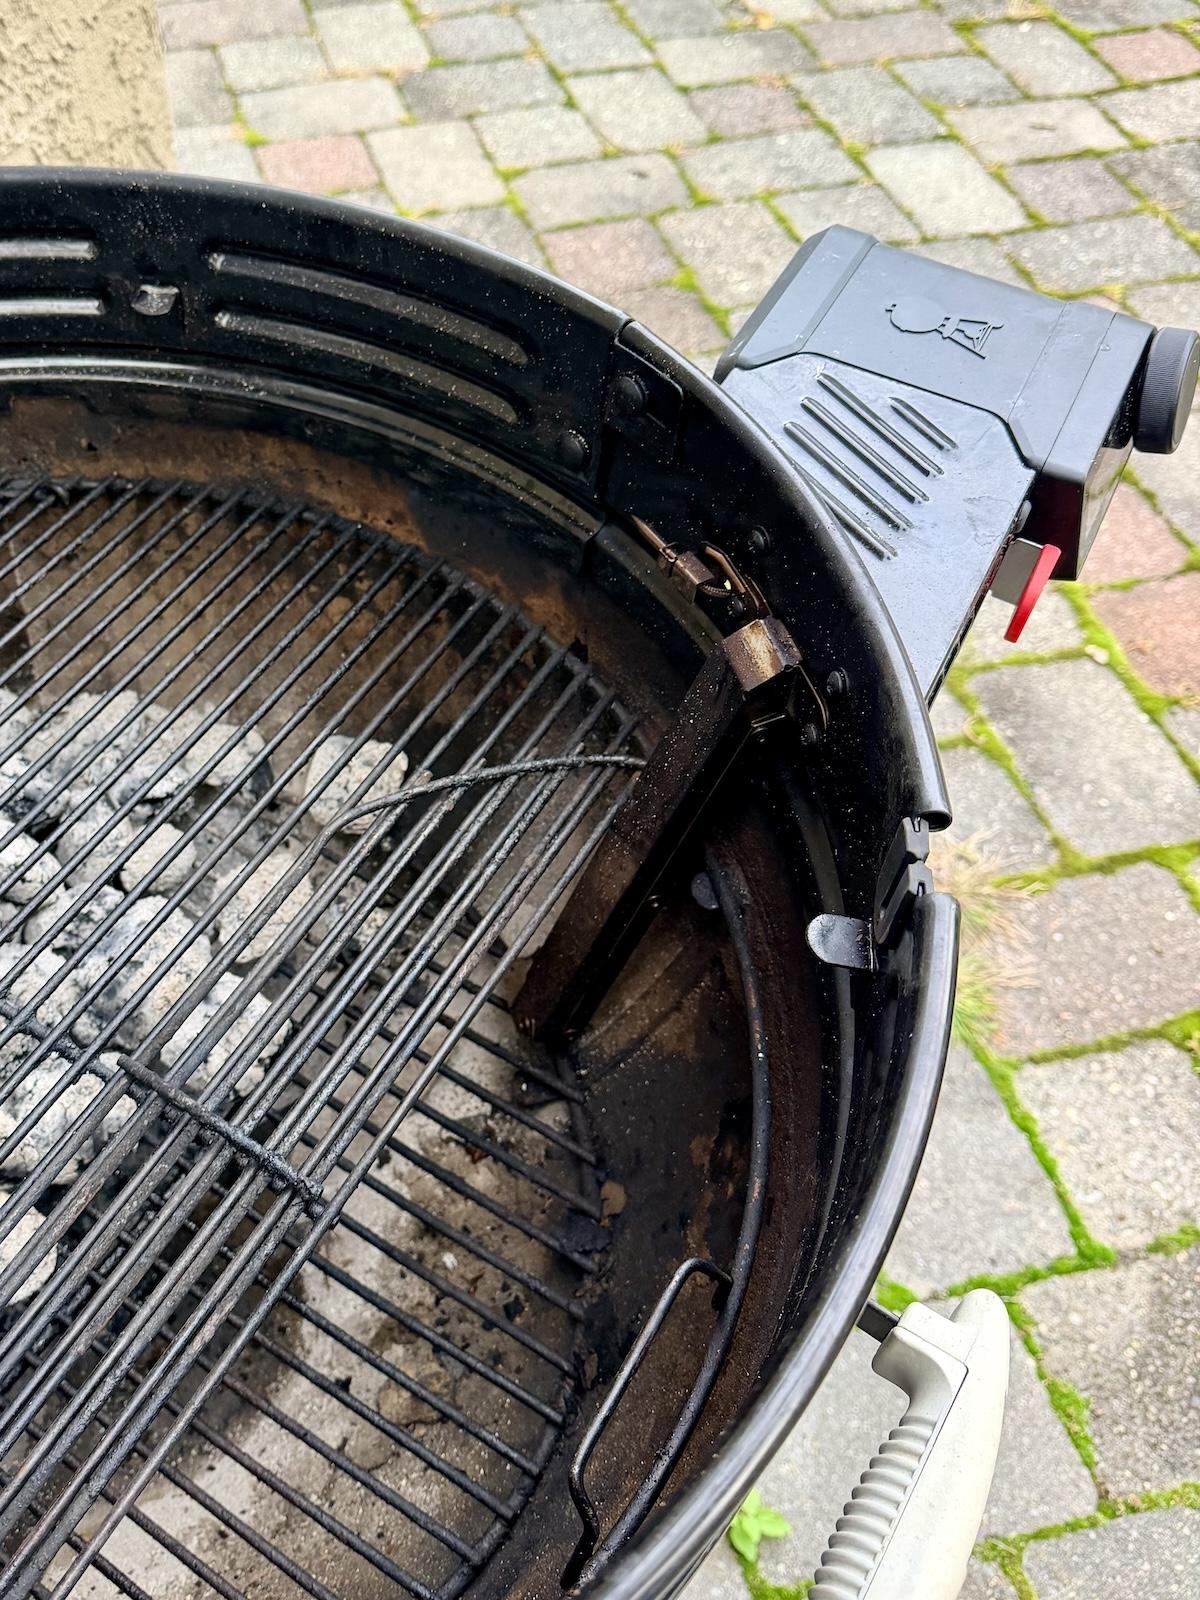
The Afterburner method worked great, but obviously, it’s an extra step in a separate cooker. Not ideal. So I checked in on our Pitmaster Club to see if any members had a solution. (Sidenote: Among the many benefits of AmazingRibs.com PMC membership is early access to barbecue products in development for beta testing. Our members participated in Weber’s early access testing program for the Smart Ring to provide feedback on the product before it was released to the public.) A quick read through the Smart Ring discussion thread and I found that PMC member barelfly faced the same issue. So he gamed the system. He put his hinged cooking grate on first, in its usual spot on the original metal tabs mounted inside the kettle bowl, and then placed the Smart Ring on the kettle, inserting the Ring’s fan chute through the opening of the hinged grate. That puts the cooking grate closer to the coals, about 5 inches above the coal grate, just like it usually is on the kettle. Barelfly reverse-seared a tomahawk ribeye steak this way and was mighty pleased with the results.
It looked like a grate workaround (ha!), so I tried this method myself. And by gum, it worked flawlessly. No futzing. No problems. See the photo above.
Thing is, Weber’s owner’s manual, literature, and website say nothing about installing the cooking grate in its original, lower position like this. They don’t explicitly warn NOT to cook with grate in the lower position. And it does not appear to present any safety issues nor affect the electronics of the Ring’s controller in any way. Plus, there’s a huge bonus: With the Smart Ring installed, you have 2 grate height positions to work with in your Weber kettle! That greatly expands the culinary possibilities of this classic charcoal grill. With the Weber Kettle Smart Ring installed, you can sear at the lower grate height, and cook low and slow at the higher grate height, or use both for a reverse sear. Plus, with a single grate in the lower position, you have more headroom so you could cook something tall like a vertically roasted whole turkey. And if you have two cooking grates installed in both positions, you have more available cooking space overall, allowing you to cook more food at once. What a big bonus!
Response from Weber
I couldn’t fathom why Weber wouldn’t trumpet this benefit of the Smart Ring. So I contacted them. Here’s the response from Weber’s product manager for smart products:
“We don’t officially recommend this grate configuration because of (1) compatibility, (2) lack of development data, and (3) access to charcoal.
- The Smart Ring is recommended to work with all 22” Weber Kettles, but only the Premium and Master Touch come with the hinged grate.
- Today we don’t have data to support the grate configuration you tested. That said, the Smart Ring was optimized for lower temperature cooks. We have a similar fan position on Performer Smart with a lower grate. The Smart Ring controller has a lower max temperature (~425°F) than Performer Smart (~600°F) but manual mode will accommodate higher temps. The Smart Ring was not designed for searing in a higher grate position.
- Access to the charcoal will be limited in your configuration. The new lower grate cannot be removed without also removing the Smart Ring.
Bottom line, your configuration can work. Of course, we always advise that people still follow the recommended charcoal setups.”
There you have it. If you want to sear, reverse sear, cook something tall, and/or cook more food at once with the Smart Ring installed, both high and low grate height positions will work.
Does the Weber Kettle Smart Ring fit a rotisserie?
I didn’t test it myself, but the Smart Ring does accommodate the Weber charcoal rotisserie assembly. The Ring’s manual does not include a recommended charcoal set up for rotisserie cooking. Maybe the rotisserie manual does? Again, I checked in on the beta testing comments from our Pitmaster Club members, and LegoMySearwood shared his results. He made a rotisserie beef chuck roast with the Smart Ring and said, “This was the BEST chuck roast I have ever cooked.” Member SheilaAnn also had good results with rotisserie chicken using a third-party rotisserie setup. Rotisserie cooking with the Smart Ring is A-OK. If you’re curious (and a PMC member), there are lots of good cook tests from chicken and ribs to pork and brisket in those PMC Smart Ring beta tests.
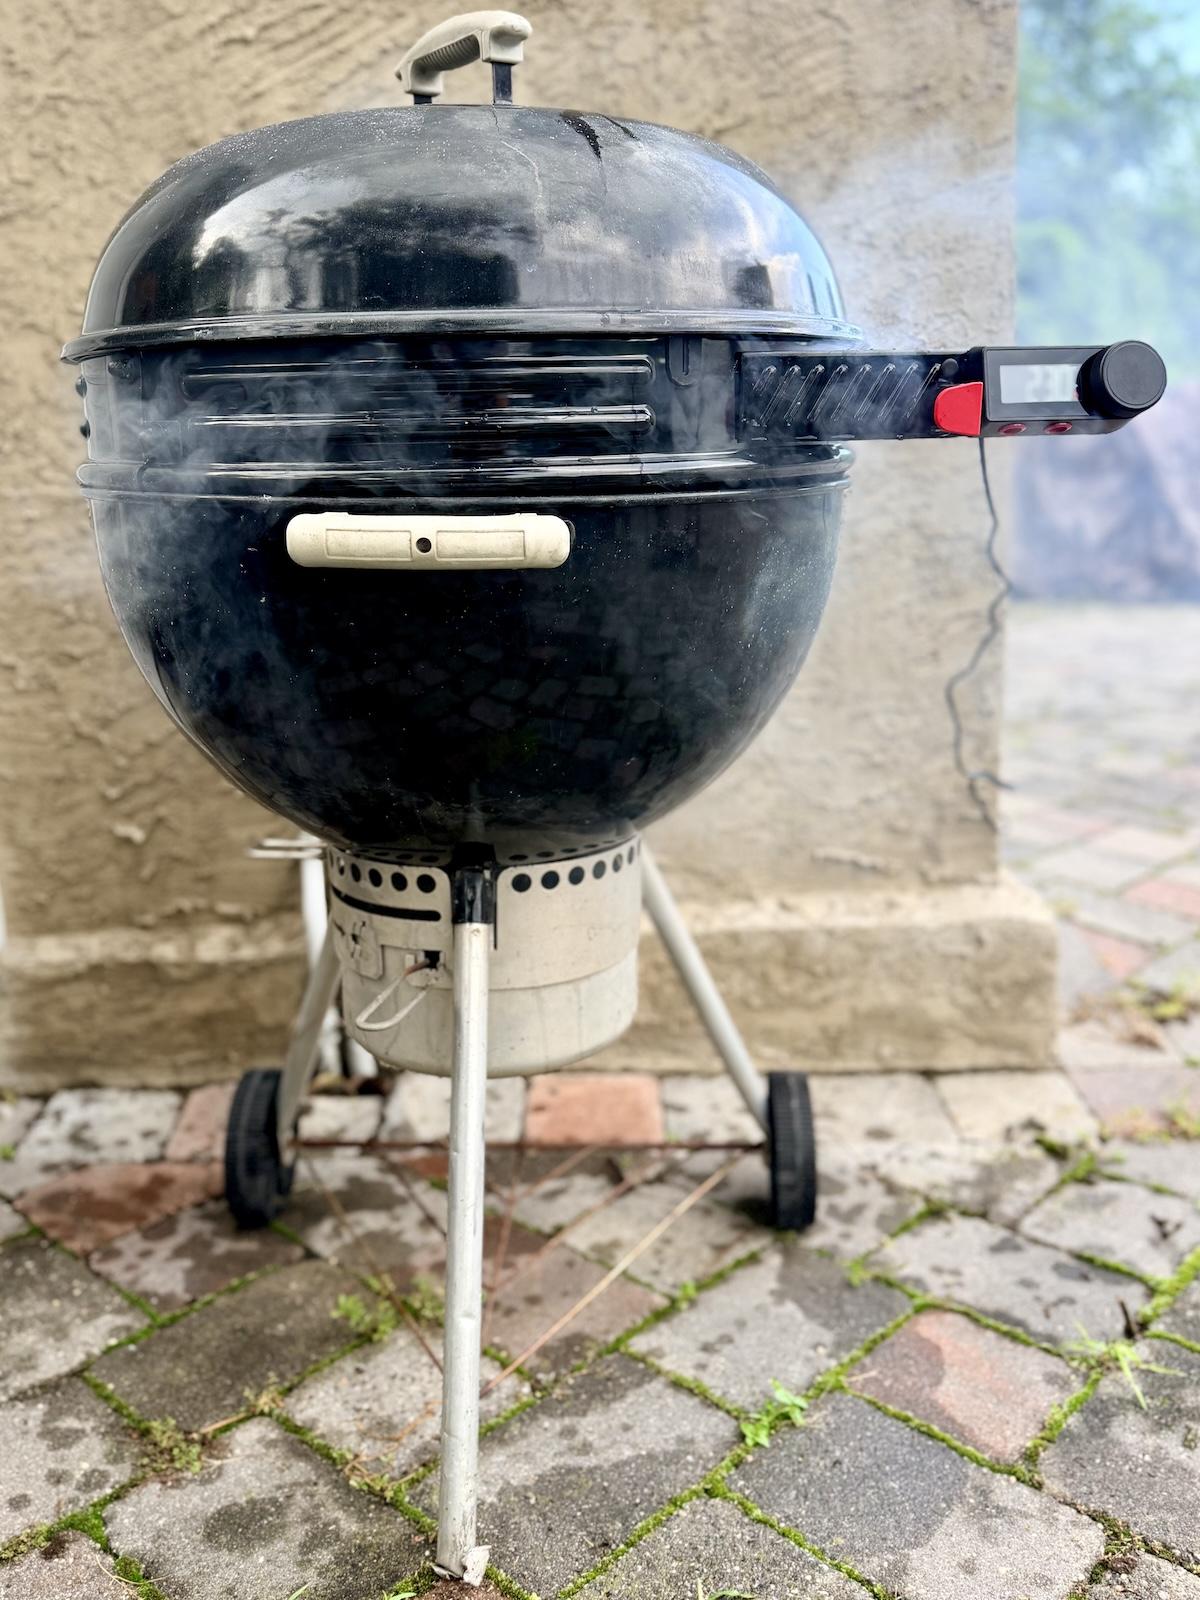
Oh, one last thing about that extra headroom with the Smart Ring installed: my grill cover did not fit with the Ring on the grill. Maybe yours will, especially if your cover is newer and more generously sized. Mind you, my kettle grill cover is from the Stone Age and has been outside in all four seasons since then. When I first tested the Ring, the cover was practically shrink-wrapped over my kettle. Bottom line: Depending on the age of your grill cover, your cover mileage may vary with Smart Ring installed.
Temperature Readings
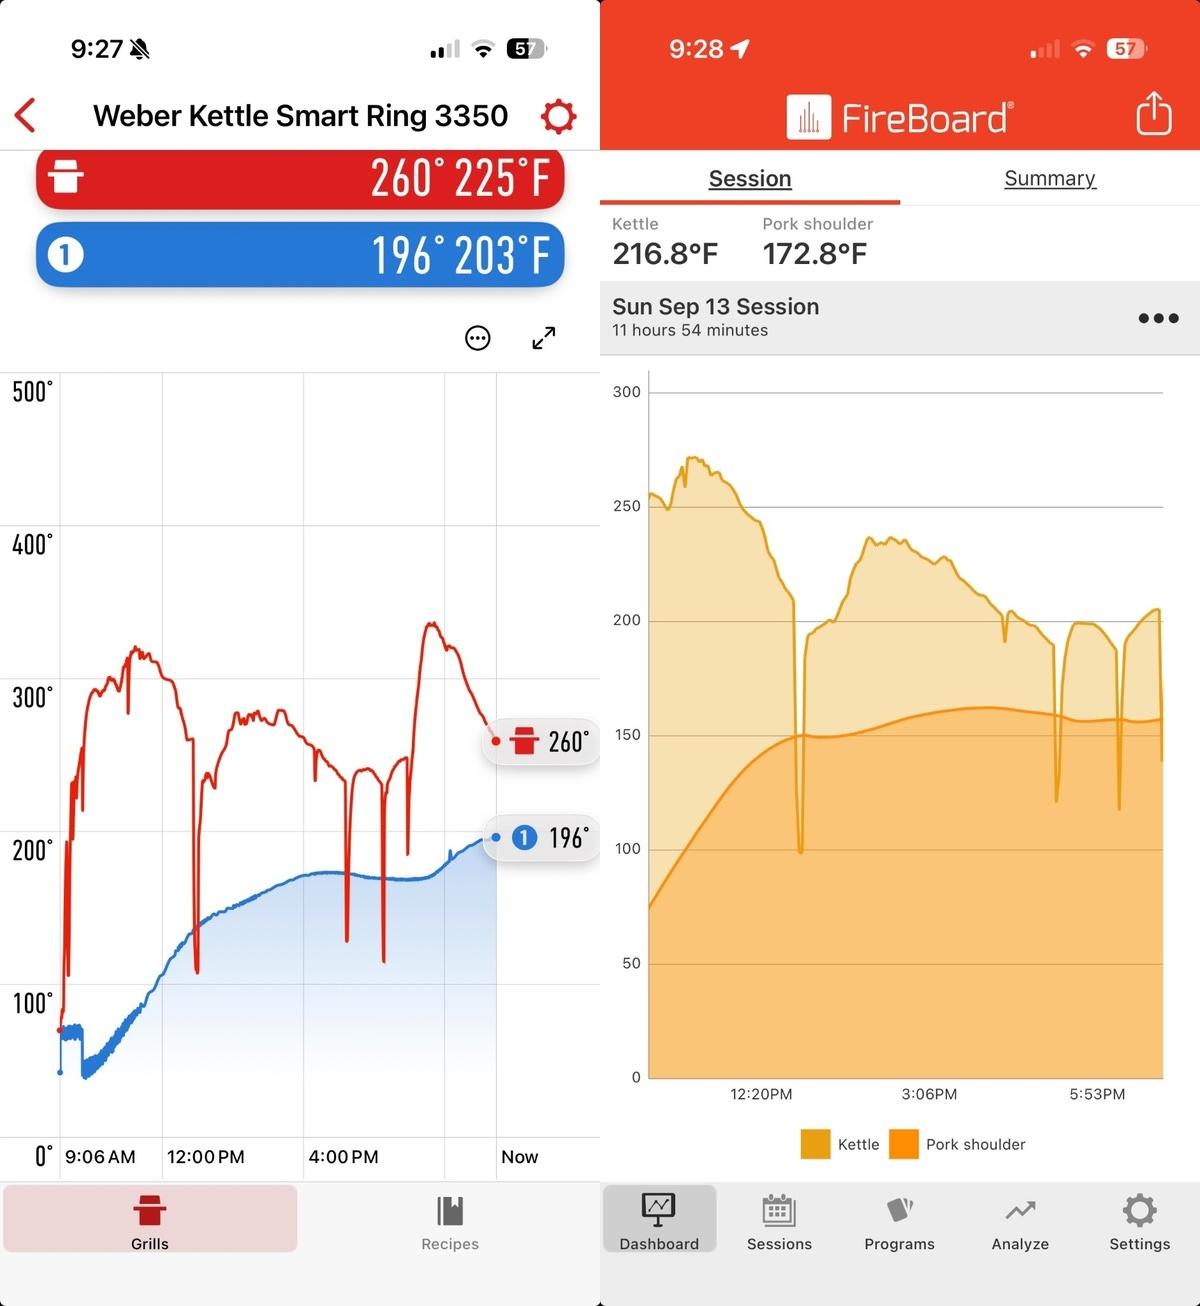
Does the Weber Kettle Smart Ring deliver on its promise to maintain stable cooking conditions over time? I tracked temperatures for each of my test cooks on two devices: 1) the Weber Connect app, which allows you to monitor and control the cook from your phone or smart device, and 2) a Fireboard Drive. Every time, the Weber temp readings ran about 25°F higher than the Fireboard temp readings. I had previously tested the Weber 22″ Smart Performer Charcoal Grill, and found similar temperature discrepancies in those test results. Beta tests from our Pitmaster Club members concurred.
In the image above from my pork shoulder session, Weber Connect says the grill temp at 9:27 pm was 260°F. A minute later, Fireboard says it was at 216.8°F, a 43° difference (no I didn’t lift the lid). Note that the Fireboard readings are missing the first few startup minutes for this cook session, but otherwise the Fireboard and Weber temp readings roughly mirror each other. You can see that the meat’s internal temp readings also ran higher on Weber Connect (196°F at the time of this screenshot) than on Fireboard (172.8°F).
What’s with the temp reading discrepancies? Weber says that the PID controller in the Smart Ring reports “a calibrated value that represents the average temperature of your grill.” It does not necessarily display the detail you might see in the temp graphs of a third-party thermometer unit.
So many factors influence temperature readings. Maybe in my tests, the Fireboard temp probe’s placement (1 inch away from Weber’s temp probe) affected the readings. Maybe because that temp probe was 1 inch closer to the cold food, it detected lower temperatures. Maybe because the Weber temp probe was 1 inch closer to the hot metal kettle bowl, it detected higher temperatures. Maybe the Fireboard temp probe is just more sensitive than the Weber temp probe. I dunno. But one thing’s for sure: Weber’s readouts reflect a calibrated average overall grill temp, while Fireboard’s reflect the exact temp at the location of the temp probe. With that in mind, throughout my cooks, I averaged the two temp readings, and everything turned out fine. Anyway, I tend to watch the food more than the numbers. The food never lies.
Keep in mind, the Weber Kettle Smart Ring cannot significantly reduce the temperature in your charcoal grill. It’s not like it can just turn down the heat once the coals are lit. The fan is primarily designed to increase the grill temperature by feeding more oxygen to the fuel and then to maintain a steady grill temperature by cycling on and off. The only way the fan can reduce the grill temperature is by staying off. At that point, the total energy in the system is primarily determined by the amount of charcoal you loaded onto the coal grate—and how you configured the briquets (and the weather, and whether a butterfly fluttered its wings in Zimbabwe at the exact moment you started monitoring temps ☺). A long, thin snake (single layer of briquets) will generate less heat over more time than a short, thick snake (double-layer of briquets). If you load in 5-6 pounds of briquets and dial in a set temp of 225°F, don’t be surprised if you overshoot the set temp, even for the majority of the cook. Even the one Ring to rule them all is not wizardly enough to get your grill temp down if you overload the grill. If it’s low and slow cooking you want, with the Smart Ring installed, it is essential to use a thin row of briquets. If the temp graph shows that the grill temp is running low, you can always add a few more briquets, or better yet, some small wood chunks, to bring the temp up a bit.
Rapidfire Assist
When you first fire up the Smart Ring, you can hear the fan working overtime to get the grill up to the set temp. Weber calls it Rapidfire Assist. Test results from my cooks and those of our Pitmaster Club members showed that Rapidfire Assist consistently overshoots the target temp then backs off to stabilize the grill. According to Weber’s website, “the Rapidfire Assist feature was designed to overshoot past low-temperature targets (any temperature below 300°F) to ensure coals are hot enough to start. It then brings the temperature back down to land at the set target temperature. This is like waiting for dirty smoke to clear when setting up a cook the traditional way, but without the extra effort.”
How long does it take for the grill temp to drop back down? It depends heavily on your charcoal setup, but the fewer briquets loaded into the kettle, the less time it will take to drop down. Again, the Smart Ring is designed primarily to assist with low and slow cooking. But you can always just lift the lid for a few minutes to drop the temp.
Weber Kettle Smart Ring Conclusion
At the end of my tests, I jotted down these final thoughts:
PROS
- Automates airflow for steady temperature control
- Fan runs pretty quietly
- No problems with fly ash (if excess ash is removed before cooking)
- Allows you to monitor the cook from your phone or smart device
- Fits the Weber charcoal rotisserie kit
- Creates two grate heights (with hinged grate installed)
CONS
- Recommended use raises the cooking grate 10 inches above the coal grate, making it challenging to sear
- Price: $279 (the Weber Original 22-inch kettle grill itself retails for $149)
- Some air gaps in the assembled Ring create a leaky system for smoking
- “Optimized for lower temperature cooks,” which reduces its versatility
The main question here is: What does this product do that I cannot already do on my charcoal kettle? The company answers this very question on the Weber Kettle Smart Ring FAQ page: “The Kettle Smart Ring does not replace your barbecue skills — it enhances them with the convenience of fan control and remote monitoring.”
Boom. That’s what you’re getting here. If you’re experienced at low and slow cooks on your Weber kettle using the “snake” charcoal setup, then cooking with the Smart Ring is pretty similar. The difference is that the fan regulates the airflow instead of you doing it manually with the top and bottom vents. That may be a big plus for those who struggle to get their kettle to maintain a steady temp over a long cook session, especially in challenging weather conditions.
For those who like to reverse sear, cooking with the Smart Ring as recommended in the manual may be a hindrance because the grate sits 5 more inches away from the fire. My solution was to use the Afterburner Method. But you could just as easily drop the hinged grate to its original lower position in your kettle, then install the Smart Ring and use the lower grate height.
Bottom line: the Weber Kettle Smart Ring is a very useful addition to 22-inch kettles. Will you use it for every cook? That’s up to you. It works as advertised, simplifies the process of maintaining low to medium target temperatures over long cooks, and connects seamlessly with the Weber Connect app for remote control and monitoring. We give it a Gold Medal.
Warranty: 3 years
We thank Weber for providing a Kettle Smart Ring for our tests.




Before you can post a comment or question you must sign into our commenting partner, Disqus. This helps make sure everyone hanging around the grill is civil. We do not tolerate nastiness, racism, porn, inappropriate language, or attacks on others. All comments are the property of AmazingRibs.com and we reserve the right to quote them, edit them, delete them, and block people from making future comments.
Please leave comments and questions on the same page that is devoted to that subject so others can see questions and our answers when they are reading about the subject. You must enable JavaScript to use the comments section, and you must accept cookies to post comments. Note: the software that runs Disqus is different from the Pitmaster Club, so members need to sign into the Pitmaster Club separately.