How to Grill A Steak Like A Pro (2 Recipes, 7 Articles)
Published On: 9/5/2019 Last Modified: 6/16/2025
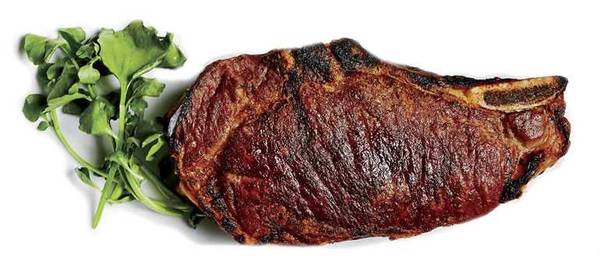
You don’t need to donate last week’s paycheck to a steakhouse to enjoy a fantastic steak thanks to these grilling tips and techniques.
What is it about beef? It can be so incredibly satisfying. Juicy. Meaty. Full of rich flavor. Sometimes, we just can’t get enough, and honestly one of our favorite ways to enjoy beef is in a big ‘ol slab. But there is no reason to spend a fortune at a restaurant when the team at AmazingRibs.com can teach you how to grill a steak at home like the pros with a few key tips for grilling steak!
With a simple steak, you get a maximum amount of surface area that browns and takes on deep, smoky, savory flavors. Sure, beef roasts are amazing too, but you don’t get as much browned surface, so you get less flavor. Plus, a steak tends to be a single serving, and it just feels good to get your own self-contained plank of meaty goodness on the dinner plate. When you eat steak, you eat like a king.
Fortunately, cooking a great steak is one of the simplest things in the world. At home, follow our simple tips for grilling steak and in no time you’ll be hoisting a steak knife to dig into one of the most gratifying meals you will ever cook.
Step 1: Buy great meat. Restaurant chefs have a saying: “Garbage in, garbage out.” That means if you buy less expensive, lower quality ingredients, no amount of seasoning or cooking is going to elevate them to the next level on the plate. It’s like trying to polish a turd. We can’t stress this enough when teaching you how to grill a steak, and that’s why it is step number one in the process: Buy the best meat you can afford. Prime graded steaks are among the best tasting because they have the highest amount of fat striated within the meat, known as intramuscular fat or marbling. Get to know your local butcher. Let him or her know you LOVE Prime beef steaks. Now and then, bring him or her a beer or another thank you. Treat your butcher well, and he or she will treat you well and maybe even set aside the best cuts of steak when Prime beef comes in the shop.
You can also buy excellent quality Prime beef steaks and Wagyu beef from online purveyors like Allen Bros. See our page of Artisan Meat Purveyors for more. Corn-feed beef tends to taste richer, sweeter, and more “beefy,” while grass-fed beef tends to have more nuanced flavors. Try both to find your favorite. The vast majority of steaks are briefly “wet-aged” in cryovac packaging, but dry-aged beef develops more complex, concentrated flavors. It also concentrates in price because it loses weight during the aging process. If you’re interested in learning more, have a look at our advice on How to Dry Age Steaks at Home.
When learning how to grill a steak, one of the first questions you should ask is “which cut should I buy?” We love ribeyes. Some prefer porterhouse. Others like strip steaks. And flank steaks certainly have their place. It’s a personal choice, and you should try a few different steak cuts to find your favorite. Bone-in or boneless? Bones have a nostalgic caveman appeal, but the fact is they inhibit heat transference and make it more difficult to cook a steak perfectly. Plus, the bones do not release some kind of magical flavor into the meat. That’s a myth and we bust it here. When following our tips for grilling steak, always look for a steak that’s at least 1 1/2 to 2 inches thick so there’s enough room for both a deeply browned crust and a perfectly cooked interior. To bone up on more steak buying basics, read our article on Buying Beef, Beef Grades, and Labels.
Step 2: Trim and tie. While this is another key step in learning how to grill a steak like a boss, it will probably be done by your butcher. But let’s say you’re the butcher, and you’re cutting some steaks from a Prime rib roast. Trim the surface fat to 1/8 to 1/4″ thickness. There’s no reason to leave a thick layer of fat on a steak, and there’s good reason to remove it. The fact is that surface fat does not penetrate the meat as it melts, somehow making the meat taste richer. This is another myth, and we bust that one here. Plus, when eating steak, most folks will cut off the gobs of surface fat and intramuscular fat (chunks of fat and gristle between the muscle groups), pushing them to the side of the plate.
And there goes the seasoning you lovingly rubbed or slathered all over the surface. Flavor that’s rubbed into the surface fat of a steak is wasted. That’s two good reasons to trim up the fatty parts of your steak before cooking, so both you and your guests get the most flavor on the plate. If you’ve removed so much fat, or so much bone, that your steaks are floppy and unwieldy, tie them up. A few inches of butcher’s string will make well-trimmed steaks easier to handle, tighten up air pockets, and help them cook more evenly. A nice, tidy steak looks much better on the plate.
Step 3: Pre-salt it. When learning how to grill a steak, one key to success is to hold off on other seasonings at first because they will burn during cooking. But you want to salt your steaks early. If you only have 30 minutes, fine. Salt the steak all over and let it sit in the fridge for 30 minutes. If you have 2 hours, that’s even better. Got 24 hours? That’s better still and is properly called dry brining. Read more about dry brining here. Whether it’s for 30 minutes or 24 hours, pre-salting gives you a better tasting, juicier steak because salt penetrates the meat and helps it hold onto its juices. And that’s why it is one of our top tips for grilling a steak! Just sprinkle a generous amount of salt all over the steak, about 1/2 teaspoon Morton’s kosher salt per pound of meat. What about marinating? Forget it. Marinating steaks is a useless technique because marinades don’t penetrate the meat much and you end up throwing away most of the flavor when you throw away the marinade. Here’s the science.
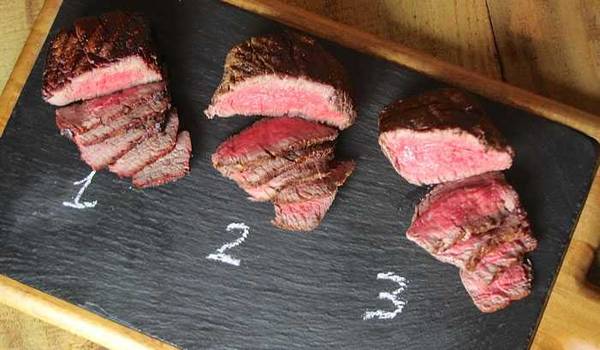
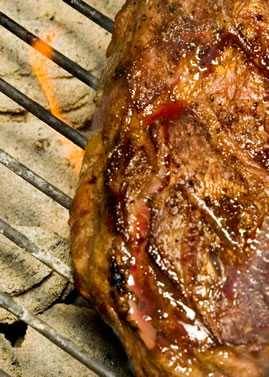
Step 4: Reverse sear it. When learning how to grill a steak, let’s answer this question first: “Do you want to bring the meat to room temperature before cooking?” No! Room temperature is about 70 degrees F, right in the food safety danger zone of 40 to 140 degrees F. It’s fine to let a steak sit AT room temperature for 30 to 45 minutes but don’t bring it TO room temperature. This myth is busted too. As for the best cooking method, the “sear and move” technique used to be a standard technique, and it works fairly well, especially with thinner steaks less than 1 inch thick. With this method, you put the steak over or under some raging high heat to sear the outside and create a flavorful browned crust, then move it to lower heat to finish cooking it through to your desired doneness.
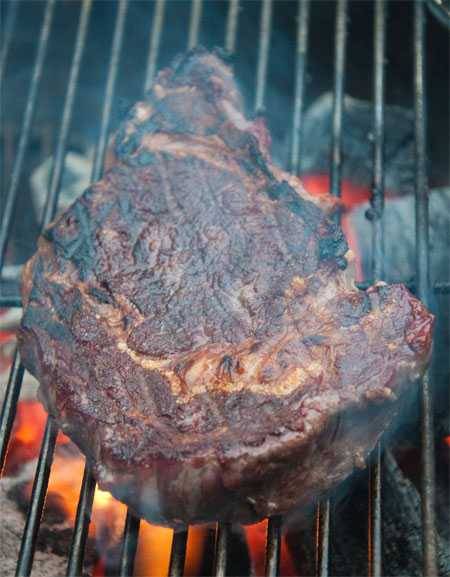
Cooking the exterior and interior of the steak differently makes sense, but the whole process works much better in reverse, especially for steaks more than 1 inch thick. Why? Meat cooks from the outside in, and with the “sear and move” technique, when you hit the steak with a ton of heat at the beginning, it creates a thicker band of overcooked, grey meat just under the surface before the interior is cooked to your preferred doneness. Flip the script for nice thick steak. Start the meat over low heat. Then at the end, blast it with the highest heat you can, flipping and rotating it like mad to create an evenly browned crust all over. For really thick steaks, sear the sides too, to get even more flavor.
With this reverse sear method, you get more perfectly cooked meat inside from edge to edge and only a thin band of grey meat just under your beautifully browned crust. For all the science and logic, dig deeper into the reverse sear method here. If you have a sous vide cooker, that makes reverse searing a thick steak a cinch: sous vide the steak to a temp that’s just under your ideal doneness (let’s say about 110 degrees F), then blast it with raging heat on a grill. We call that “sous vide que” and you can read more about it here. Of course, you could get your raging high heat from a cast-iron pan instead of a grill. You’ll get a nice browned crust. But you won’t get the awesome smell of woodsmoke from the grill. Watch our friend Jabin Postal cook two perfect ribeyes with our bottled Meathead’s Amazing Smoked Red Meat Seasoning & Dry Brine and the reverse sear/cold grate method on a Slow ‘N Sear. Perfection!
Step 5: Flavor it. One of our key tips for grilling steaks is all about the seasoning. Maybe you like it simple, just salt and pepper. And if you’ve got a super-expensive piece of A5 Wagyu, then yes, that is all you need. But for less rich steaks, a little butter does wonders. Just melt some butter over your salted and peppered steak. For even more flavor, use a compound butter with some chopped herbs or spices mixed in. Got a killer steak rub? Scatter it on when the meat comes off the heat. Just make sure there’s no salt in the rub if you pre-salted the steak.
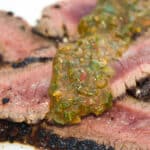
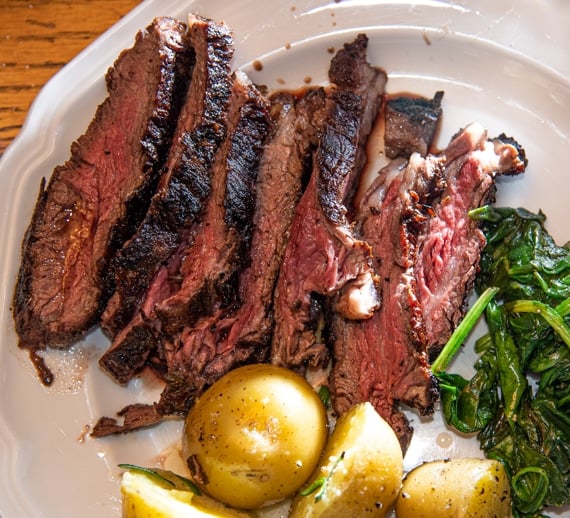
Another great option: a board sauce. Chop up some herbs or crush some spices and mix them with softened butter or olive oil right on your cutting board. When you put the hot steak on the board, the butter melts, the flavors open up, the meat juices mix with whatever you put on the board, and it all mingles together, amping up the taste of your steak when it’s served. Read more about board sauces here. Herb sauces lend nice, bright flavors to beef steaks, too, and Argentinian chimichurri is among the best (that’s it on the flank steak in the photo).
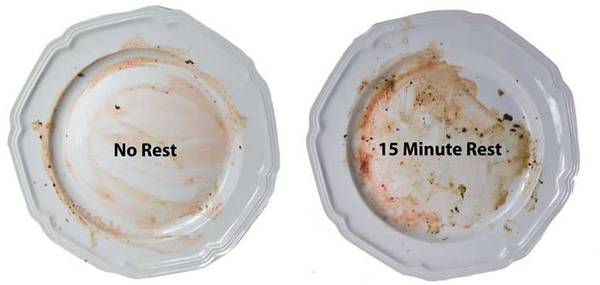
Step 6: Serve it hot. Should you rest your steak before serving? No! Hot steak tastes better and the juices retained from a brief rest are minimal. Did some juices spill out onto the cutting board? Don’t cry over them: just pour them over the steak to enjoy your boeuf “au jus.” Nothing will be lost.” This is another myth busted: read about the science here.
That’s it; those are the tips for grilling steak like the pros do! These six basic steps work with any beef steak from ribeye to porterhouse to filet mignon. So fire up the grill and enjoy a steak today! For more details, check out some of our favorite steak recipes, seasonings, sauces, and other tips below.
Buying Beef: Beef Grades And Labels, And Busting The Kobe Beef Myth
Grades of beef explained: Choice, Prime, Wagyu, Certified Angus, Kobe, aged, grass fed, grain fed, organic, natural, kosher, and halal.
Beef & Bison Cuts: Not All are Created Equal
Everything you need to know about the different beef cuts, all the primals as well as all the popular commercial cuts.
Extreme Steak: Wild And Crazy Ways To Get A Killer Sear
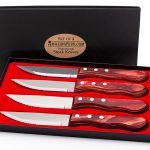
Here are four offbeat methods for cooking steaks: The Afterburner Method, the Vigneron Method, the Caveman Method, and the Stripsteak Method.Professional Brazilian Steakhouse Knife Set
This machine washable professional Brazilian steak knife set was hand selected by Meathead. Read on for our review.
The Big Chill: A Trick For Making The Perfect Sous-Vide-Que Steak
By starting steak in a temperature controlled sous vide water bath, it's rendered perfectly cooked every time.
How To Cook A Whole Beef Tenderloin Or Butcher Into Smaller Cuts
Many people have no idea what to do with beef tenderloin. As such, here's a "how to", offering simple techniques so you know what to do.
The Rib Cap, The Best Cut On The Steer
Along the outside edge of the beef ribeye lies the rib cap or deckle, which is more marbled and flavorful than the ribeye itself.
How to Dry Age Steak At Home
If you dry age and wet age beef at home, you can save a lot of money. Click here for all the information you need.
Cooking Hot And Fast, Low And Slow, And The Reverse Sear Method
What is the right cooking temperature for barbecue? It depends. Not all food should be cooked low and slow or hot and fast.Professional Brazilian Steakhouse Knife Set
Bright And Bold Chimichurri Sauce Amps Up Your Grilling Game
Cooking Hot And Fast, Low And Slow, And The Reverse Sear Method
The Big Chill: A Trick For Making The Perfect Sous-Vide-Que Steak
The Steak Sauce Recipe That Puts Steakhouse Versions On Notice
Board Sauces Are Incredibly Versatile And Simple
The Rib Cap, The Best Cut On The Steer
What’s A Proper Sear And Why Grill Marks Are Overrated
Myth: Searing Steaks Seals In The Juices
Resting Meat: Why I Think It Is A Mistake, And Why I think Holding Some Meat Is A Good Idea
What Causes Some Beef To Have A Liver Flavor?
Bamboo Steak Markers, Ensuring Guests Get The Temperature They Requested
How To Grill Juicy Wagyu Picanha Steaks
Steak Locker Home Dry Age Fridge SL150 Review And Rating
Elk Steak Seared In Cast Iron Is As Simple And Delicious As It Gets
Related articles
- Buying Beef: Beef Grades And Labels, And Busting The Kobe Beef Myth
- Basic Meat Science For Cooks
- Beef And Bison Recipes For The Smoker Or Grill (41 Recipes, 3 Pages, 11 Articles)
- Recipe Secrets Revealed For Grilled Steaks That Put The Best Restaurants To Shame
- Extreme Steak: Wild And Crazy Ways To Get A Killer Sear
- Beef & Bison Cuts: Not All are Created Equal
- The Big Chill: A Trick For Making The Perfect Sous-Vide-Que Steak
- How To Cook A Whole Beef Tenderloin Or Butcher Into Smaller Cuts
- The Rib Cap, The Best Cut On The Steer
- How to Dry Age Steak At Home
- Cooking Hot And Fast, Low And Slow, And The Reverse Sear Method
- Bright And Bold Chimichurri Sauce Amps Up Your Grilling Game
- Steak Sauce Recipe
- Board Sauces Are Incredibly Versatile And Simple
- What’s A Proper Sear And Why Grill Marks Are Overrated
- Myth: Searing Steaks Seals In The Juices
- Resting Meat: Why I Think It Is A Mistake, And Why I think Holding Some Meat Is A Good Idea
- What Causes Some Beef To Have A Liver Flavor?
- Elk Steak Recipe
- Caprese Flank Steak Takes The Classic Italian Salad To The Grill
- Level Up Your Eggs Benedict Game With Filet Mignon
- Rich Butter Poached Bison Ribeye Recipe, The Sous-Vide-Que Method
- An Epic Surf-and-Turf: Filet Mignon And Butter Poached Lobster
- Grilled Chuck Steak With Red Wine Marinade Recipe
- Mrs. O’Leary’s Cow Crust: The Perfect Beef Dry Rub Recipe
- This Grilled Flank Steak Recipe Is A Guaranteed Hit
- The Secret To This Amazing Grilled Ribeye Is Sous Vide
- Beef Dry Rub Recipe
- How To Grill Juicy Wagyu Picanha Steaks
- Smoked Tomahawk Steak From Eric Wareheim’s Steak House Cookbook




High quality websites are expensive to run. If you help us, we’ll pay you back bigtime with an ad-free experience and a lot of freebies!
Millions come to AmazingRibs.com every month for high quality tested recipes, tips on technique, science, mythbusting, product reviews, and inspiration. But it is expensive to run a website with more than 2,000 pages and we don’t have a big corporate partner to subsidize us.
Our most important source of sustenance is people who join our Pitmaster Club. But please don’t think of it as a donation. Members get MANY great benefits. We block all third-party ads, we give members free ebooks, magazines, interviews, webinars, more recipes, a monthly sweepstakes with prizes worth up to $2,000, discounts on products, and best of all a community of like-minded cooks free of flame wars. Click below to see all the benefits, take a free 30 day trial, and help keep this site alive.
Post comments and questions below
1) Please try the search box at the top of every page before you ask for help.
2) Try to post your question to the appropriate page.
3) Tell us everything we need to know to help such as the type of cooker and thermometer. Dial thermometers are often off by as much as 50°F so if you are not using a good digital thermometer we probably can’t help you with time and temp questions. Please read this article about thermometers.
4) If you are a member of the Pitmaster Club, your comments login is probably different.
5) Posts with links in them may not appear immediately.
Moderators