AmazingRibs.com is supported by our Pitmaster Club. Also, when you buy with links on our site we may earn a finder’s fee.
Click to see how we test and review products.
Top Tips And Accessories For The Weber Smokey Mountain

Published On: 6/26/2019 Last Modified: 6/16/2025
Get the most out of your Weber Smokey Mountain (WSM) or similar bullet style upright smoker with these tricks and tools.
If you’re in the market for a quality smoker that doesn’t take up a ton of space, the WSM is among our favorites given its quality construction and consistent performance (you can check out our hands-on review of this and hundreds of other smokers and grills here).
In addition to the WSM, there are a number of other “bullet” style (they basically look like a bullet set upright on its flat end), but we have yet to find one that provides the same quality and performance for the price. This includes the Apollo which has some design improvements but users still complain about build quality. Equally, the bullets from Brinkmann are popular, but very poor imitations. They should both be avoided.
Below, in brief, is all you need to get started with your new WSM. Later you can play with more or less wood, more or less coal, vent settings, etc.
Seasoning and calibrating your smoker with dry runs
The first thing to do after you assemble your new grill or smoker is to season it and calibrate it by doing a few dry runs without food. This will burn off any manufacturer’s grease, and give you a sense for how to set it up to hit the two important target temps that almost all my recipes use: 225°F and 325°F.
Of course, in order to do this, you absolutely positively must have a good digital oven thermometer. I don’t care how much you spent, the bi-metal dial thermometer that came with it is cheap and unreliable and likely to be off by as much as 50°F. Worse still, it is in the dome, and the temp down on the grate where the meat sits is much different. Like a musician, you must master your instrument to make great food.
Harry Soo is one of the top cooks on the barbecue competition circuit and his team, Slap Yo’ Daddy BBQ from Diamond Bar, CA, wins tens of thousands of dollars every year. He cooks on 18.5″ Weber Smokey Mountains he bought on Amazon, not the $15,000 big rigs most of the other teams use. He also teaches classes. Harry conducted an extremely informative seminar on the operation of the WSM for the Pitmaster Club and if you are a member you can watch it here.
He says “The key step once your smoker arrives is to ensure you season it properly. New WSMs will tend to overheat until you are able to season the inside. The fastest way to season is to do the following:
“Cover the water pan completely with aluminum foil and run a full load of lit Kingsford blue bag briquets and let it run as hot as it can with no water in the pan (over 350°F) to burn off any manufacturing residue. Clean out the ash.
“Fill the charcoal basket 1/2 full of unlit briquets. Hollow out the center so you can see the grate, making a donut of charcoal. Then put in a 1/2 chimney of lit Kingsford briquets in the middle. This will allow a slow burn for three to five hours on a 72°F day. Adjust the vents to get 275°F on the dome thermometer. Put in bacon strips, chicken parts, pork fat, or any other scrap meat you don’t plan to eat. The key is to get fatty meats to generate lots of vapors. Toss in a couple of tennis ball size wood chunks to generate smoke.
“Repeat the above step at least twice before you cook meat that you want to eat. Remember to always empty the ash from the bottom and grease on the foiled water pan to avoid fires and any rancid old oil smell before you cook. Also, I never cook seafood and hotdogs on WSMs that will cook pork, beef, or poultry. Nothing destroys the aroma faster. That’s why you should buy a second smoker if you plan to cook seafood or hotdogs.”
After cooking Soo uses a wire brush to scrape off creosote and grease, but not the dull black coat that reduces reflection of heat waves. You want the interior dull, but you don’t want rancid grease.
Cooking with your bullet
1) Clean out the ash from the bottom of the smoker. It is essential that nothing blocks the air intakes. Besides, ash absorbs heat. If you can, buy another spare bottom grate and lay it on top of the one that came with your WSM with the bars perpendicular, creating a checkerboard pattern. This will prevent coals and wood from falling through.
2) Open the vent on the top all the way, and open the bottom vents half way.
3) There are a number of methods to start and maintain the fire all better than the method recommended by Weber. If you light all the coals at once, as Weber recommends, they will burn hot at first and then cool off. Of course we want to get the pit to a target temp and hold it steady. The best way to set up your fire is with one of the many variations of the Minion Method, named after Jim Minion, a caterer who invented the technique.
Here are the best methods for you to try. Do a dry run or two without food to figure out exactly how many coals works for you. It is really important to use a good thermometer and keep a cooking log when using a WSM, at least until you understand how it works. And remember, don’t soak the wood because wet wood just cools the fire, and for chicken and turkey, you don’t need any wood at all, the coals emit enough smoke. Click here to read why and more about wood and smoke.

The Original Minion Method. The original Minion Method says to pour unlit coals in the ring and pour a chimney of hot coals on top. As the hot coals burn out the new coals fire up. The Minion method is much better at keeping the temp steady because it lights new coals as the old ones burn out.
Soo’s Donut. Soo uses a modified Minion Method that I call Soo’s Donut. Get a 16 pound bag of plain old fashioned Kingsford briquets. They burn steady and relatively clean. Click here to read more about charcoal types and why Soo and I and many others prefer Blue Bag over all the others including the expensive “natural” lump charcoals. Fill a Weber chimney half way (40 coals), light them, and wait until they are all coated with white ash. The exact number of coals will vary depending on the brand you use and the weather.
Fill the ring with unlit coals into the fire ring, and dig a hole in the center all the way down and about 8″ wide forming a charcoal donut. Bury 3 to 4 chunks of wood in the donut at different distances from the center. You can use chips or pellets, but I prefer chunks because they ignite and smolder slowly. Then pour the hot coals into the hole. The hot coals begin to burn out after a while but as they do, they ignite the coals near them and the new coals ignite the coals near them so the fire moves from the center to the edges.
AmazingRibs.com SVP of Whatever and frequent WSM user Clint Cantwell uses a similar method but only adds 6-8 pre-heated briquets to the center hole. As such he is capable of maintaining his desired temperature for 10+ hours without adding more charcoal.
The Fuse. I prefer this method for the large WSM because this unit tends to run hotter than the smaller unit and the fuse helps me keep the temp down to 225°F. Create a donut as above, but put a stack of bricks or a big rock in the center to keep the coals from falling into the hole. Then take a bite out of the donut about 8″ so it is now a big C shape.
Fill a Weber chimney about 1/2 way and get the coals fully engaged. Pour the lit coals over one end of the C, not in the center. Space about three chunks of wood in a line near the hot coals. The lit coals will provide you with heat and smoke and slowly ignite the rest of the coals in the manner of a fuse, burning around the C, producing a nice even heat for a long time. The bricks absorb and emit heat helping hold temps steady.
The Pyramid. Build a pyramid of coals in the center of the ring. Put a Weber paraffin cube under the top coal and light it. It will start up more slowly but will not overshoot the target temp easily.
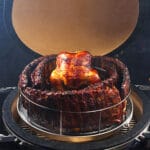
4) Place the cooking grates right on top of the hot coals to heat them up so you can scrape them clean. Old grease and rust can taint the flavor of your food. Remove the clean grates.
5) Put together the rest of the smoker positioning the door so it is easily accessible. Line the water pan with heavy duty aluminum foil. This will make cleanup easier. Insert the water pan and fill it within 1/2″ of the top with hot water. Try to use hot water since it will absorb less heat and help get the oven up to temp faster. Click here to read more about what goes in the water pan. Place the cooking grates in position.
Soo does things differently, so you can experiment with my method and his: “Don’t use any water in the pan. Just cover the water pan with foil top and bottom. I foil it twice so I can remove the second layer after the cook and refoil it. That way, I don’t have to clean my pan. Dry heat allows the bark to form faster on the meat. Once the bark forms, you can introduce moisture. I just spray the meat with water every hour.
To test for properly formed bark, use your finger nail and scrape the meat surface. If the crust has formed, it will not come off when you gently scrape it with your fingernail. If the crust comes off, the bark has not set, so don’t spray until it sets. Let it cook longer and check back in 15 minutes. When the bark is set, I then wrap the meat in foil for about an hour, take it out and let it dry a bit. I’ve won many awards with this technique.”
6) Normally I recommend you control temp with the bottom vents and leave the top open. But the door on the WSM leaks so badly that the coals get air from there. So on this device, you need to close the top vent and the bottom vents together to lower temp, because the top vent creates the suction, called the draft, that pulls in oxygen through the door.
When the temp gets up to about 200°F, and it will get there quickly on a hot day, throttle back the vents to about 1/3 open and keep fiddling with them until you stabilize at about 225 to 250°F. Remember, it is much easier to gently increase the temperature than to bring it back down if it gets away from you. Regulating temp may be a bit trickier on a new unit until it has built up a nice deposit of carbon on the inside. New units can run a bit hot because they are reflective. For recipes that call for 325°F, like my Ultimate Turkey, use more lit coals and more air. If necessary, leave the water pan dry or use sand in it. The sand becomes a big heat sink and helps stabilize fluctuations. Click here to learn more about controlling temp with vents.
7) Insert a meat thermometer probe into the center of large cuts (it is next to impossible to get an accurate reading on ribs so don’t bother, there are other ways to tell when they are ready). Make sure the probe is not in contact with the bone. Add the meat. If you can fit it all on one grate, use the top grate and remove the lower grate so it doesn’t get all gunky from drippings.
If you need to use both grates, put the faster cooking food on top so it is easier to remove. Be aware that the top rack meats will drip on the lower meats, so I never put poultry or fish under pork or beef. If you are cooking both beef and pork, I put pork on top. If I want both meats to finish together, I often swap the top and bottom shelves. They will progress differently because the top grate is usually 10 to 20°F warmer than the grate above the water pan. A pan of beans on the lower shelf is always a good idea.
Place an oven thermometer probe near the meat but not touching the grate. Keep it at least 1″ away from the meat because there is a cold air bubble around the meat. Do not meter the temp at the dome. It is often 10 to 15°F hotter than the top grate. Thread the cables through a top vent hole.
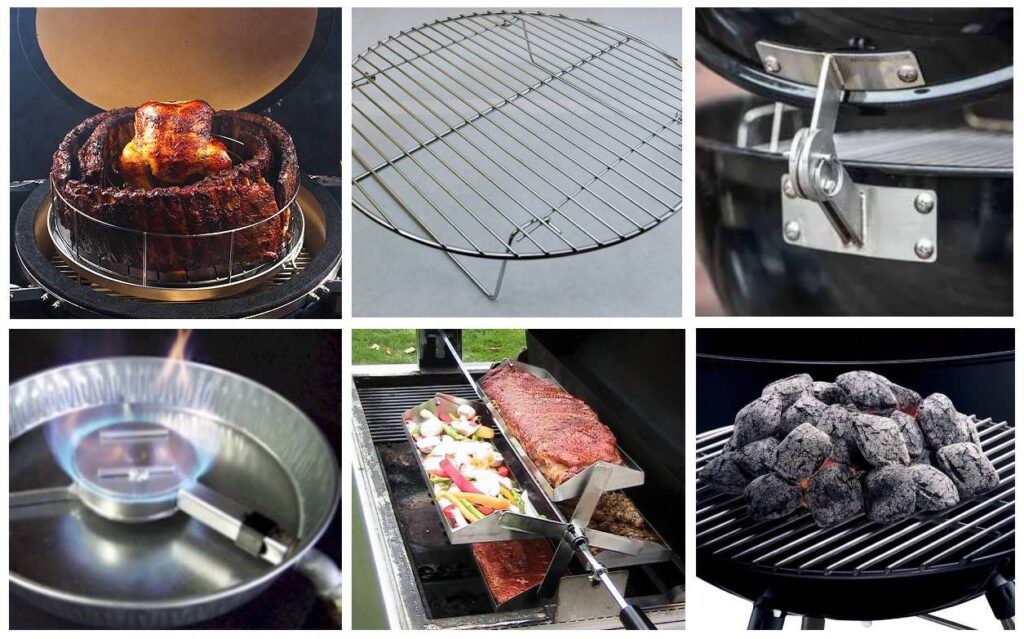
One of the problems with the 18.5″ bullet smokers is that they have 15.5″ grates and many slabs of ribs, especially St. Louis cut slabs, don’t fit. You don’t have to cut them in half. The picture here shows one way to get two full slabs on a single rack in a Weber Smokey Mountain: Use rib racks and bend the slabs to fit. If you do this on both the upper and lower grate on a WSM you can get four slabs on. Another technique is to roll the slab in a circle and run a long skewer through the place where then ends overlap. Works great and keeps the ends from burning.
8) Now go drink a beer. After the smoke stops, you can add more wood if you know what you are doing. There’s always the risk of over smoking, so until you really know your machine, don’t add any more wood.
9) Every two hours check to make sure the water pan has not dried out. When it gets low, carefully add hot water.
10) When you are done, close all vents to smother the coals and preserve them for the next cook. Just make sure you shake off the ash before you use partially burned coals, and wipe your ash out.
11) When you store your WSM, leave the vents open and take the door off so it will not get moldy inside. Put a good cover over it and make sure it drops low enough to keep rain out of the lower seam. Click here to read about what to do if your WSM gets moldy.
And that’s all there is to it. Go drink another beer. Just don’t drink the bong water in the pan.
The temperature gradients
If you use a good digital thermometer (and you are, aren’t you?), you will notice that the dial in the dome isn’t accurate, that the dome temp is hotter than the top grate, and the top grate is hotter than the bottom grate. How much? That depends on the temp of the water in the pan, the ambient air temp outside, if it is sunny, or if it is windy. If it is hot and sunny, that dome can absorb a lot of heat, and if you just added water, the bottom shelf can be a lot cooler. On a nice summer day in the 70s, in the shade with no wind, the dome will be about 10 to 15°F hotter than the top grate which will be 10 to 15°F hotter than the bottom grate. Your mileage may vary.
A lot of WSM owners use quality remote temperature probes (you can check out some of our favorites here) to monitor the internal temperature of the smoker. They even drill small holes in the side and add a grommet such as these ones for inserting a probe. Don’t worry, these small holes won’t screw up your thermodynamics.
Pimp your WSM with these great products
Add a thermostat temperature controller

The WSM is pretty even keeled and once you get the hang of it, keeping it burning at a steady temp is not too hard, but charcoal does burn out and the temp declines. You can compensate for this by controlling the other fuel, oxygen.A handful of companies build devices that cover one of the intakes with a fan. The fan is attached to a digital probe that is placed on the cooking surface. The other intakes are closed. You set the desired temp, and the fan controls oxygen to the charcoal. Some of these thermostats are quite sophisticated. They can control multiple cookers, change temps at desired times or temps, and even be controlled by your computer or mobile device. A few are inexpensive, yet effective, and one even operates on batteries. Click here to see our thermometer ratings and reviews.

Upgrading Your Flimsy Weber Smokey Mountain Door
Upgrade your flimsy Weber Smokey Mountain door with this quality version. Read our review to see why we recommend it.
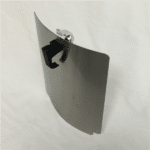
Weber Smokey Mountain Gasket and Hinge Kit Review
If you're tired of looking for a place to set your hot Weber Smokey Mountain lid then you'll love this easy to install lid hinge.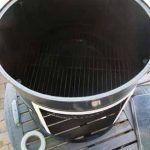
Weber Smokey Mountain Gaskets Create Airtight Seals
The door on a WSM is a bit flimsy and the lid doesn't always fit tight, leading to a leaky cooker that allows heat to escape.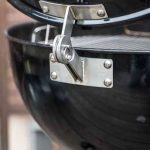
Lid Hinge Add-on For Weber Smokers And Grills
Adding a hinge makes opening and closing a Weber Smokey Mountain smoker and Weber kettle grills effortless.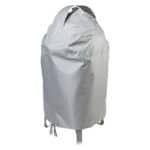
Cold Weather Jacket For Your Smoker
The Cold Weather Jacket is a silicone coated jacket designed to insulate your Weber Smokey Mountain while cooking.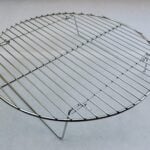
The Smokenator Hovergrill Expands Your Grill’s Cooking Capacity
The Smokenator Hovergrill is a quality stainless steel grate with legs that can do three great things for your cooking.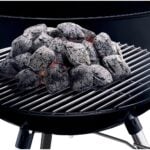
Replacement Charcoal Grate For Weber Kettle Grills And WSM Smoker
On the Weber Smokey Mountain and the Weber Kettle, as charcoal burns down to small nubs, the tend to fall through the grates.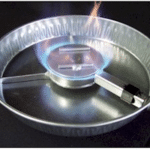
Convert A Smoker To Propane With These Simple Kits
Just because you live somewhere that doesn't allow charcoal grills doesn't mean that you can't enjoy cooking on the Weber Smokey Mountain.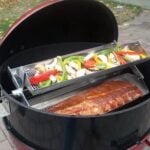
The Rib-O-Lator, A Rib Rotisserie Insert For Grills
Adding the Rib-o-lator to the rotisserie on your grill allows you to cook multiple racks of ribs perfectly.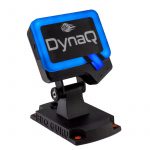
BBQ Guru DynaQ Thermostatic Controller Review
BBQ Guru DynaQ is a wireless thermometer. It's a well-made unit with only Bluetooth connectivity, and should be fine for many backyard cooks.Related articles
- Grill And Smoker Setup And Firing Up (1 Page, 18 Articles)
- BBQ And Kitchen Tools, Toys, And Accessories Rated And Reviewed (23 Pages)
Up Your BBQ IQ By Joining The Pitmaster Club

Sign up for a free trial of the AmazingRibs.com Pitmaster Club and experience everything that the world’s largest membership-based BBQ and grilling community has to offer!
High quality websites are expensive to run. If you help us, we’ll pay you back bigtime with an ad-free experience and a lot of freebies!
Millions come to AmazingRibs.com every month for high quality tested recipes, tips on technique, science, mythbusting, product reviews, and inspiration. But it is expensive to run a website with more than 2,000 pages and we don’t have a big corporate partner to subsidize us.
Our most important source of sustenance is people who join our Pitmaster Club. But please don’t think of it as a donation. Members get MANY great benefits. We block all third-party ads, we give members free ebooks, magazines, interviews, webinars, more recipes, a monthly sweepstakes with prizes worth up to $2,000, discounts on products, and best of all a community of like-minded cooks free of flame wars. Click below to see all the benefits, take a free 30 day trial, and help keep this site alive.
Post comments and questions below
1) Please try the search box at the top of every page before you ask for help.
2) Try to post your question to the appropriate page.
3) Tell us everything we need to know to help such as the type of cooker and thermometer. Dial thermometers are often off by as much as 50°F so if you are not using a good digital thermometer we probably can’t help you with time and temp questions. Please read this article about thermometers.
4) If you are a member of the Pitmaster Club, your comments login is probably different.
5) Posts with links in them may not appear immediately.
Moderators