


Instead of filling the house with fried food smells, spattering oil all over the stovetop, and setting off the smoke alarm, take it outside and there is no mess! Read on to hear how using our fried chicken recipe.
Outdoors there is no stovetop to clean and no smoke alarm. If oil gets on the grates or drips down, it will burn off quickly the next time you fire up the grill. And you can use part of the grill grate as a rack to drain your fried chicken!
Before you start, please read my background article on frying here. To ensure success there are several tricks:
- It helps to cut the chicken pieces into uniform sizes, so I cut the breasts in half, which has the added benefit of creating more crunchy breading!
- I also like to season the meat not the flour (DOH! I don’t know why so many recipes season the flour. You can’t control how much seasoning gets on the meat and you waste a lot.).
- I dry brine the chicken (unless I soak it in pickle brine for an hour or so). The salt penetrates and helps the meat hold on to moisture as well as amping up flavor.
- Another secret for extra crunchy is the use of corn starch in the dredge. You can use only flour and it will be just fine, but using corn starch amps up the crunch.
- After rolling the bird in the flour/cornstarch mix, let it rest in the fridge for 20 to 30 minutes. This hydrates the starches and forms gluten which helps the crust cling and crunch.
- One more vital trick: Do not deep fry! Let the chicken touch the hot metal at the bottom of the pot and a small part of the chicken peak above the oil to let off steam. Metal conducts more heat than oil and it cooks and crisps faster.
Let’s talk about buttermilk for a minute
The molecules in buttermilk are far too large to penetrate the meat and enhance it in any way. What buttermilk does do is attack the surface proteins with its acidity denaturing them and making them softer. This can help the breading to adhere. But it takes time. Any recipe that says dunk it in buttermilk and then flour is making a mistake. The problem with buttermilk is that it tends to make the breading turn prematurely brown when frying, before the meat is cooked through.
But just about any acid can have the same effect on protein as buttermilk. In India chicken is often marinated in yogurt. A quick soak in pickle juice, vinegar, or lemon juice has the same effect and creates fascinating flavors. Try pickle juice. You get the tenderizing of vinegar, and the flavor and moisture benefits of salt. With vinegar the meat gets a nice tang reminiscent of salt and vinegar potato chips.
Trust me. Fried chicken works fine without the buttermilk.
How KFC fries its chicken
Here’s how they do it at KFC. First they dunk about 16 pieces of fresh chicken parts in a wet brine for only a few seconds. This deposits salt on it evenly and wets the surface so the flour will stick. Then they shake most of it off and it goes into a small tub with the flour, the original spice blend, dried milk and dried egg, and it is coated thoroughly. Excess powder is shaken off and the pieces are set on wire racks in a pressure fryer and they are then deep fried under pressure at a top secret temp for about 10 minutes.
Col. Harland Sanders started cooking in skillets, as was traditional in the South, and eventually went to pressure cookers. Pressure frying is a technique used at Broasted Chicken restaurants and many others. It reduces cooking time by about half and reduces moisture loss. You should not try this at home in a pressure cooker. Most can’t get up to the proper temp, and the oil can melt the gaskets. An explosion could be very dangerous.
Is this the original recipe?
The internet is overflowing with copycat recipes for the original recipe by Col. Sanders. KFC has carefully kept the list of the original 11 herbs and spices under wraps. They are reputed to use two different suppliers to prepare the blend so than no single source has the list. In 2016, Jay Jones of the Chicago Tribune visited the Sanders Cafe in the tiny town of Corbin, KY, where Sanders first started selling his famous chicken. Built in 1940 and listed in the National Register of Historic Places, the restaurant and the nearby museum is a memorial to Sanders, who died in 1990, and you can order fried chicken at the restaurant. If you want to really celebrate fried chicken, check out the World Chicken Festival in London, KY any September, just 20 minutes from Corbin.
Anyway, Jones visited with Joe and Jill Ledington. Joe worked for Sanders back in the day. At their home, they leafed through a family album started by their Aunt Claudia who was Sanders’ second wife. In it, they found Aunt Claudia’s will, and on the back was a list of 11 spices to be mixed with 2 cups flour:
1) 2/3 tablespoons table salt
2) 1/2 tablespoons thyme
3) 1/2 tablespoons basil
4) 1/3 tablespoons oregano
5) 1 tablespoons celery salt
6) 1 tablespoons black pepper
7) 1 tablespoons dried mustard
8) 4 tablespoons paprika
9) 2 tablespoons garlic salt
10) 1 tablespoons ground ginger
11) 3 tablespoons white pepper
The Tribune set about duplicating the recipe. After fiddling with the fryer temperature, they determined that by adding a sprinkling of MSG just before serving, the recipe was almost identical, and KFC confirmed that they do use MSG in addition to the 11. Click here to see a photograph of the recipe.
Nashville Hot Chicken
It’s all the rage, and it comes packing heat and a great backstory. There are many variations on the theme. Here’s my version.
Extra Crunchy
Add one more bowl to the process. In it put the same amount of flour/cornstarch as my recipe with 1/4 cup of milk and mix it lightly. This makes it lumpy and those lumps stick to the chicken and make really crunchy shards. Tack on the lumps when you dredge the chicken.
Extra Extra Korean-Style Crunchy
Use rice flour. Fry it once. Take it out. Let it cool for 10 minutes. Then fry again for 3 to 4 minutes.
Coatings
As an option, if you wish, after the dunk in a flour/cornstarch mix, dunk the chicken in egg, clubsoda, buttermilk, or milk and then into flour/cornstarch, breadcrumbs, panko, corn flakes, corn meal, crushed pretzels, potato chips, crushed corn chips, crushed Cheetos, crushed Cheez-Its, or any combination you like. If you use one of these crumbs, pat it on so it sticks.
Wet brine
A number of chefs like to wet brine their fried chicken overnight because salt penetrates the meat, seasons it, and holds onto moisture.
Pickle Brine
I love this technique. If you like the salt and vinegar flavor combo (think potato chips), then the next time you kill a jar of dill pickles, save the pickle brine. Personally, I toss the bottle in my spare fridge in the basement. I have been known to bum some pickle brine from a local grocer that sells pickles from a barrel. Soak the chicken in the pickle brine for about an hour. It will have the same effect on the surface that buttermilk has. If you pickle brine, skip the dry brine step, and go straight to the herbs and spices, then the breading. If you don’t have pickle brine, just use plain old distilled vinegar 50/50 with water and add 3 tablespoons Morton coarse kosher salt per quart, a brinerade, for 30 minutes. I love the tang!
Smokey
Cut up the bird, dry brine it, flavor it, and then give it 30 minutes in the smoker. Then dredge and fry.
Leftovers
It is not likely that you will have any chicken leftover, but you can bring leftovers back to life on the grill in the indirect zone at about 225°F for about 30 minutes to reheat the meat, and then a few minutes over direct heat to crisp up the breading.
Our Fried Chicken Recipe

Fried Chicken Recipe Done On The Grill
Ingredients
Method
- Prep. Cut the chicken into parts, separating drumsticks, thighs, wings, and breasts. Cut the breasts in half crosswise. This will make them similar in size to the thighs. Cut off excess fat, but leave the skins on.
- Dredge. To dredge the chicken, begin by sprinkling the surface of the brined chicken lightly with the baking powder, herb blend, black pepper, and if you wish, hot pepper powder such as chipotle or hot smoked paprika. I strongly recommend you sprinkle it with Accent too. Accent contains MSG and it amps the flavor to 11.Wash and thoroughly dry your hands. Pour the flour and corn starch in a bowl and mix them together. Crack the eggs into another bowl and whisk them. With one hand, place the chicken pieces in the flour/starch one at a time and completely coat the meat. Keep the other hand behind your back. Shake off the excess flour (important). Then dunk the chicken in the egg, and back into the flour mix. Then place the chicken on a rack, sheet pan, or platter.
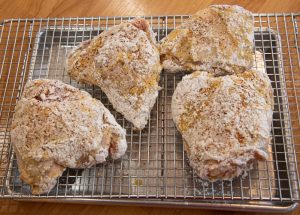
- Hydrate (optional). When you are done coating the chicken, discard the leftover flour/starch and the egg and let the coated chicken sit in the fridge for 20 to 30 minutes while you get the oil up to temp (next step). This rest hydrates the starches and helps gluten form and that helps the crust stay on. You can see in this picture some of the flour has not hydrated yet and remains white, while some has been soaked through by the egg.
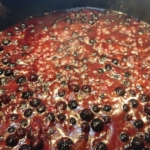
- Fire up. Place your frying pot, preferably a Dutch oven, over a burner on the grill grate. Add the oil to the pot about 2-inches deep. I like the meat in contact with the bottom of the pan where hot metal conducts more heat than hot oil. Fire up your grill in a 2-zone setup. Put the pot on the hot side and bring the oil temp up to about 350°F (167°C). If it goes higher, dial down the gas or move the pot off of the flames onto the indirect side. Don’t let it go above 400°F (204°C) or it could start smoking.
- Cook side 1. With a spider, slotted spoon, or tongs, slide the meat, skin side down, into the hot oil carefully so it doesn't splash or spatter. Do not crowd the pot and try to cook pieces of similar thickness together. Close the lid of the grill, but don’t put a lid on the pot. The cold chicken will knock the oil temp down a lot, and you should adjust the grill temp to keep the oil in the 325°F (163°C) plus range.
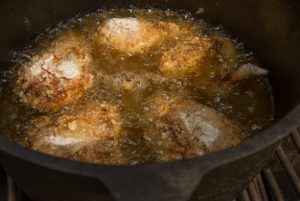
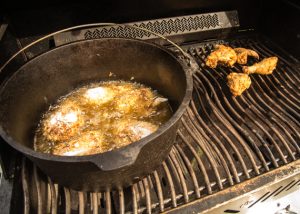
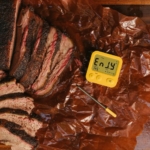
- Flip. After 15 minutes, you can look at the bottoms of each piece. When they are golden brown, flip them over. After you flip, they should take another 10 minutes or more. Remove them when they are GBD all over, put them on the indirect side of the grill to drain (no paper towels needed), and immediately check the internal temp of each and every piece. All pieces need to have an internal temp of at least 160°F (71°C) to be safe. Thighs and drums (dark meat) are safe at that temp but they are best at 170°F (77°C). If the pieces are not all done, close the lid and let them drip dry and bake on the indirect side of the grill until the temp is just right. When the oil gets back up to 350°F (167°C), keep frying the rest of the chicken in batches. Here is the pot with chicken frying and chicken pieces next to the pot finishing cooking and drip drying.
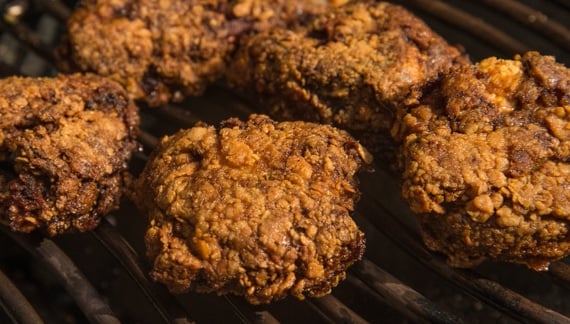
- Serve. Plate the fried chicken and serve immediately. I like a final sprinkle of large grain salt. But taste first because the meat has already been salted. If you want to amp it up to 11, serve the chicken with a dipping sauce such as our recipes for Mumbo Sauce or Alabama white BBQ sauce. I also absolutely love it drizzled with hot honey butter, a mix of honey, melted butter, and hot sauce. If you serve biscuits with the chicken, and you absolutely should, hot honey butter is great on them too.
Before you can post a comment or question you must sign into our commenting partner, Disqus. This helps make sure everyone hanging around the grill is civil. We do not tolerate nastiness, racism, porn, inappropriate language, or attacks on others. All comments are the property of AmazingRibs.com and we reserve the right to quote them, edit them, delete them, and block people from making future comments.
Please leave comments and questions on the same page that is devoted to that subject so others can see questions and our answers when they are reading about the subject. You must enable JavaScript to use the comments section, and you must accept cookies to post comments. Note: the software that runs Disqus is different from the Pitmaster Club, so members need to sign into the Pitmaster Club separately.